
Last updated on
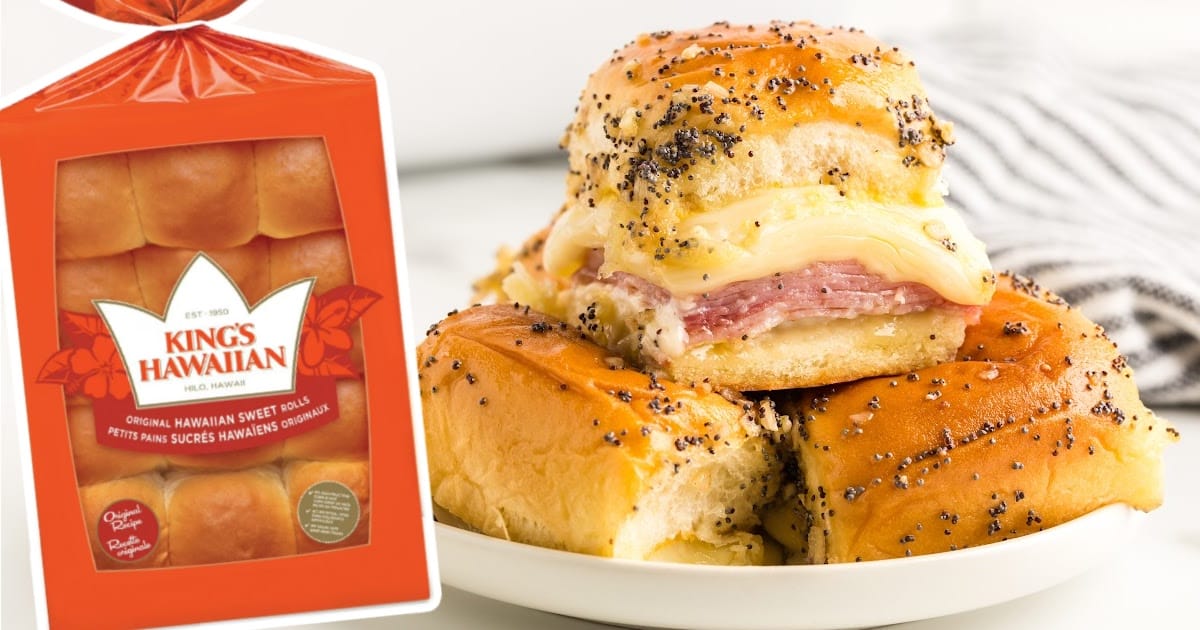
Ham and Cheese Sliders

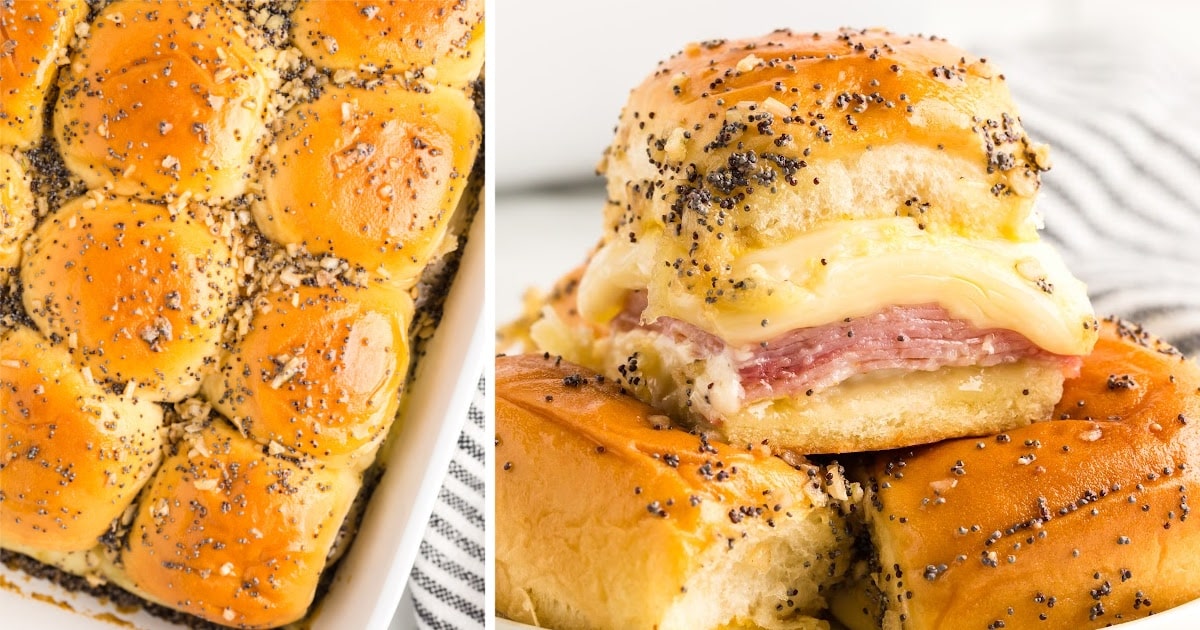
Hawaiian rolls are arranged with layers of mustard, mayonnaise, seasonings, ham, and cheese, then baked to create these delectable ham and cheese sliders.
Jump to RecipeTable of Contents

These ham and cheese sliders are the perfect party snack or easy dinner! Made with gooey cheese, savory ham, and soft rolls, they come together in minutes. Bake them until golden for irresistible, melty goodness. Everyone will ask for seconds!
This easy ham & cheese sliders recipe is simple to follow with step-by-step photos and clear directions. We’ve added pro tips and tricks to guarantee delicious results. Plus, check out our frequently asked questions for even more helpful answers!

More Recipes ⭐ Baked Ham and Cheese Sandwiches | Ham Roast | Amish Macaroni Salad
Ham and cheese sliders take just 30 minutes and are loaded with melty cheese and savory ham. Perfect for parties, game days, or quick dinners, they disappear fast!
The buttery, golden-brown tops and gooey center make every bite irresistible. Make a batch for your next potluck or family gathering!
Ingredients for Ham & Cheese Sliders
What you'll need to make ham and cheese sliders:
- 1 package sweet Hawaiian rolls (12 rolls)
- ¼ cup mayonnaise
- 1 pound thinly sliced deli ham
- 1 package Swiss cheese (12 slices)
- ¼ cup butter, melted
- 1 tablespoon Dijon mustard
- 1 tablespoon honey
- 1 tablespoon poppy seeds
- ½ tablespoon dried minced onion
- 1 teaspoon Worcestershire sauce
Substitutions and Additions
These easy substitutions and additions can easily be swapped out while still maintaining the deliciousness of this easy sliders recipe!
MEAT: Consider exploring various ham types such as honey-glazed or smoked to add a unique flavor twist, elevating the sliders' taste.
- This is an excellent method for repurposing leftover ham, or even turkey breast!
- Adding crispy bacon, whether in whole strips or crumbled, introduces an extra crunch.
TYPES OF CHEESE: Venture into different cheese varieties like
- Swiss
- Cheddar
- Monterey Jack
- Pepper Jack
- Colby Jack
- Mozzarella
- White cheddar
- Gouda
Feel free to layer extra cheese for even cheesier sliders!
MUSTARD: Dijon mustard offers a rich flavor for these mini sandwiches, but you can also consider regular mustard, honey mustard, Chick-fil-A sauce, or Carolina mustard BBQ sauce for varied taste profiles.
POPPY SEEDS: Try sesame seeds or everything bagel seasoning as alternatives to poppy seeds for an appealing crunch and flavor enhancement.
ONION POWDER: Swap out onion powder with garlic powder or finely minced fresh garlic for a different yet savory flavor contribution.
SUGAR: Substitute honey with brown sugar or maple syrup according to preference.
SPICY: Incorporate a layer of banana peppers or pickled jalapeños to introduce a spicy element to the sliders.
ROLLS: While sweet Hawaiian rolls are my favorite for this recipe, plain dinner rolls, potato slider buns, or small plain hamburger buns also make delightful alternatives. Any dinner roll variety pairs well with these sliders!
How to Make Ham and Cheese Sliders
Follow along with our step-by-step pictures and easy instructions to make the best ham and cheese sliders. Don’t miss the tips and tricks below for extra flavor and perfect results. Let’s get started and bake up something delicious!
Pro Tip
These Swiss cheese sliders can be prepared and assembled up to two days in advance, stored in the refrigerator under cover until it's time to bake them.
Should they begin at a cold temperature, a slight increase in baking time may be necessary to compensate.
FIRST STEP: Preheat the oven to 350°F and spray a 9×13-inch baking dish with cooking spray.
We do recommend using a casserole dish for this recipe instead of a baking sheet so that the sliders can soak up all the butter sauce.
SECOND STEP: Slice rolls down the middle and leave intact – do not separate into individual servings!
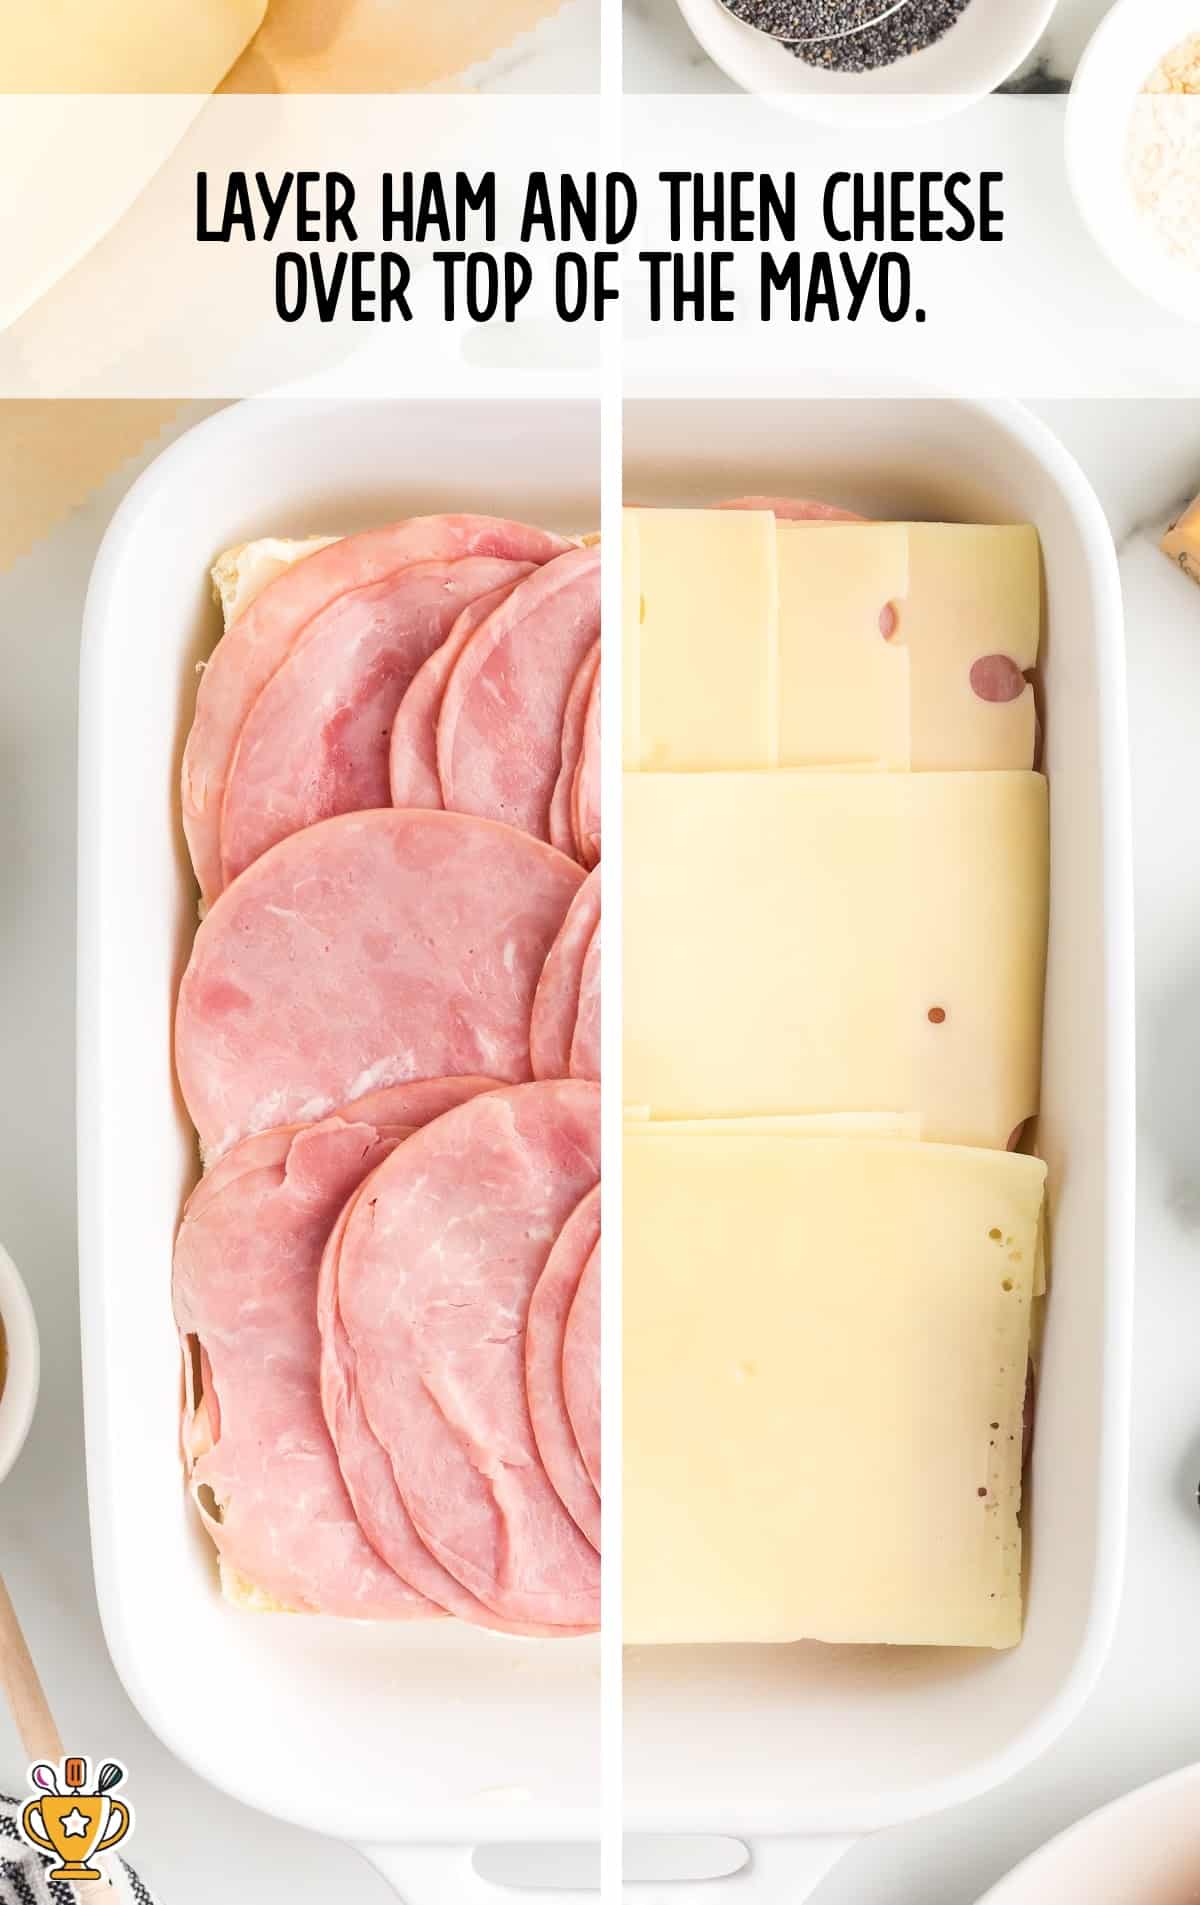
THIRD STEP: Spread mayonnaise on the bottom layer of the rolls and place it in the bottom of the prepared pan.
Pro Tip
I frequently opt for disposable pans when making this recipe due to my preference for hassle-free cleanup.

FOURTH STEP: Place ham slices in an even layer, then top with an even layer of Swiss cheese before placing the top half of the rolls on top.
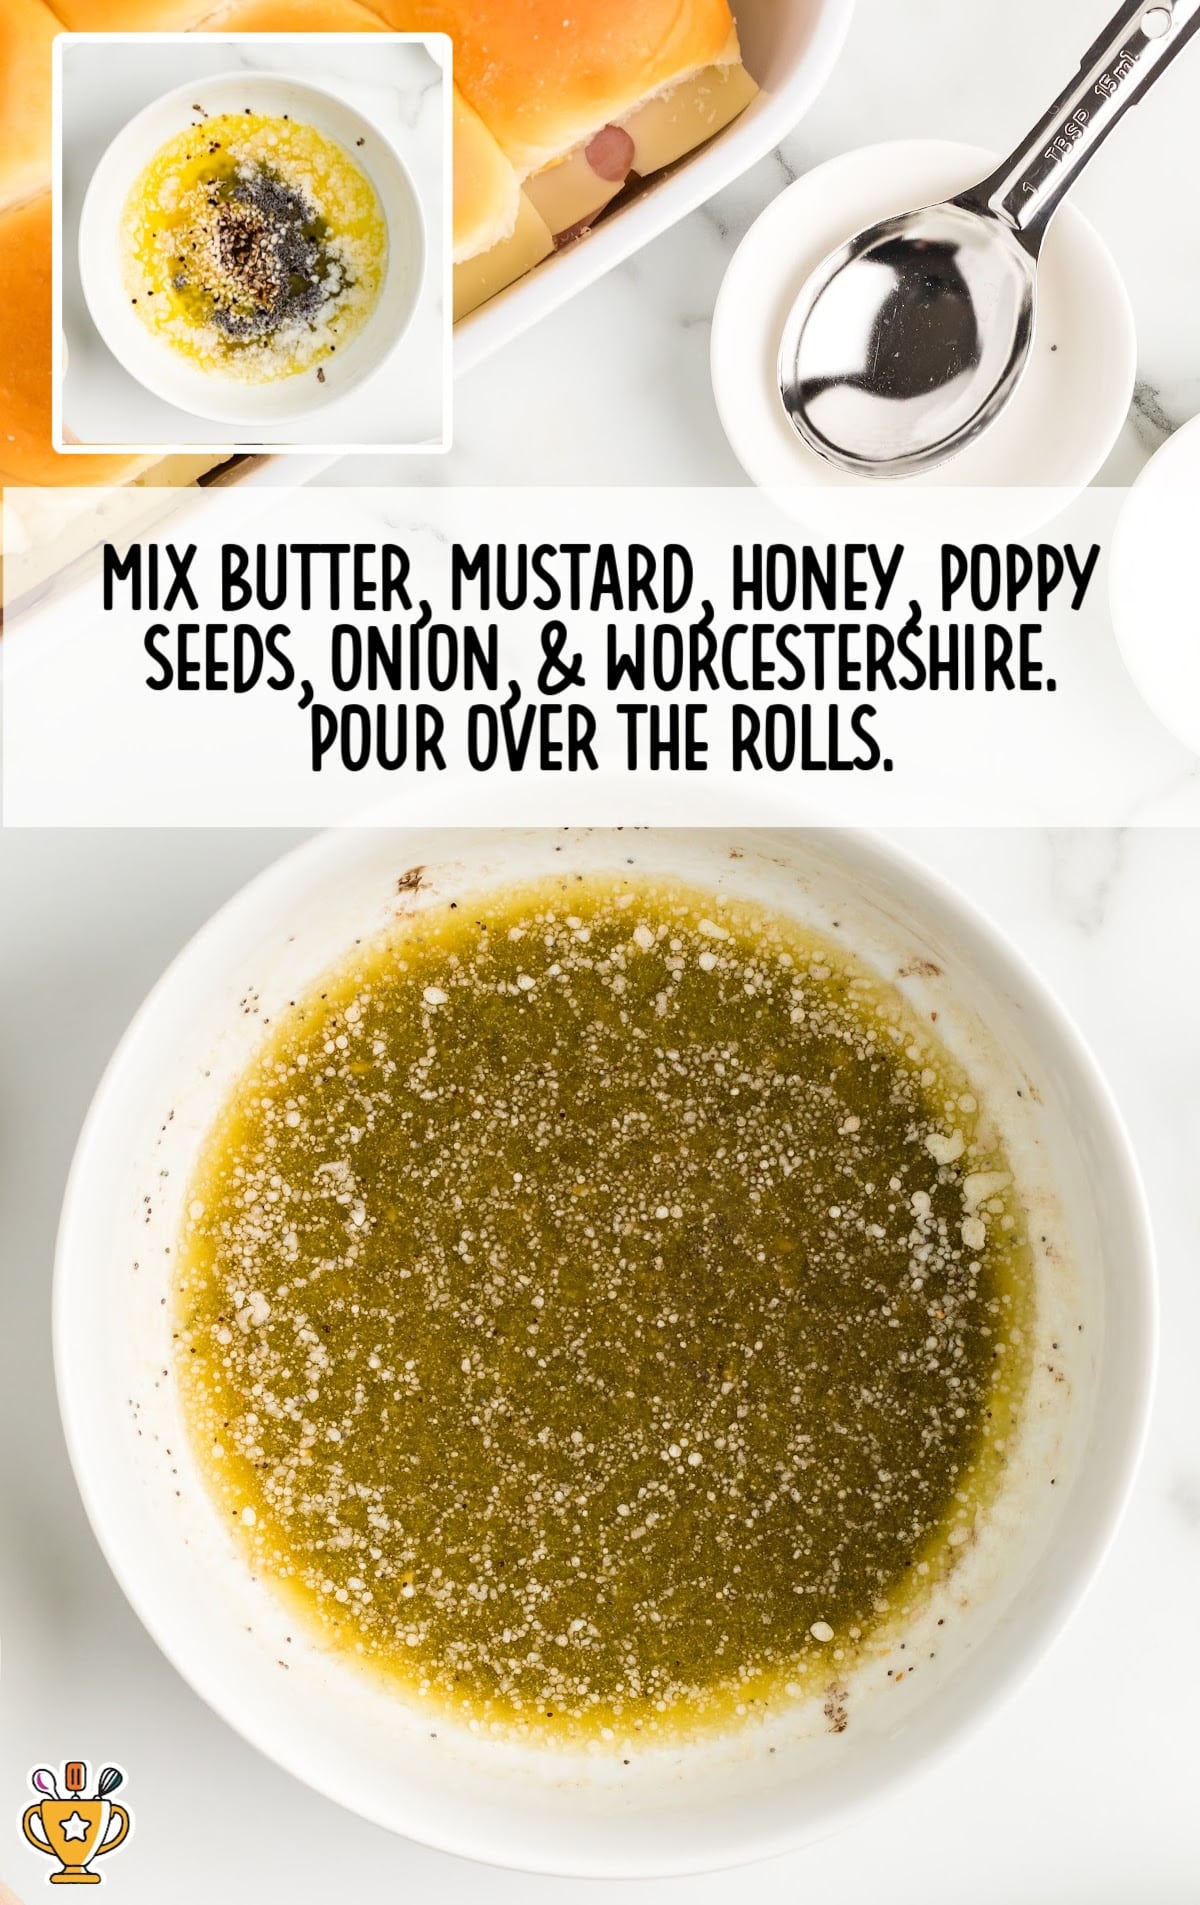
FIFTH STEP: In a small bowl, mix melted butter, Dijon mustard, honey, poppy seeds, minced onion, and Worcestershire sauce until mixed.
Pour the butter mixture evenly over the top of the rolls.
Pro Tip
Make sure not to skimp on the butter. It seeps into every nook and cranny, infusing a wealth of flavor into both the top and bottom halves of the slider buns.
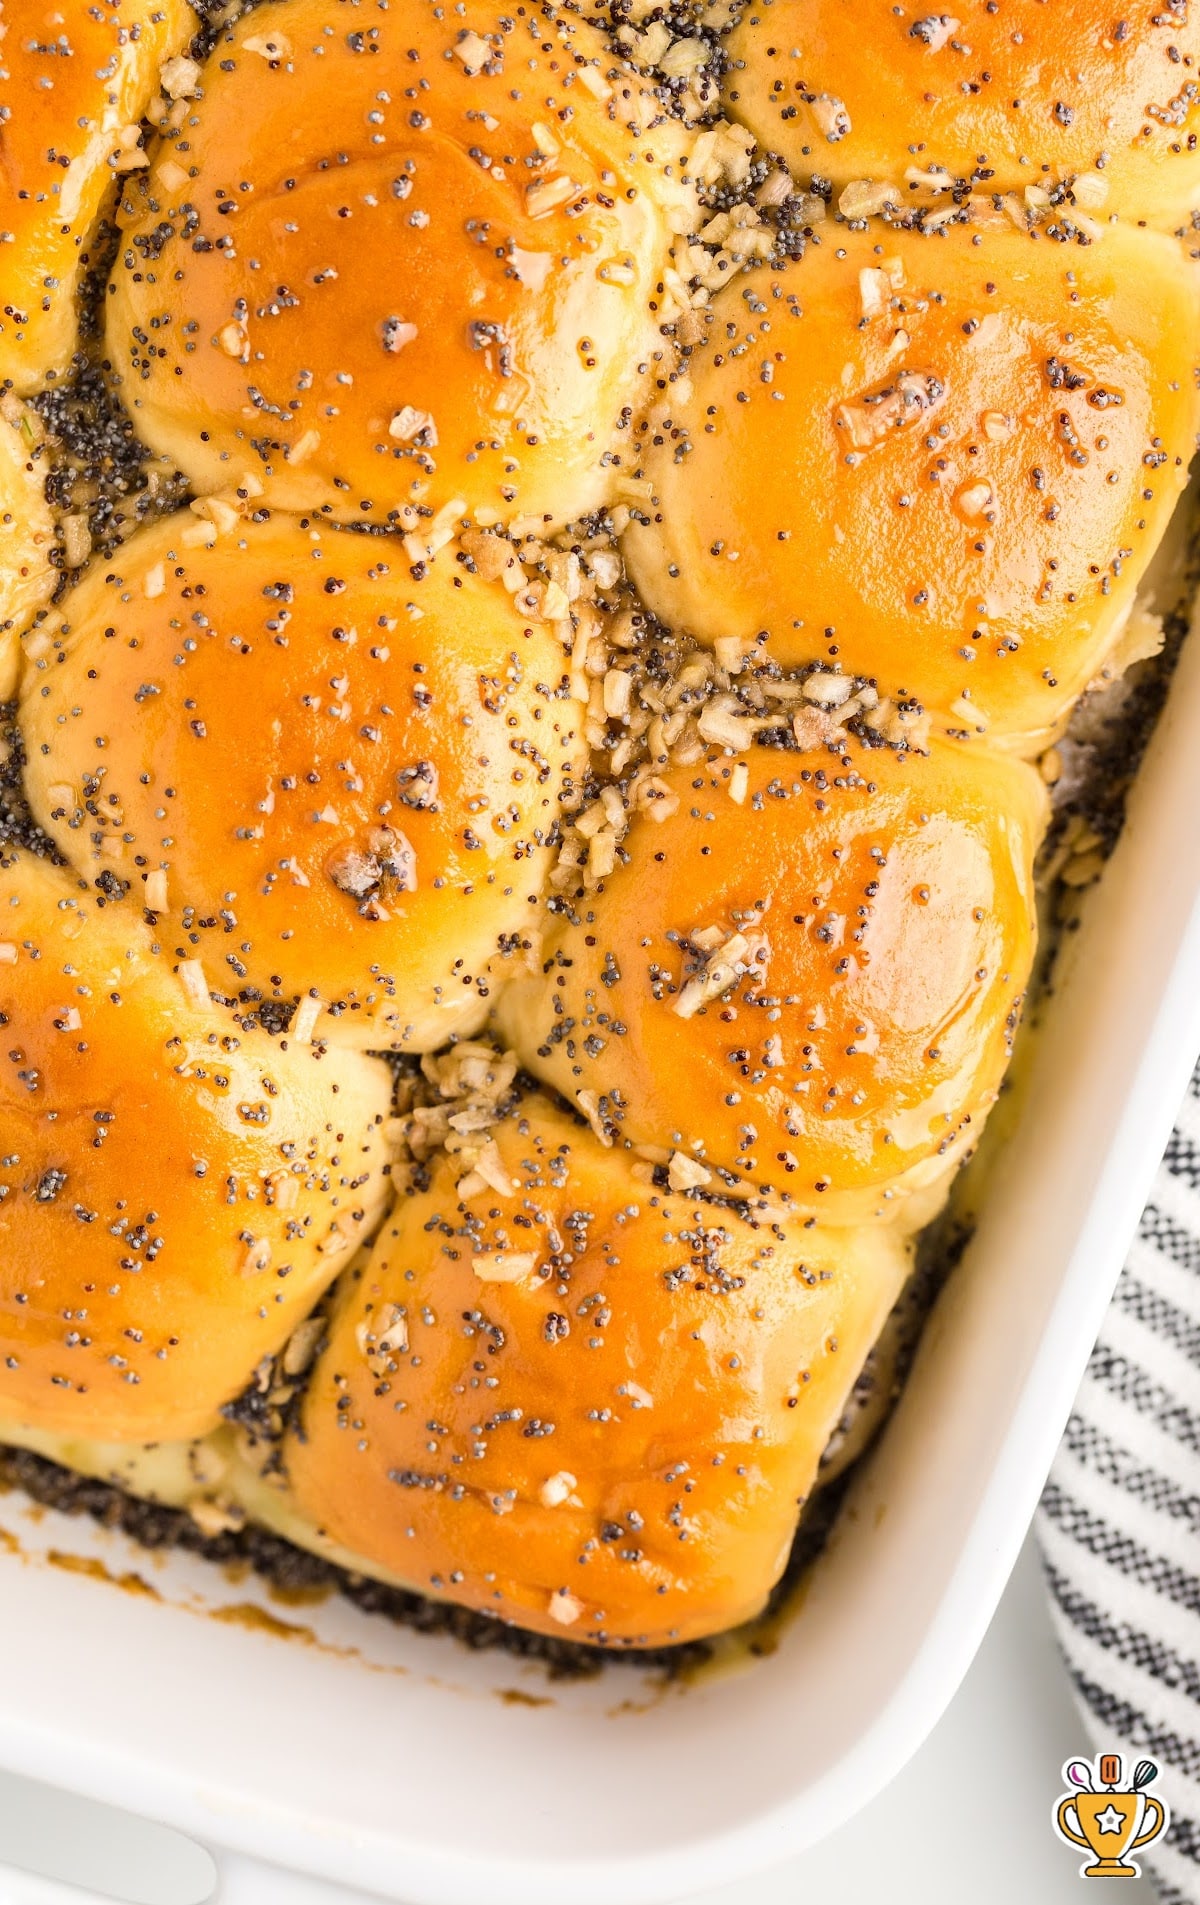
SIXTH STEP: Cover with foil and bake for ten to twelve minutes until the melted cheese is bubbly and the tops of the rolls are golden brown.
Pro Tip
Keep in mind that oven temperatures can differ and might require occasional recalibration for accuracy. It's wise to start checking your sliders towards the earlier part of the suggested baking range.
How To Serve Ham and Cheese Sliders
Ham & cheese sliders are versatile and perfect for any gathering. They’re kid-friendly, but adults love them just as much!
- Game Day or Parties: Sliders make the ultimate party snack, especially during football season or family game nights. Pair them with buffalo wings, cheese dip, or crispy potato wedges for a winning spread.
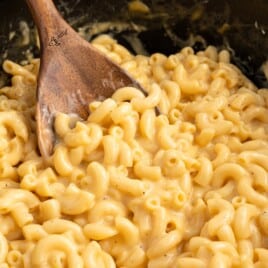
- Casual Dinners: Whip up these sliders for an easy weeknight dinner. Serve with baked mac and cheese for a cozy dinner.
- Holiday Potlucks or Gatherings: Bring a tray of sliders to any holiday potluck or summer cookout. They’re a hit alongside barbecue ribs or corn casserole.
Why You'll Love This Recipe for Ham & Cheese Sliders
Ham and cheese sliders are more than just a snack—they’re a crowd favorite for so many delicious reasons:
- The Perfect Flavor Combo: Savory ham, melted cheese, and buttery rolls create a mouthwatering bite every time. The tangy mustard glaze adds just the right kick, making these sliders unforgettable.
- Comfort Food for Any Occasion: Sliders bring comfort to every table, whether at family dinners or holiday gatherings. Their warm, cheesy goodness makes them a go-to for cozy nights or special celebrations.
- Simple but Irresistible: This recipe takes just 30 minutes from start to finish. It’s quick, easy, and always a hit with kids and adults alike.
Ham sliders aren’t just tasty—they’re a warm, cheesy hug that brings everyone together!

Recipe FAQ
How do you keep ham and cheese sliders from getting soggy?
Brush the tops lightly with butter and bake uncovered. This keeps the bread crispy while the cheese melts perfectly.
What kind of ham works best for ham and cheese sliders?
Thinly sliced deli ham works best because it layers easily. Honey or smoked ham adds extra flavor to each bite.
Can you make ham and cheese sliders ahead of time?
Yes! Assemble them early, cover tightly, and refrigerate. Bake fresh when ready to serve for the best results.
How long do you bake these sliders?
Bake at 350°F for 15-20 minutes until the tops turn golden and the cheese melts completely.
Serving FAQ
How should you serve ham and cheese sliders at a party?
Cut the sliders into individual portions and arrange them on a large platter. Guests can easily grab and enjoy them.
Should you serve ham and cheese sliders warm or cold?
Serve them warm for gooey, melty cheese and crispy tops. They taste best fresh from the oven.
How many ham and cheese sliders should you plan per person?
Plan for 2-3 sliders per person. They’re small but filling, and guests will likely come back for seconds.
Can you cut ham and cheese sliders before baking?
No, bake the sliders whole and cut them after. This keeps the cheese from leaking out during baking.
Storage FAQ
Follow these directions, tips, and tricks to store ham and cheese sliders for the best flavor and texture. From making them ahead to reheating leftovers, we’ve got everything you need to know!
Can I prepare ham and cheese sliders ahead of time?
Yes, assemble the sliders and cover tightly with foil. Store them in the fridge until ready to bake.
What's the best way to store leftover ham and cheese sliders?
Place leftovers in an airtight container in the fridge. They stay fresh for up to two days.
Is it possible to freeze ham and cheese sliders?
Yes, wrap unbaked sliders tightly in foil and freeze for up to one month. Bake straight from frozen when needed.
How do I thaw and reheat frozen ham and cheese sliders?
Bake frozen sliders at 350°F for 20-25 minutes until the tops turn golden and the cheese melts.
Can I reheat ham and cheese sliders in the microwave?
Yes, microwave for 30 seconds at a time until warm, but baking them keeps the bread crisp.
More Easy Ham Recipes


Ham and Cheese Sliders
Hawaiian rolls are arranged with layers of mustard, mayonnaise, seasonings, ham, and cheese, then baked to create these delectable ham and cheese sliders.
Did you try this recipe?Let our readers know how it turned out by Leaving a Review!
Ingredients
- 12 Sweet Hawaiian Rolls
- 1 pound ham (thinly sliced)
- 12 slices Swiss cheese ((8-ounce package))
- ¼ cup mayonnaise
- ¼ cup butter (melted)
- 1 tablespoon Dijon mustard
- 1 tablespoon honey
- 1 tablespoon poppy seeds
- ½ tablespoon onion (dried minced)
- 1 teaspoon Worcestershire sauce
DIRECTIONS
- Preheat the oven or grill to 350°F, then use cooking spray in the bottom of the pan.
- Slice rolls down the middle and leave intact.
- Spread mayonnaise on the bottom layer of rolls and place them in the bottom of the pan.
- Layer ham, then cheese, then place the top layer of buns on.
- Mix melted butter, dijon mustard, honey, poppy seeds, minced onion, and Worcestershire sauce until mixed and pour evenly over rolls.
- Cover with foil and bake for 10 to 12 minutes until cheese is bubbly and rolls are golden brown.
Notes
- These are best eaten right away, but you can store leftovers in the fridge and reheat them for later. I would suggest first wrapping with plastic wrap and then adding a second layer of aluminum foil. You can freeze for up to three months. Allow them to thaw for about 30 minutes before baking.
- You can assemble these Swiss cheese sliders up to two days before baking and leave them covered in the fridge until you’re ready to pop them in the oven. If you are starting them off cold, you might need to add a few extra minutes in the oven to compensate.
- I will often use disposable pans to make this recipe because I love easy cleanup.
- Don’t skimp on the butter. It soaks into all the nooks and crannies and adds a ton of flavor to both the top and the bottom half of the slider buns.
- Oven temperatures vary and may need to be recalibrated periodically to ensure they are accurate. Make sure to check your sliders at the lower end of the recommended baking time.
Nutrition
Calories: 324kcal | Carbohydrates: 17g | Protein: 16g | Fat: 21g | Saturated Fat: 9g | Polyunsaturated Fat: 3g | Monounsaturated Fat: 6g | Trans Fat: 0.2g | Cholesterol: 61mg | Sodium: 645mg | Potassium: 135mg | Fiber: 0.2g | Sugar: 6g | Vitamin A: 264IU | Vitamin C: 0.1mg | Calcium: 168mg | Iron: 0.5mg
HAVE YOU TRIED THIS RECIPE?Follow me on Pinterest @bestblogrecipes


Leave a Comment