
Published on
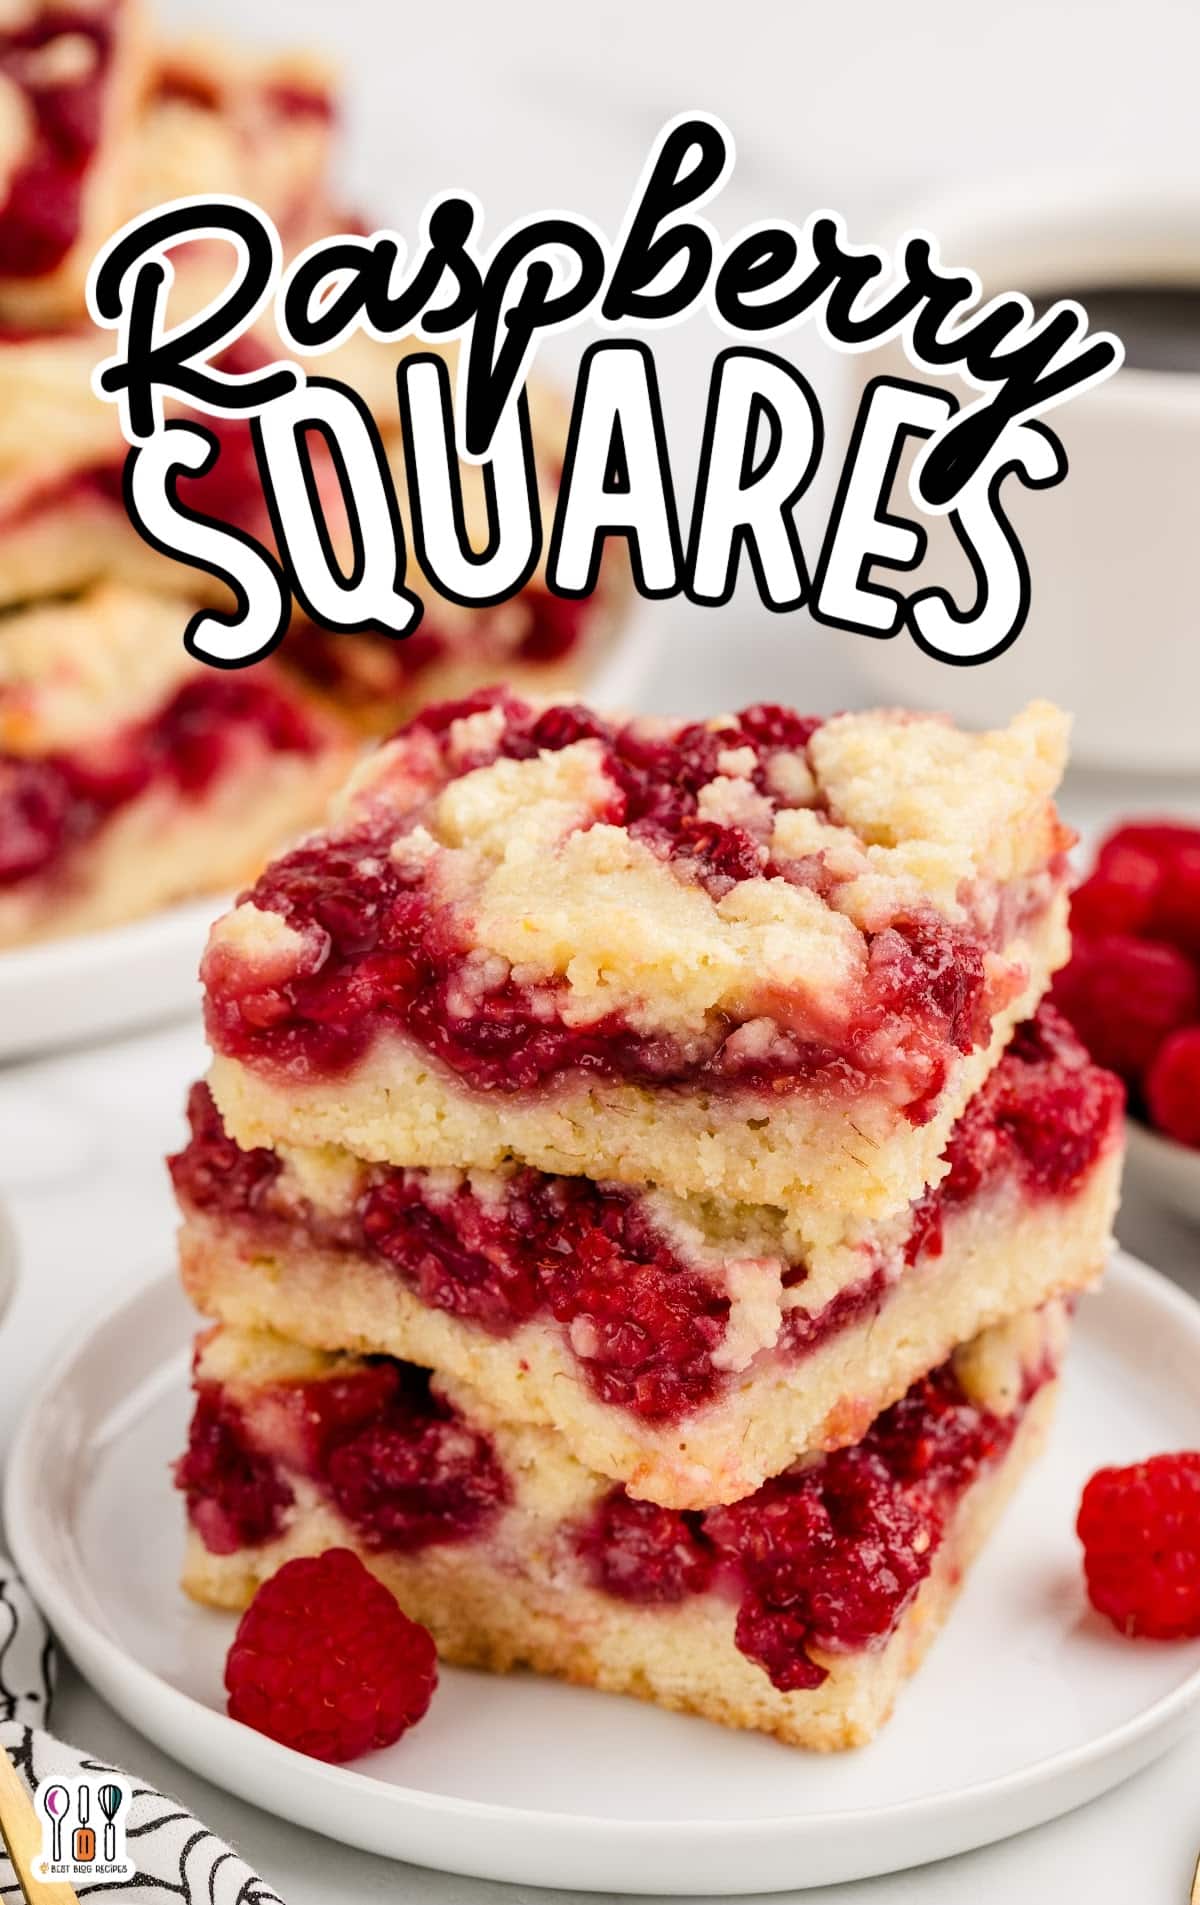
Raspberry Squares
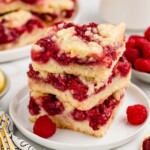
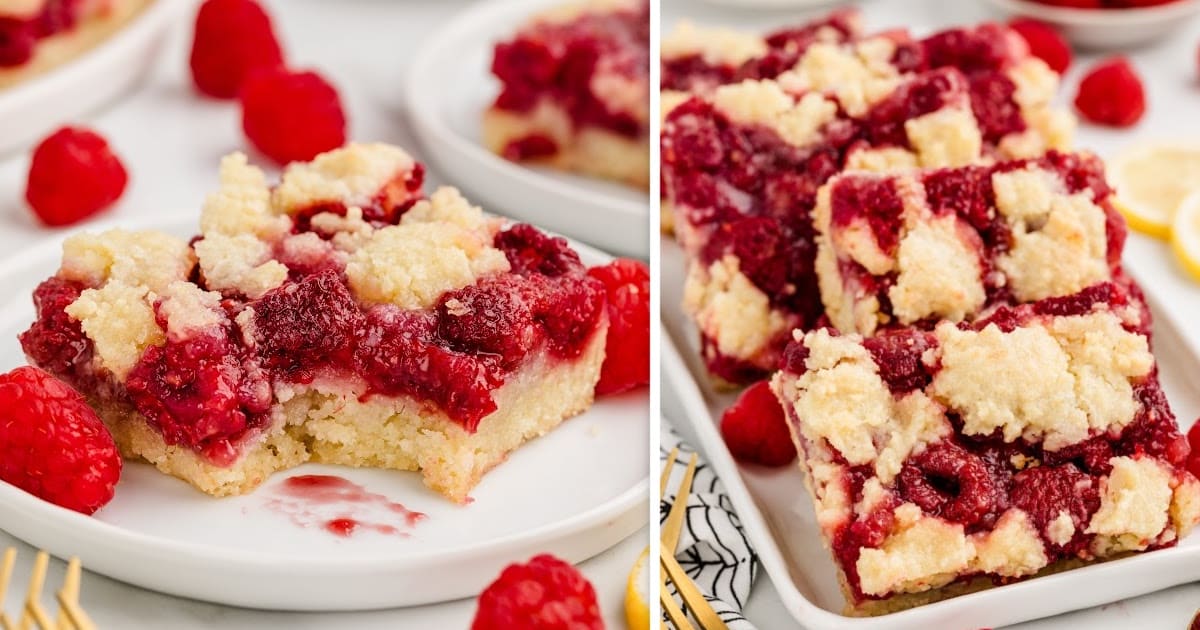
These raspberry squares combine a buttery crust with a sweet-tart filling for a delicious, crowd-pleasing treat. Perfect for any occasion, they’re easy to make and always a hit!
Jump to RecipeTable of Contents

Get ready to enjoy the best raspberry squares! This easy recipe combines a buttery crust with a sweet-tart raspberry filling. Perfect for any occasion, these squares are sure to impress your guests. Quick to make and absolutely delicious, they’ll become your go-to dessert in no time.
Follow the guide below for easy step-by-step photos and directions. We include pro tips, tricks, and answers to frequently asked questions to ensure your raspberry squares turn out perfectly every time!
More Recipes ⭐ Caramel Brownies | Strawberry Shortcake Brownies | Blackberry Crumble
Whip up these delicious raspberry squares in just under an hour for your next party or special occasion. The buttery crust pairs perfectly with the sweet and tangy raspberry filling, creating a dessert everyone will love. These squares are easy to make and impress guests with their vibrant flavor and beautiful presentation. Whether for a potluck or an after-dinner treat, this recipe will quickly become a favorite.
Ingredients
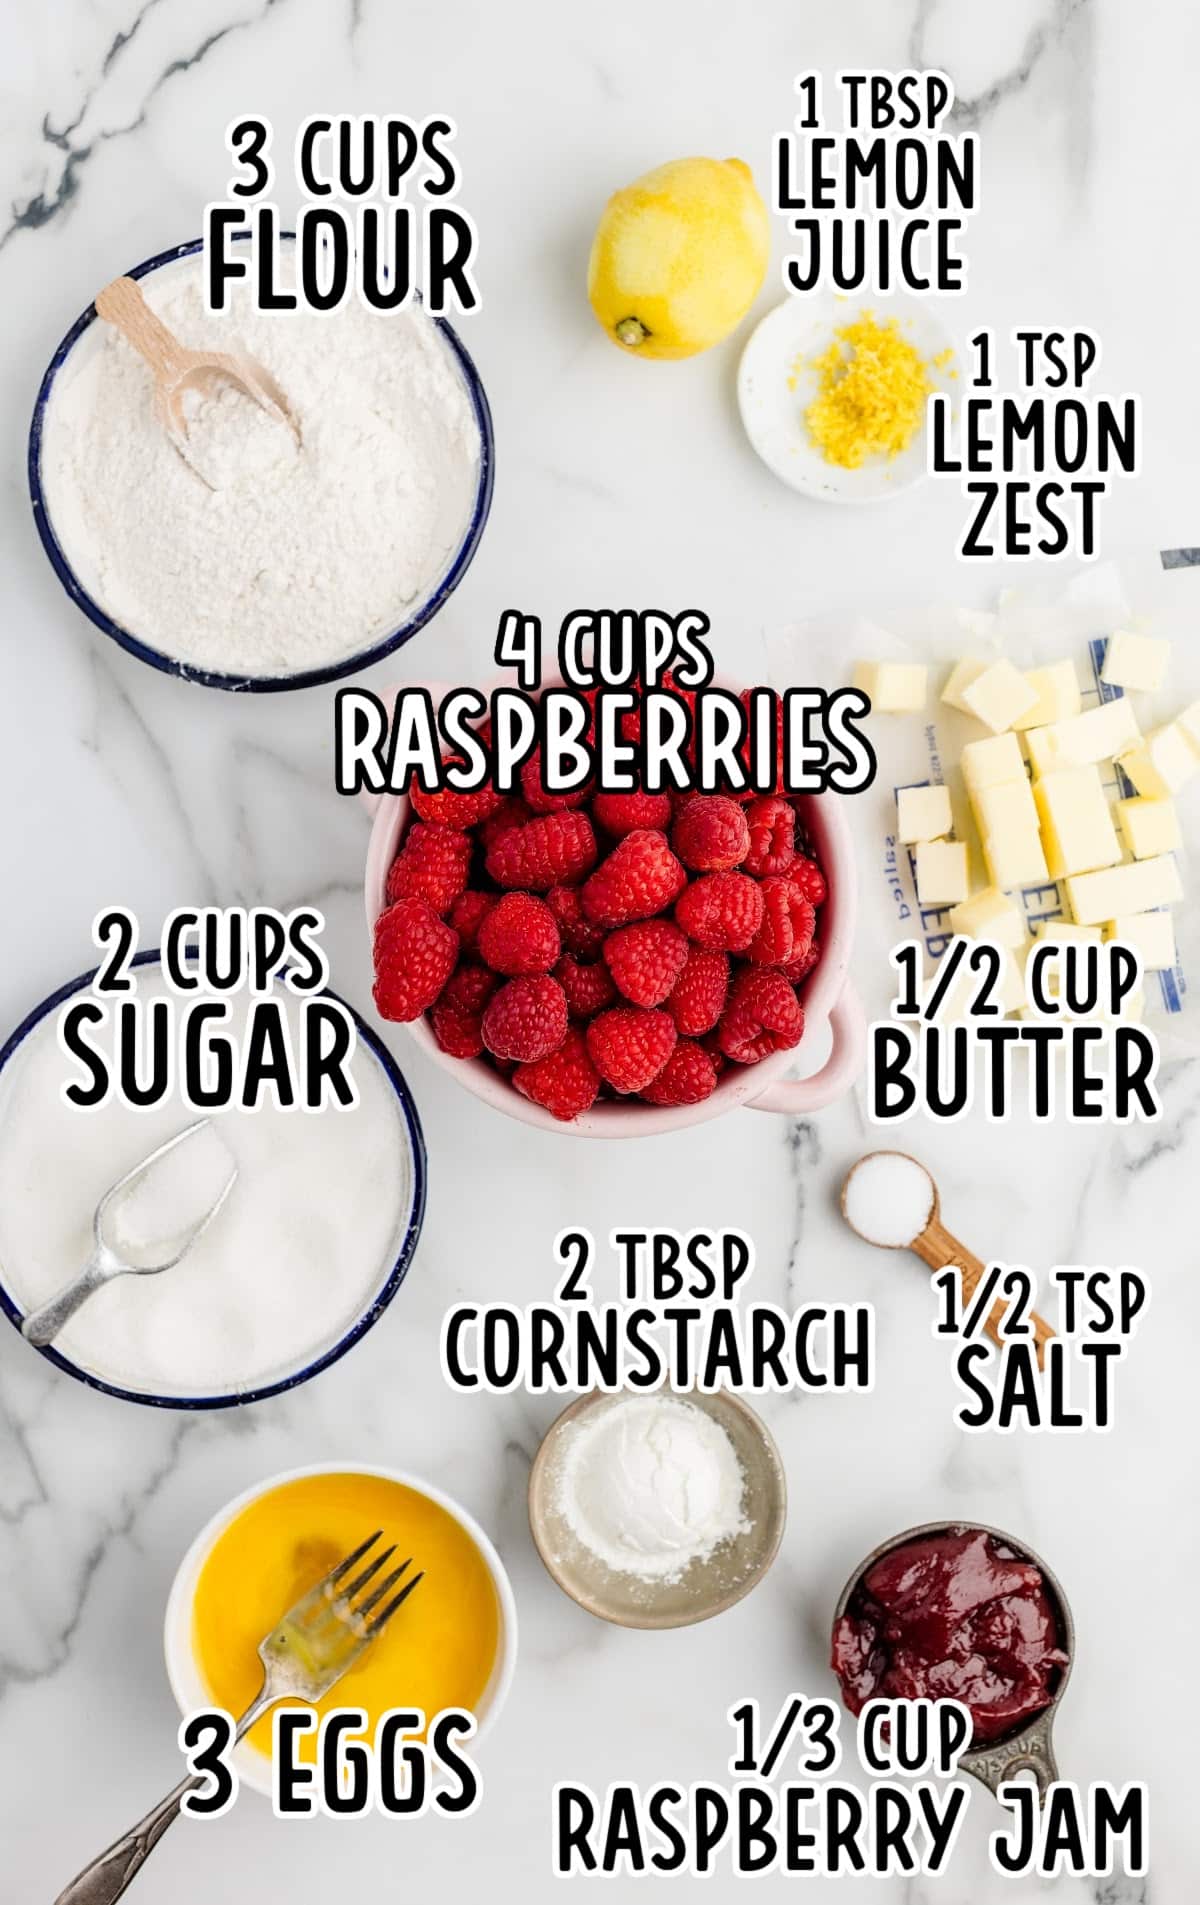
What you'll need to make this Raspberry Squares Recipe:
- For the Crust:
- 3 cups all-purpose flour
- 1½ cups granulated sugar
- ½ teaspoon salt
- 1 teaspoon lemon zest
- ½ cup unsalted butter, chilled and cut into cubes
- 3 eggs, lightly beaten
- For the Raspberry Filling:
- 4 cups fresh raspberries (approximately 4 x 6oz containers)
- ½ cup granulated sugar
- ⅓ cup seedless raspberry jam
- 2 tablespoons cornstarch
- 1 tablespoon fresh lemon juice
Substitutions and Additions
Personalize your raspberry squares recipe by swapping out ingredients and adding tasty extras! These simple changes make your dessert uniquely yours. Here are some top substitutions and additions:
- Substitute Raspberry Jam: Try strawberry or apricot jam for a new twist on your raspberry squares.
- Substitute Butter: Use margarine or coconut oil to create a slightly different flavor in your squares.
- Add Chocolate Chips: Sprinkle chocolate chips into the filling for a delicious chocolate-raspberry combination.
- Add Nuts: Mix in chopped almonds or pecans for extra crunch and flavor.
- Substitute Lemon Zest: Swap lemon zest with orange zest for a citrusy twist that complements the raspberry filling.
How to Make Raspberry Squares
Follow along with our pictures, step-by-step instructions, and the tips and tricks listed below. Let’s get started on this delicious recipe now!
FIRST STEP: Measure out your ingredients and juice your lemon. You can also lightly beat your eggs. Preheat your oven and spray a 9×13 inch baking pan with baking spray. Set aside for now.
SECOND STEP: In the bowl of a food processor, add the all-purpose flour, granulated sugar, salt, and lemon zest. Combine flour mixture by pulsing 2-3 times until combined.
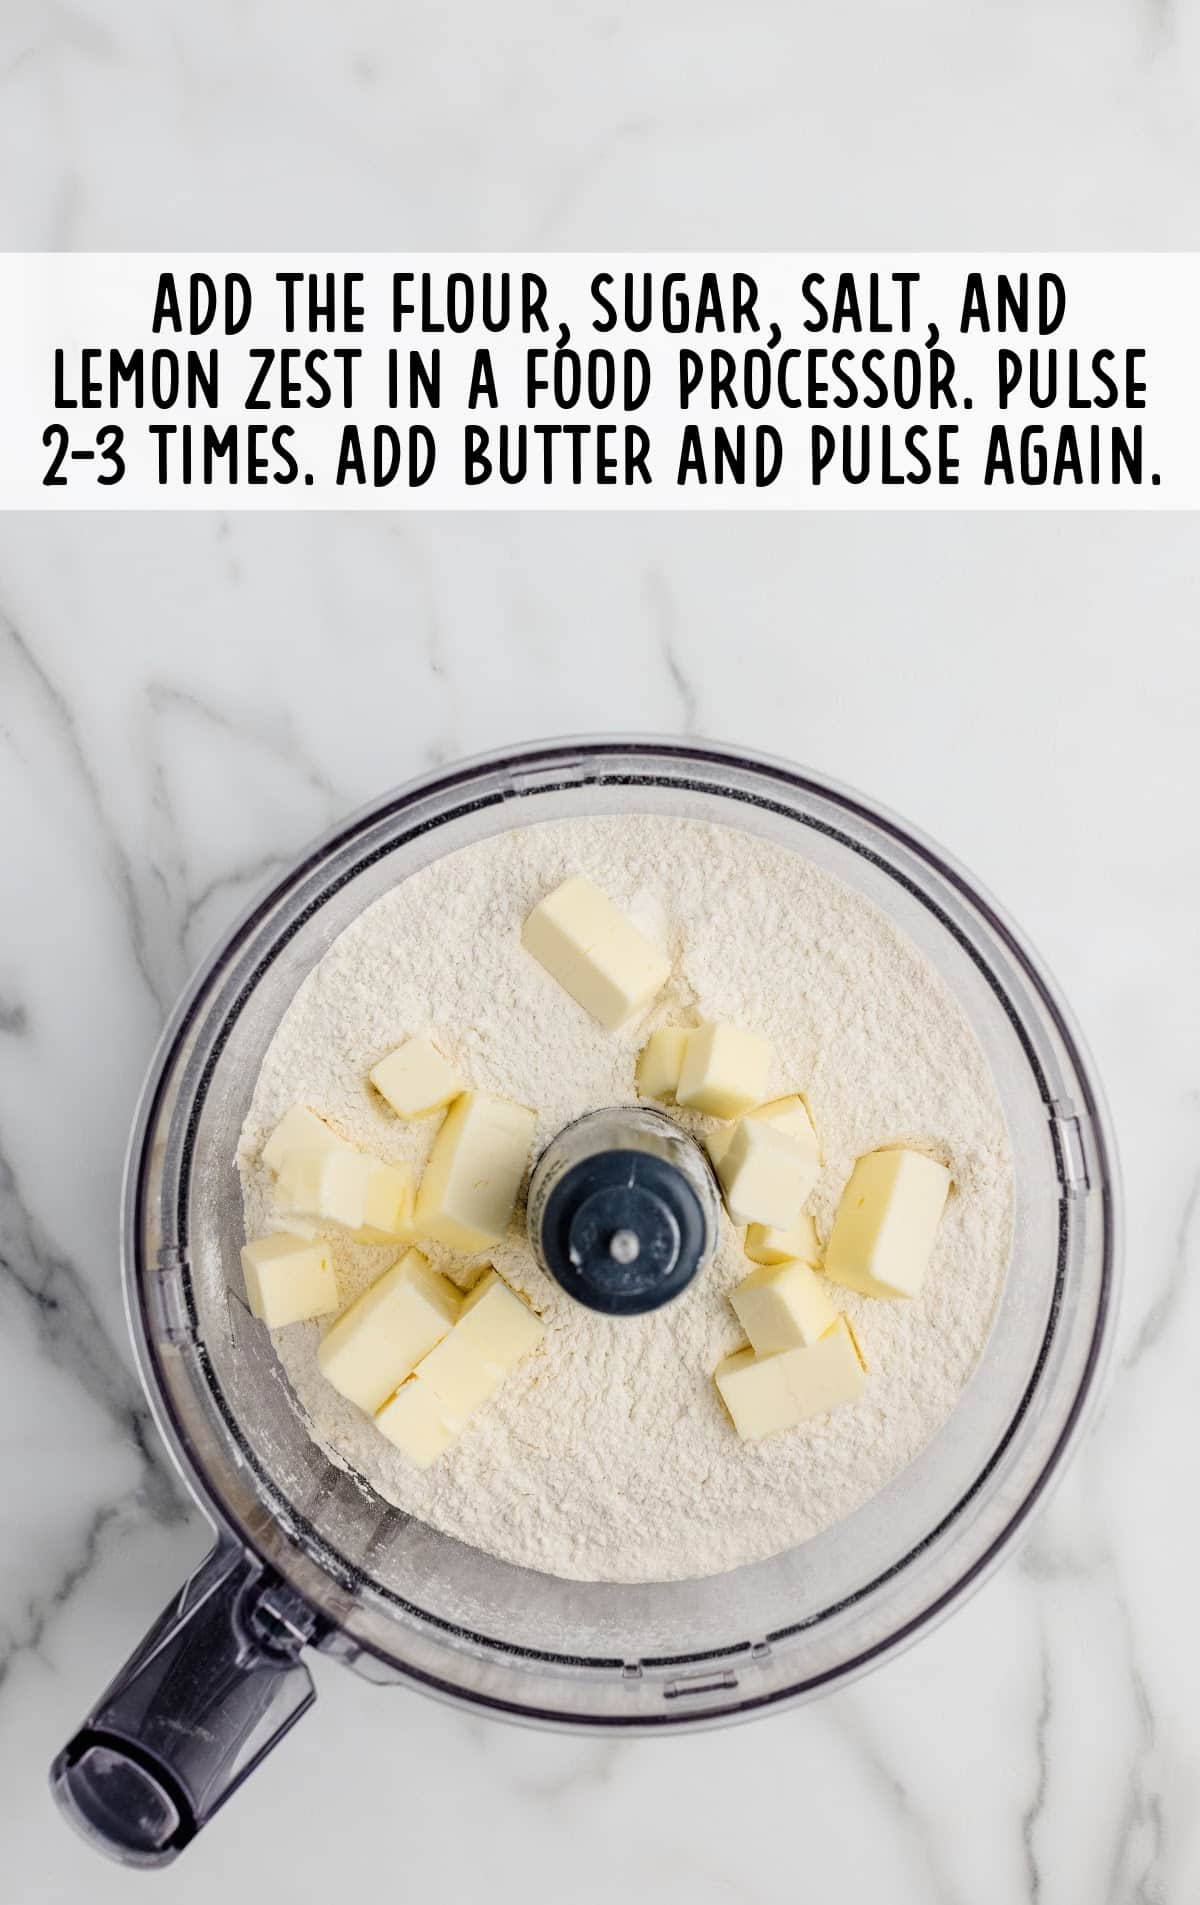
THIRD STEP: Add the cubed and chilled butter to the food processor and pulse again for 15-30 seconds or until you get small pea-sized pieces of butter.
Pro Tip
If you don’t have a food processor, you can make this crust by hand using a pastry blender (like you would use to make pie crust by hand) or a stand mixer fitted with a paddle attachment.
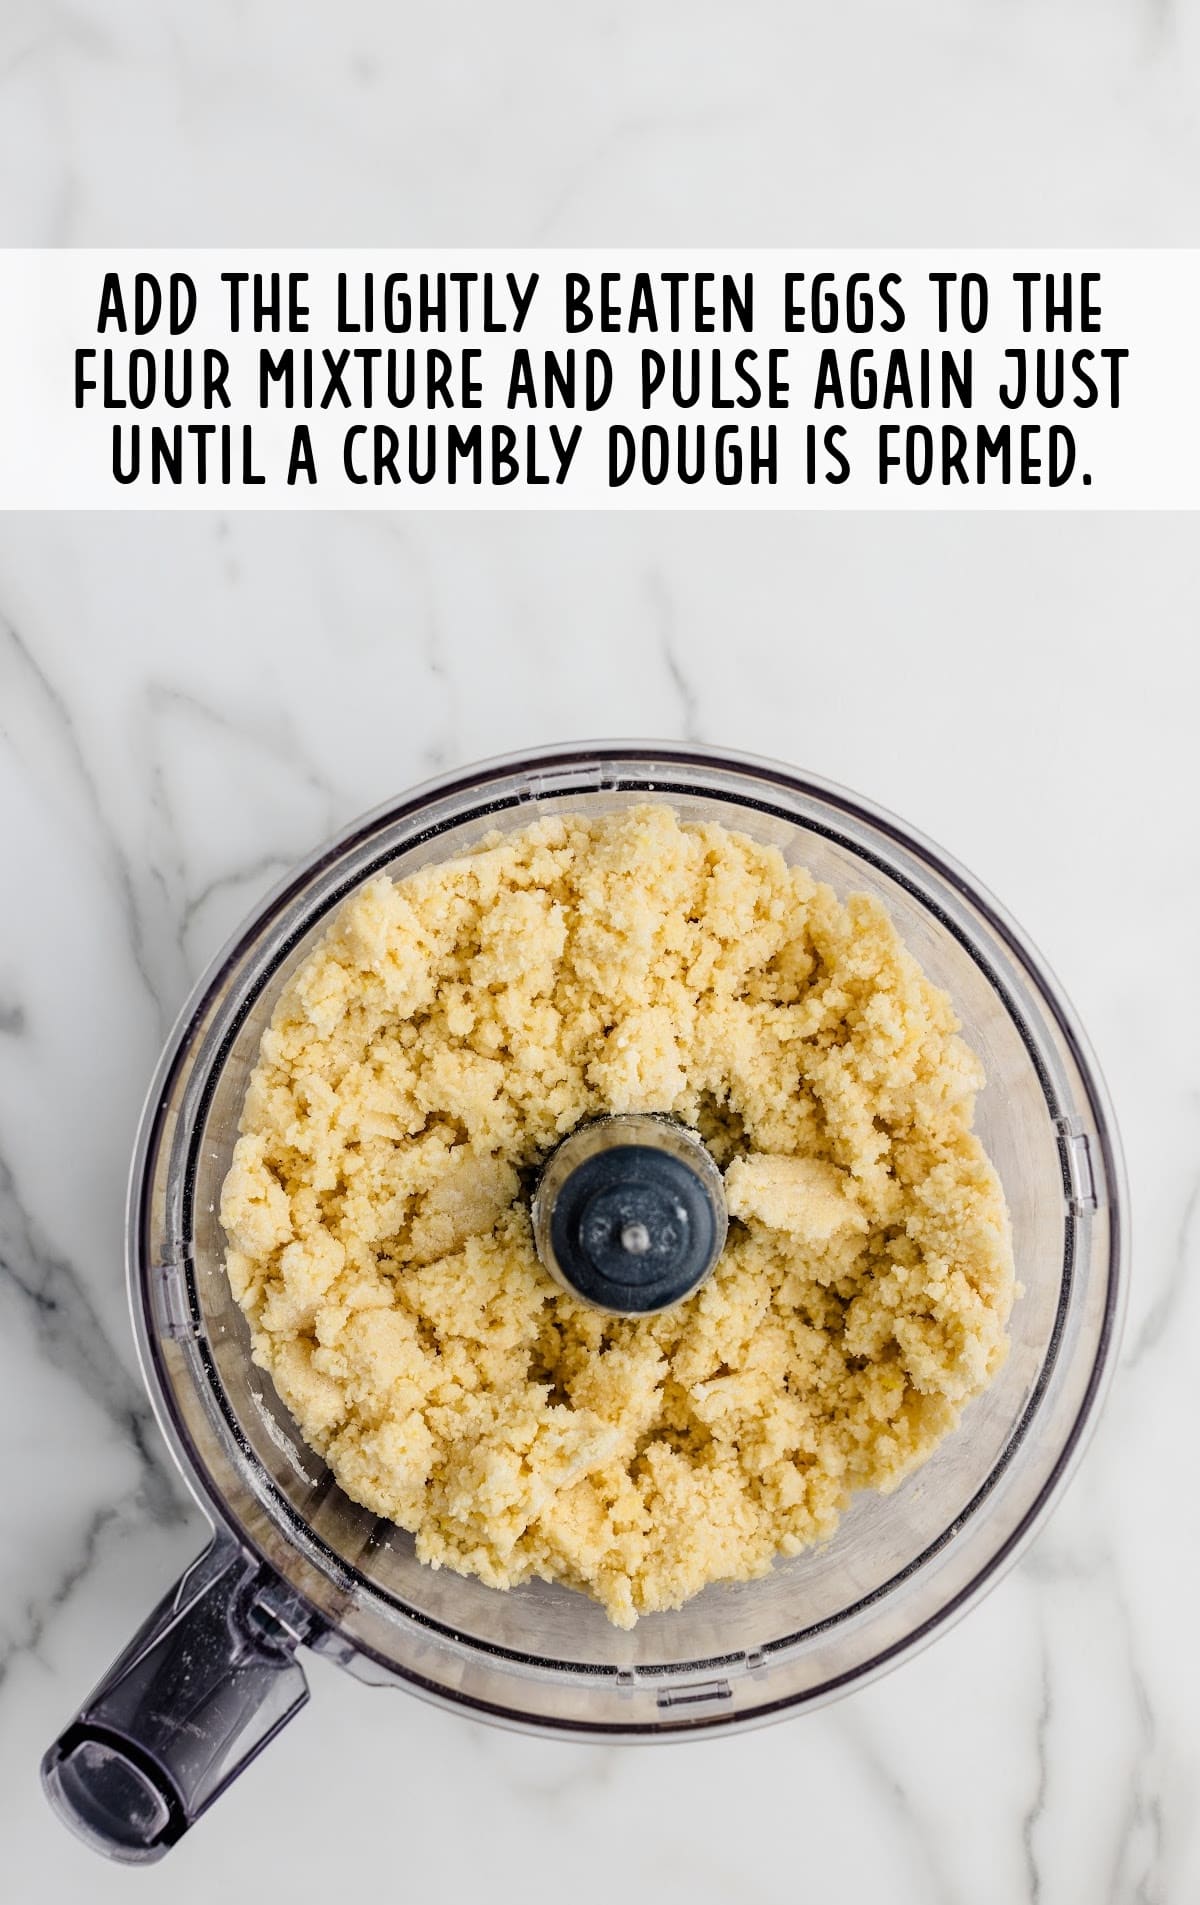
FOURTH STEP: Add the lightly beaten eggs to the flour mixture and pulse again, just until a crumbly dough is formed. Use a spatula to scrape the bottom of the food processor to make sure you don’t have any dry pockets of flour in the dough.
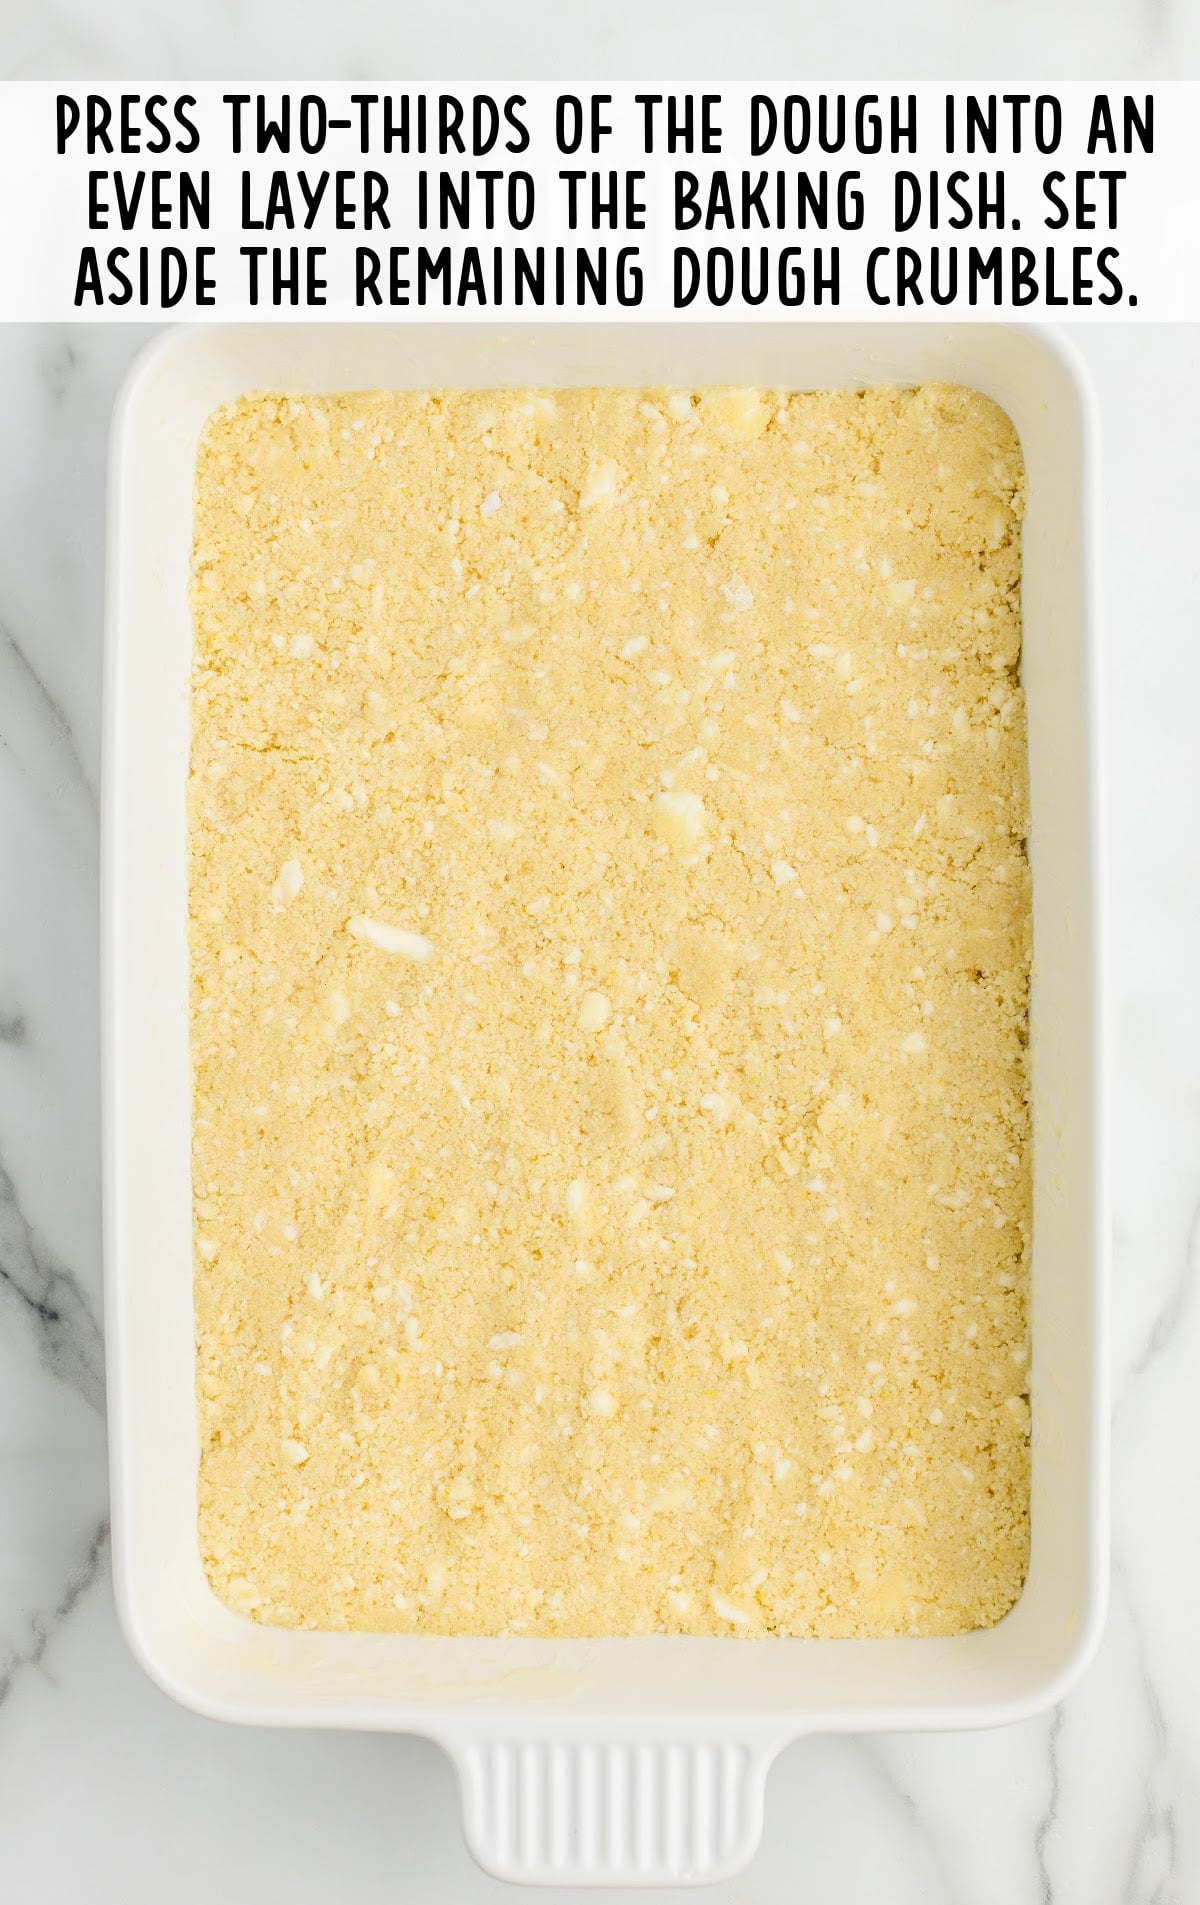
FIFTH STEP: Add ⅔ of the dough to the bottom of the prepared pan and press it into an even layer. You’ll have remaining dough, which you can set aside for now.
Pro Tip
You can use the bottom of a flat glass to help you press the mixture down flat into the pan.
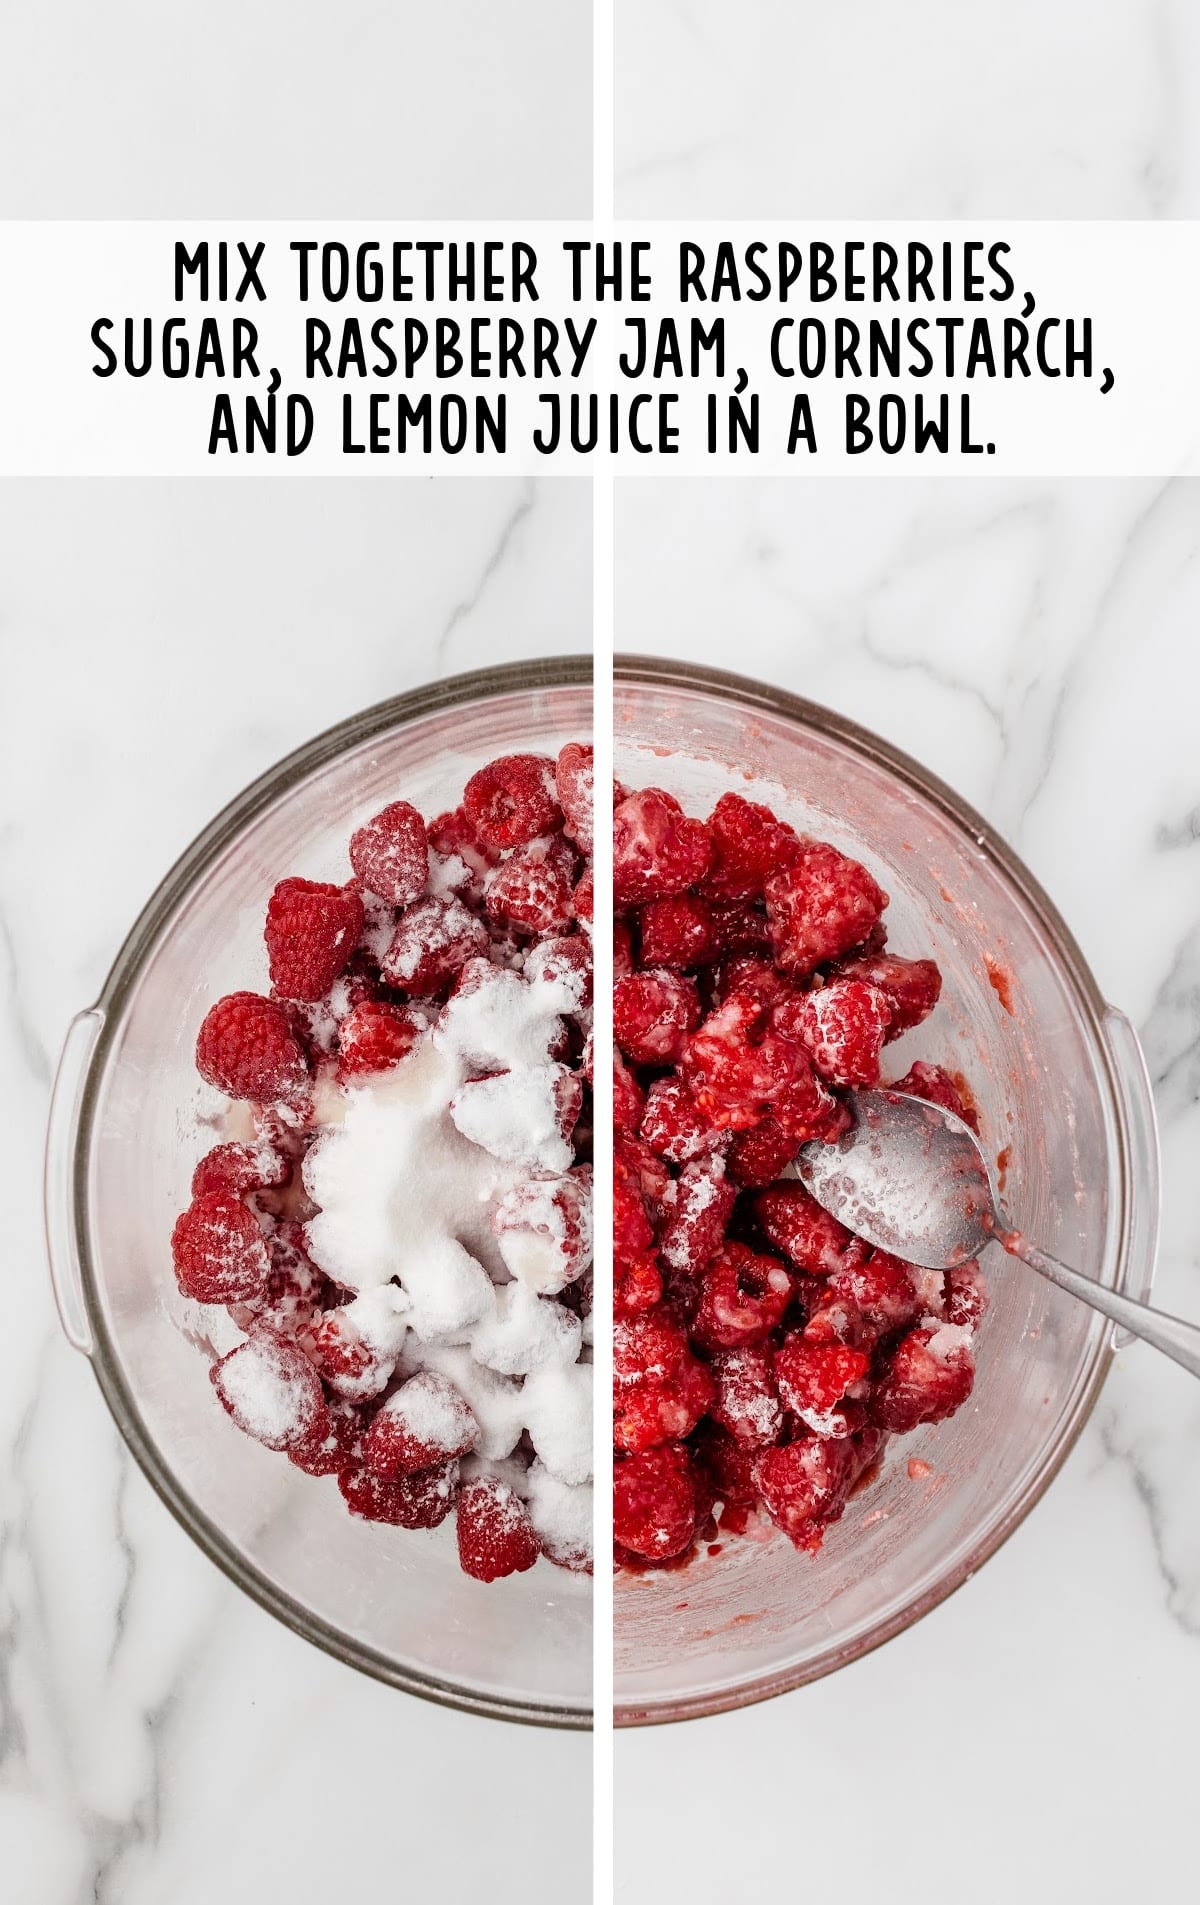
SIXTH STEP: In a large mixing bowl, add the raspberries, sugar, raspberry jam, cornstarch, and lemon juice. Gently mix the raspberry pie filling ingredients together with a spatula or wooden spoon. Try to go carefully so you don’t break up the raspberries too much.
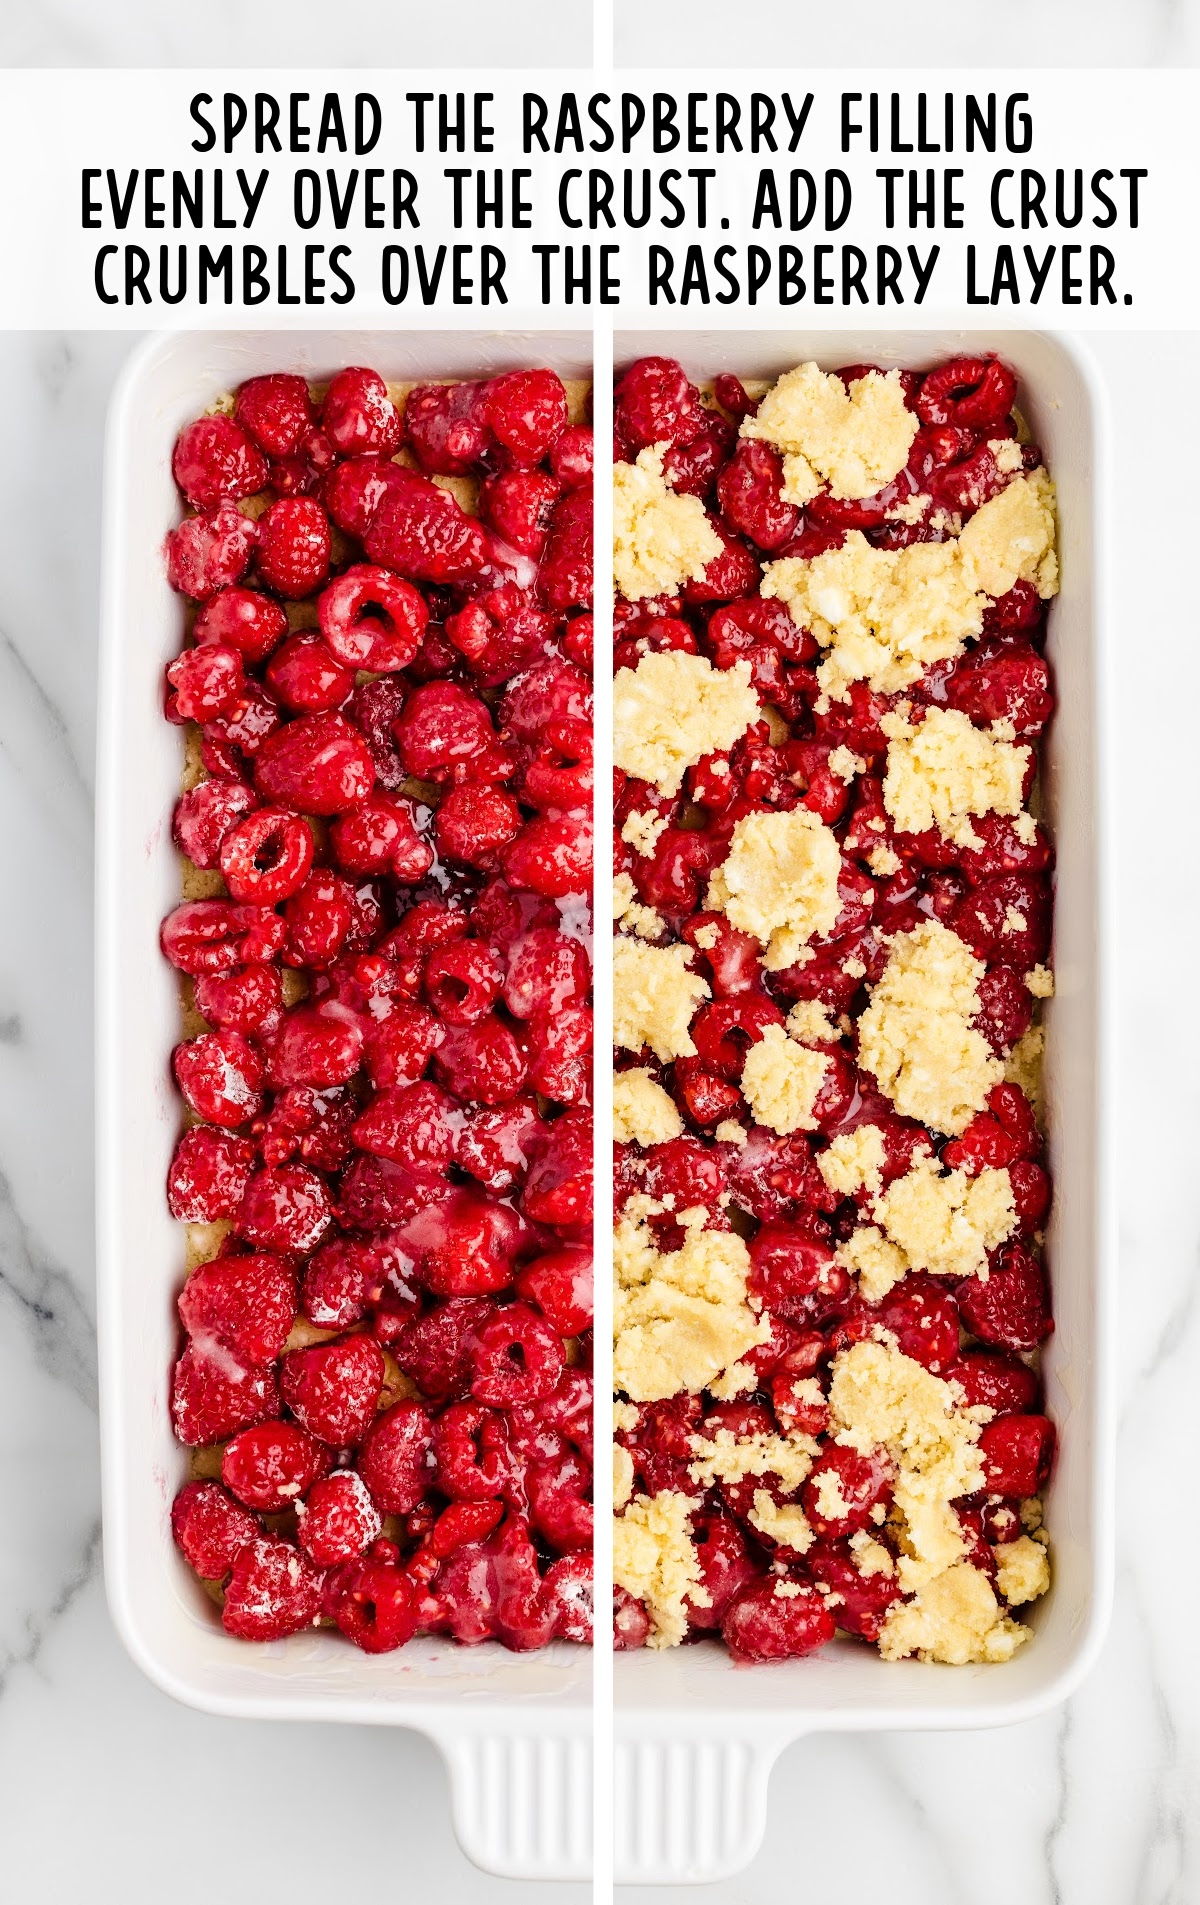
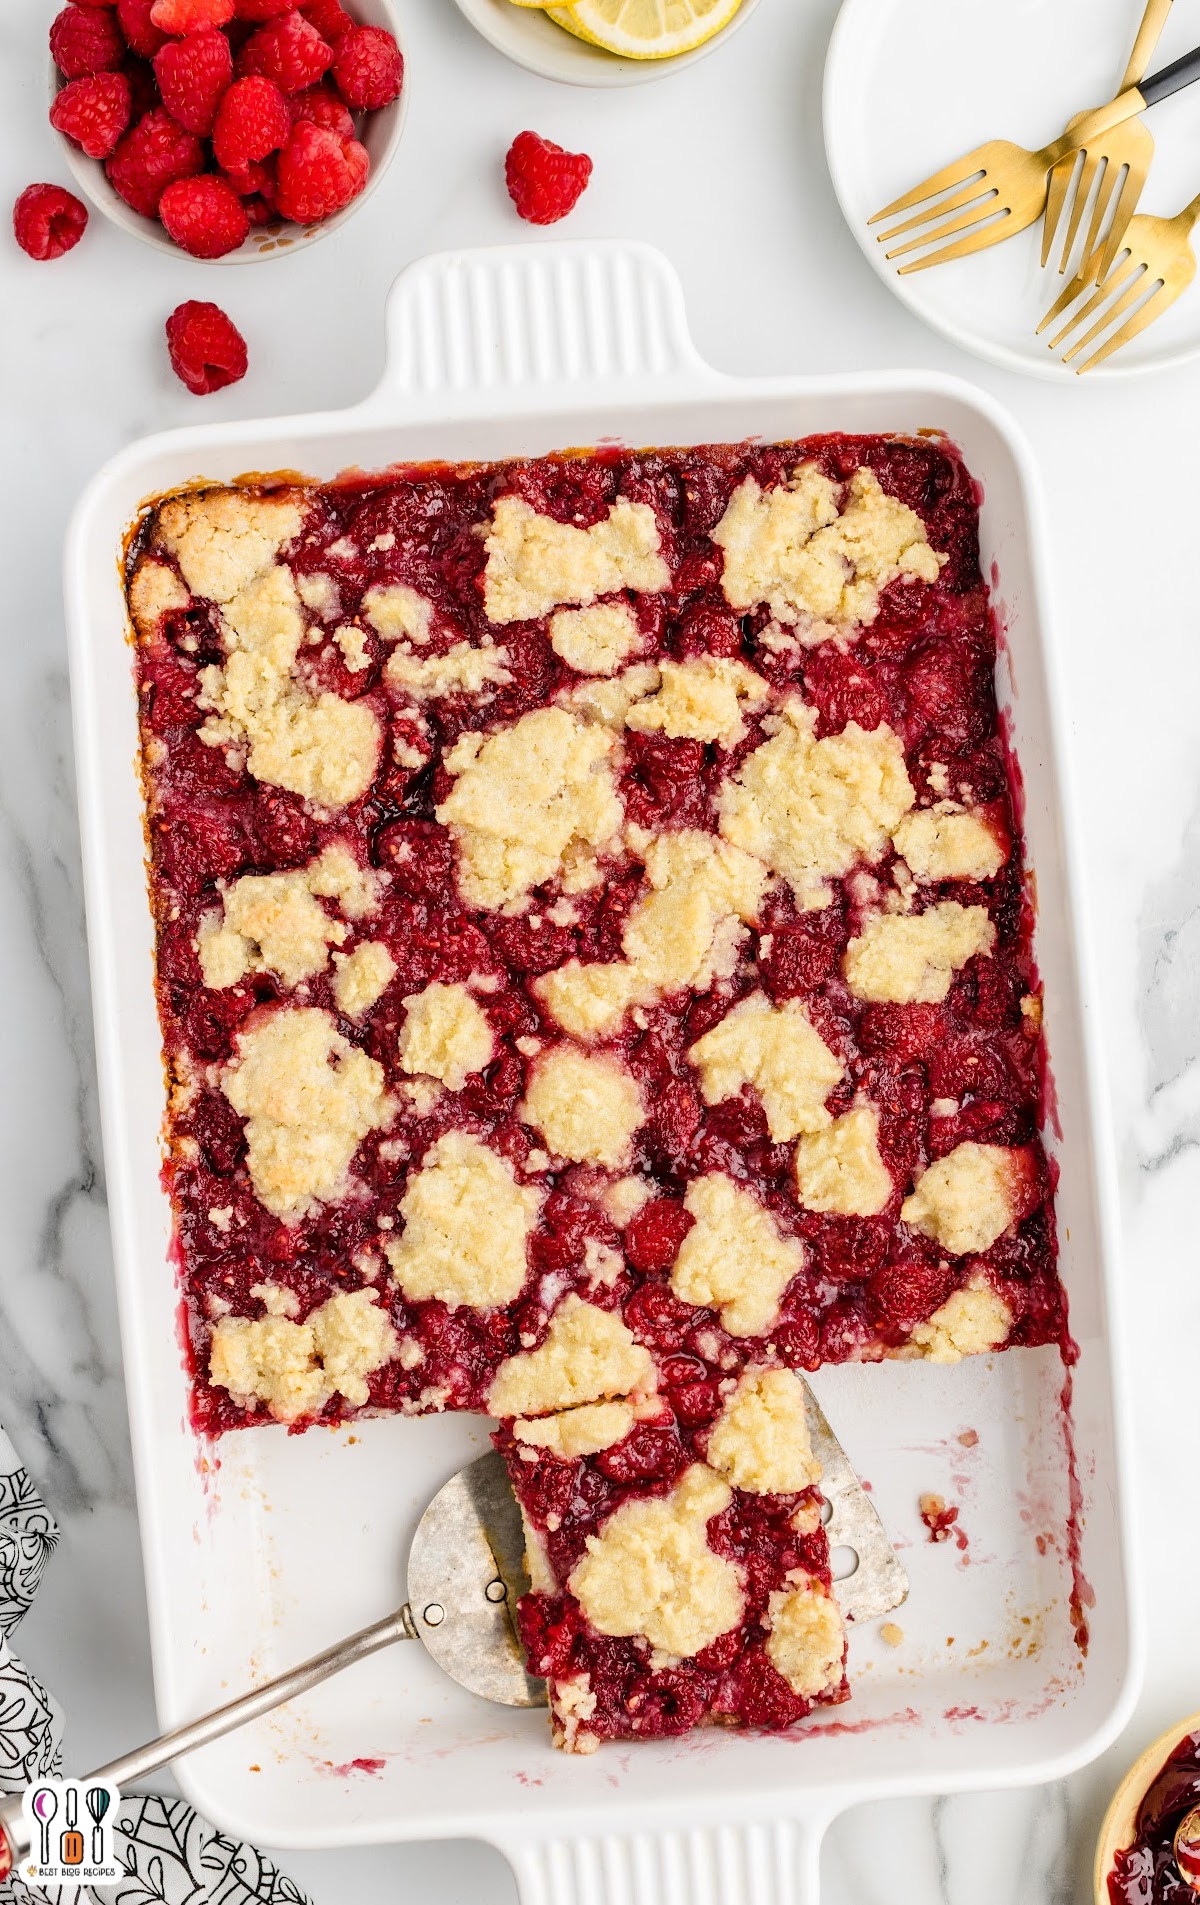
SEVENTH STEP: Pour the raspberry filling onto the crust and spread it evenly. Crumble the reserved crumb topping over the top of the raspberry filling layer. You will have areas that aren’t covered with the crumbled dough.
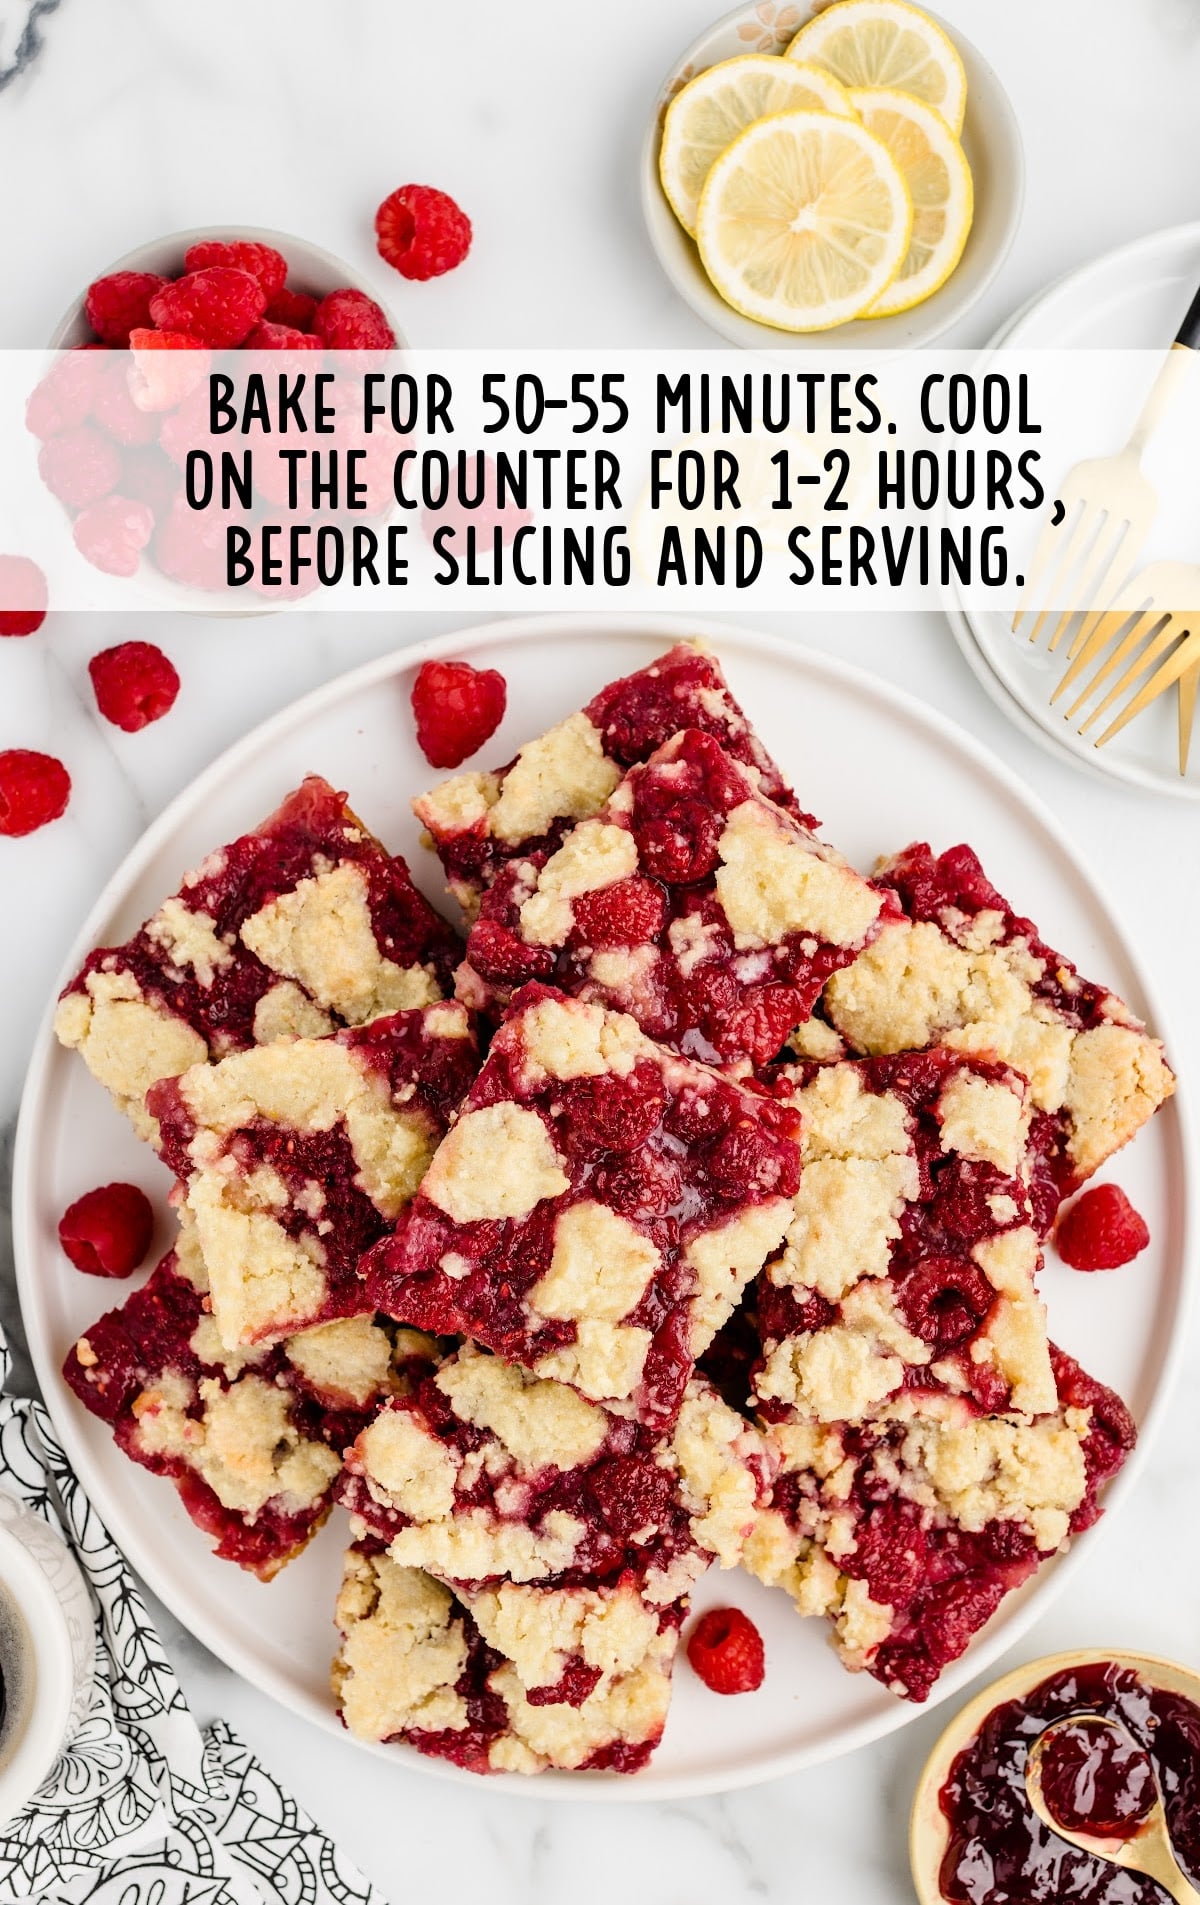
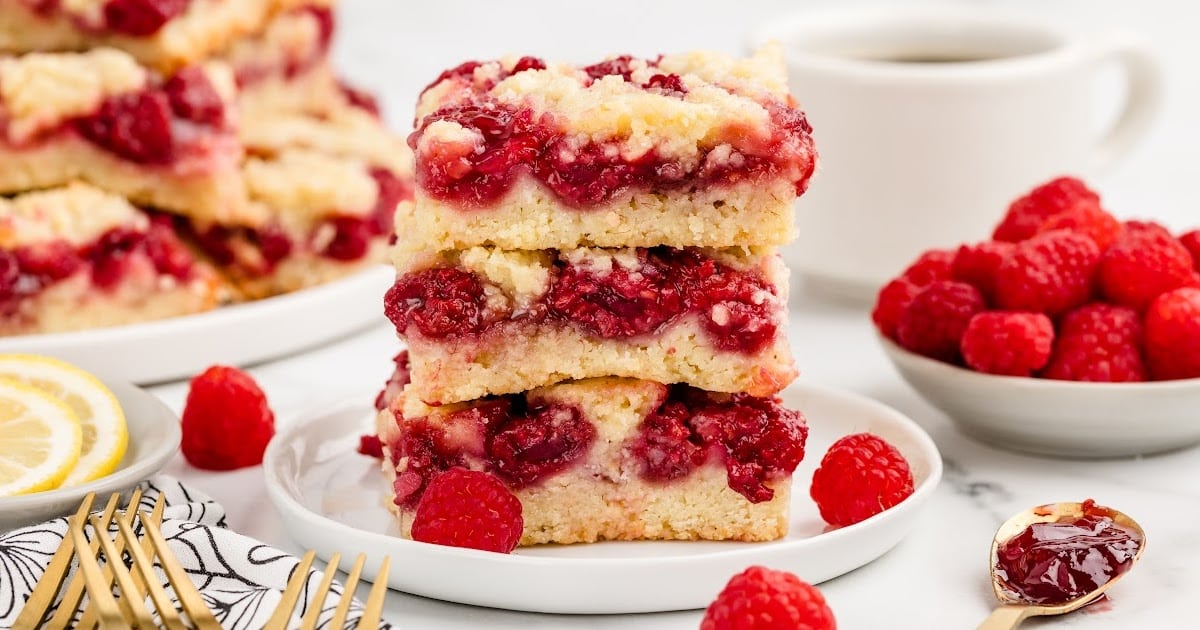
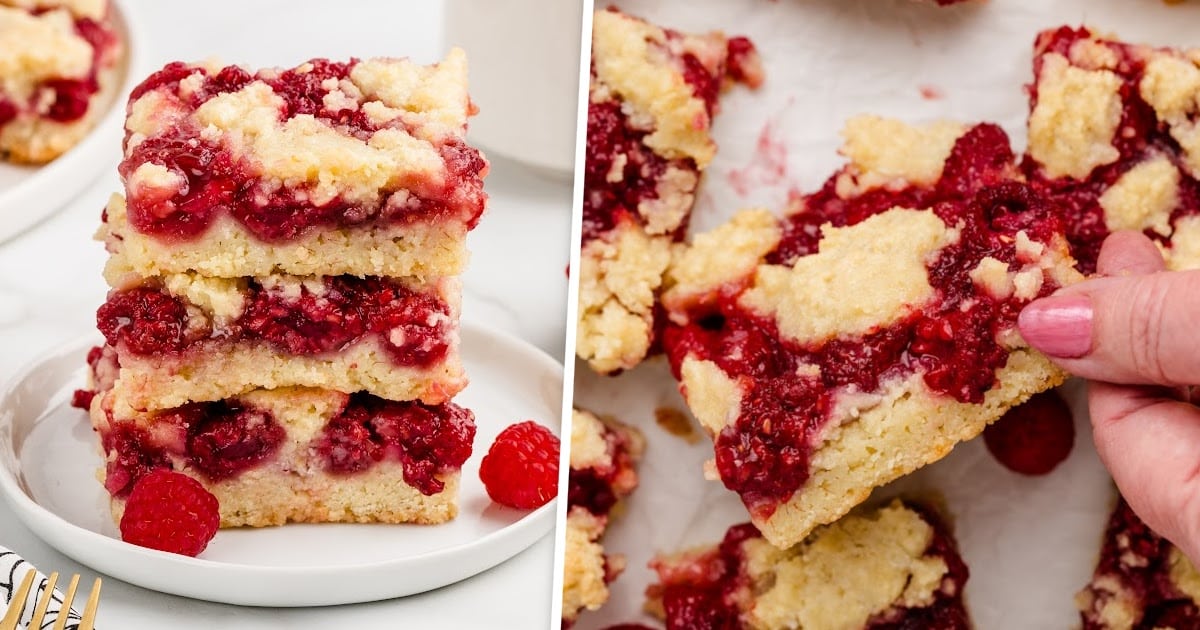
EIGHTH STEP: Bake until the raspberry mixture is bubbly and thick, and the crust is light golden brown. Remove from the oven and let the squares cool on the counter for 1-2 hours. Once they’re completely cool, slice and enjoy!
How to Serve Raspberry Squares
These raspberry squares are a versatile treat that can be served in various ways, making them perfect for any occasion. Whether you’re hosting a party, enjoying a cozy family gathering, or celebrating a special moment, these squares fit right in. Here are some fun and delicious ways to serve this recipe:
- For Special Occasions: Serve these raspberry squares at weddings, baby showers, or holiday parties. Their vibrant color and sweet-tart flavor make them a festive addition to any dessert table. Pair them with a sparkling beverage or a rich chocolate dessert like our Busy Day Chocolate Cake for an extra indulgent treat.
- Seasonal Delights: These squares shine in spring and summer when fresh, juicy raspberries are in season. They’re light, refreshing, and perfect for picnics or backyard BBQs. Complement them with a cool glass of lemonade or our Strawberry Spinach Salad for a refreshing, seasonal menu.
- Kid-Friendly Fun: Kids love the sweet and tangy combination of these raspberry squares. Serve them at birthday parties or family picnics alongside our ham and cheese sliders and a scoop of vanilla ice cream for a fun, kid-approved meal. They’re easy to eat and a guaranteed hit with little ones!
No matter how you serve them, these raspberry squares will be a delightful addition to any celebration!
Why You'll Love This Raspberry Squares Recipe
Raspberry Squares are more than just a dessert—they're a beloved favorite for several delightful reasons:
- A Burst of Flavor: This recipe perfectly balances the buttery crust with the sweet-tart raspberry filling. Every bite is a delicious burst of flavor.
- Versatile and Crowd-Pleasing: Whether it's for a family gathering, potluck, or casual weeknight treat, Raspberry Squares are always a hit. The bright, fruity flavor makes them a crowd-pleaser in every season.
- Simple Yet Impressive: These squares are easy to make but look and taste like you spent hours in the kitchen. Their beautiful presentation and rich flavor make them an impressive addition to any dessert table.
Raspberry Squares aren't just tasty—they're a must-try treat that will quickly become a favorite in your home.
Recipe FAQ
Can I use fresh raspberries instead of jam for these raspberry squares?
Yes, you can use fresh raspberries. Mash them slightly with sugar to create a similar consistency to jam.
How do I prevent the raspberry filling from leaking out of the squares?
Ensure the crust is well-sealed around the edges and don't overfill to prevent the raspberry filling from leaking.
Why is my crust too hard after baking?
Overmixing or overbaking can cause the crust to become hard. Mix until just combined and bake until lightly golden.
How do I make my raspberry squares more tart?
Add a squeeze of lemon juice to the raspberry filling to enhance its tartness and balance the sweetness.
Serving FAQ
What’s the best way to serve raspberry squares at a party?
Cut the squares into small, bite-sized portions for easy serving. Arrange them on a platter for a tempting display.
Should I serve raspberry squares warm or cold?
These squares taste delicious both ways! Serve them warm for a comforting dessert or chilled for a refreshing treat.
How can I make raspberry squares look more festive for a special occasion?
Dust the squares with powdered sugar or add a fresh raspberry on top for a festive and elegant presentation.
Are raspberry squares suitable for a summer picnic?
Yes, raspberry squares are perfect for picnics! They’re portable, easy to eat, and hold up well in warm weather.
Storage FAQ
For optimal storage, follow the directions, tips, and tricks below. From making ahead to reheating, we’ve got you covered.
Can I prepare raspberry squares ahead of time?
Yes, bake the raspberry squares and let them cool completely. Store them in an airtight container at room temperature for up to two days.
What’s the best way to store leftover raspberry squares?
Store any leftover squares in an airtight container. They will stay fresh at room temperature for up to two days.
Is it possible to freeze raspberry squares?
Yes, you can freeze raspberry squares. Wrap each square in plastic wrap and store in an airtight container for up to one month.
How do I thaw and reheat frozen raspberry squares?
Thaw the squares in the fridge overnight. Reheat them in a 300°F oven for about 10 minutes or until warmed through.
How should I reheat raspberry squares when ready to serve?
Reheat the squares in a 300°F oven for 5-10 minutes until warm. Enjoy them fresh out of the oven for the best taste!
Can I reheat raspberry squares in the microwave?
Yes, you can reheat in the microwave. Warm them in 10-second increments, but be careful not to overheat.
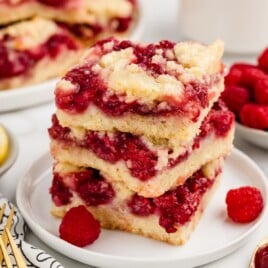
Raspberry Squares
These raspberry squares combine a buttery crust with a sweet-tart filling for a delicious, crowd-pleasing treat. Perfect for any occasion, they’re easy to make and always a hit!
Did you try this recipe?Let our readers know how it turned out by Leaving a Review!
Ingredients
For the Crust
- 3 cups all-purpose flour
- 1 ½ cups granulated sugar
- ½ teaspoon salt
- 1 teaspoon lemon zest
- ½ cup unsalted butter (chilled and cut into cubes)
- 3 eggs (lightly beaten)
For the Raspberry Filling
- 4 cups fresh raspberries (approximately 4 to 6 ounce containers)
- ½ cup granulated sugar
- ⅓ cup seedless raspberry jam
- 2 tablespoons cornstarch
- 1 tablespoon fresh lemon juice
DIRECTIONS
- Preheat oven to 350°F. Spray a 9×13 baking pan with Baker’s spray. Set aside.
- In the bowl of a food processor, add the all-purpose flour, granulated sugar, salt, and lemon zest. Pulse 2-3 times until combined. Add the chilled and cubed unsalted butter to the food processor and pulse again for 15-30 seconds or until you get small pea-sized pieces of butter.
- Add the lightly beaten eggs to the dry ingredients and pulse again just until a crumbly dough is formed. You should not have any dry pockets of flour in the dough.
- Press two-thirds of the dough into an even layer at the bottom of the prepared 9×13 baking dish. The best way to get a smooth top is to use a small flat-bottomed cup to press the shortbread crust down. Set aside the remaining dough crumbles.
- Add the fresh raspberries, granulated sugar, seedless raspberry jam, cornstarch, and fresh lemon juice in a large bowl. Gently mix the ingredients together, being careful not to break up the raspberries too much.
- Spread the raspberry filling evenly over the bottom layer of crust. Add the remaining crumb mixture evenly over the raspberry filling layer. You should have areas of raspberries that are not covered by the crumbled dough pieces.
- Bake for 50-55 minutes or until the raspberry mixture is bubbly and has thickened and the crust is lightly browned. Allow the raspberry pie bars to cool on the counter for 1-2 hours, or until completely cool, before slicing and serving.
Notes
- If you don’t have a food processor, you can make this crust by hand using a pastry blender (like you would use to make pie crust by hand) or a stand mixer fitted with a paddle attachment.
- You can use the bottom of a flat glass to help you press the mixture down flat into the pan.
Nutrition
Calories: 352kcal | Carbohydrates: 63g | Protein: 5g | Fat: 9g | Saturated Fat: 5g | Polyunsaturated Fat: 1g | Monounsaturated Fat: 2g | Trans Fat: 0.3g | Cholesterol: 61mg | Sodium: 115mg | Potassium: 114mg | Fiber: 3g | Sugar: 35g | Vitamin A: 309IU | Vitamin C: 11mg | Calcium: 24mg | Iron: 2mg
HAVE YOU TRIED THIS RECIPE?Follow me on Pinterest @bestblogrecipes

Leave a Comment