
Published on
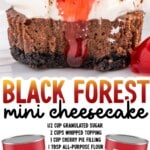
Black Forest Mini Cheesecakes
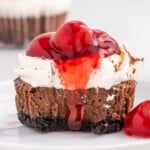
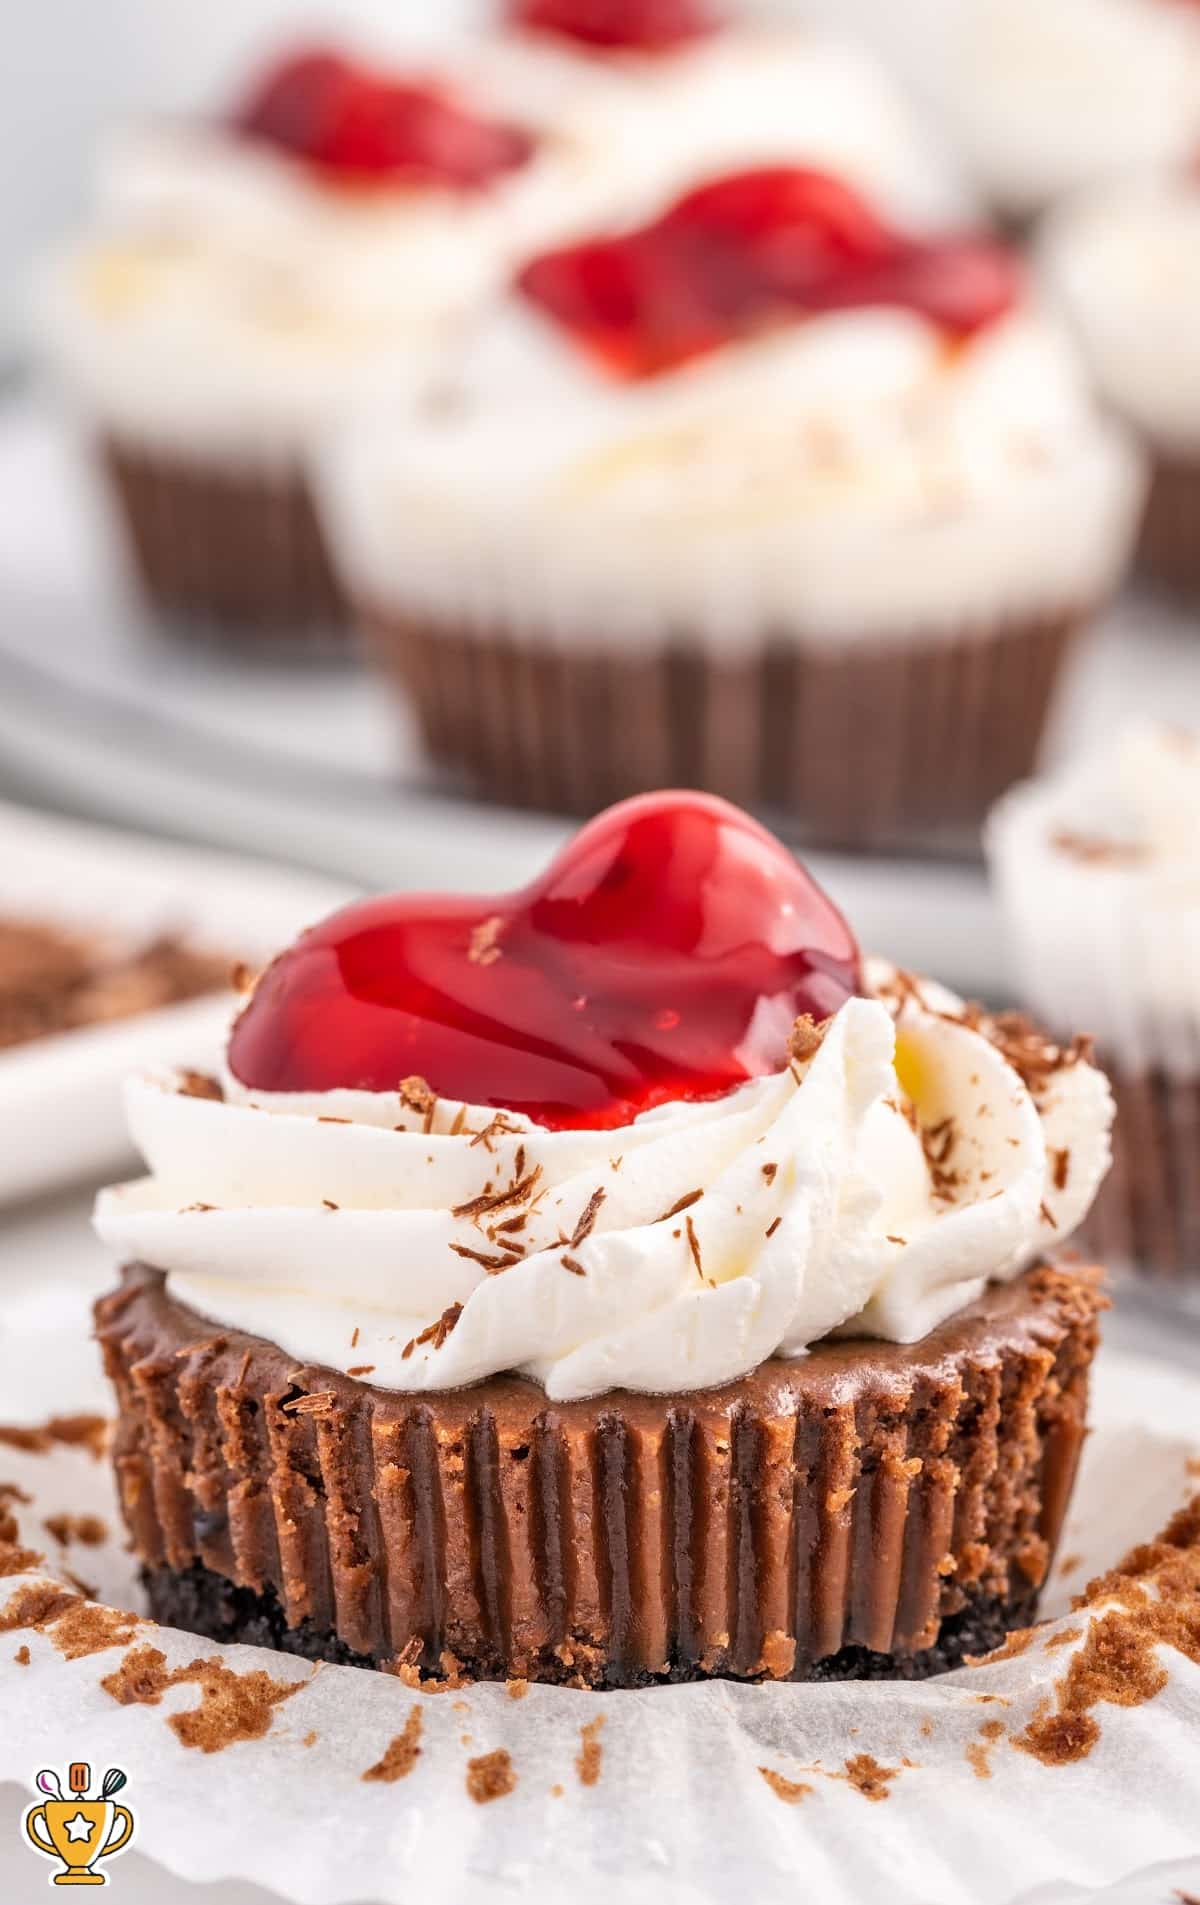
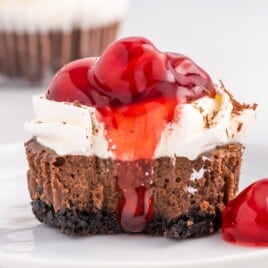
Black Forest Mini Cheesecakes feature a rich chocolate cookie crust, a smooth chocolate cheesecake filling, and a classic cherry topping finished with whipped cream. These individual cheesecakes bake evenly, chill beautifully, and are easy to make ahead.
Jump to RecipeTable of Contents


Black forest mini cheesecakes take everything people love about the classic dessert. Rich chocolate, sweet-tart cherries, and creamy layers - all transformed into an elegant, individual cheesecake that’s made for modern home bakers.
This mini black forest cheesecake recipe was created to capture all the classic Black Forest flavors while keeping the dessert firmly in cheesecake territory - not your typical cake or cupcakes.

Unlike traditional mini Black Forest cakes, which rely on sponge layers and whipped cream filling, these mini cheesecakes are built around a smooth, chocolate-forward cheesecake base with a crisp crust and a glossy cherry topping.
The result is a dessert that’s richer, more stable, and far more make-ahead friendly—perfect for holidays, parties, or anytime you want a show-stopping dessert that looks impressive but is completely manageable at home.
Why You’ll Love These Black Forest Mini Cheesecakes
🍒 Black forest mini cheesecakes feel special without being complicated.
Each one gives you:
- Rich chocolate cheesecake
- A crisp chocolate crust
- A sweet-tart cherry topping
All in a perfectly portioned, individual dessert that’s easy to serve and easy to enjoy.
🍫 This mini black forest cheesecake recipe works beautifully when you want something a little more elegant than brownies or cupcakes, but not as involved as a full-sized cheesecake. Because these are baked as individual cheesecakes, they chill faster, hold their shape, and look polished every time you set them out.
✨ If you love chocolate-and-cherry desserts, these individual Black Forest cheesecakes hit the sweet spot. They taste creamy without feeling heavy, chocolate-forward without turning bitter, and sweet without overpowering the classic Black Forest flavor combination.
Ingredients You’ll Need

What you'll need to make chocolate cherry mini cheesecakes:
Crust
- 10 Oreos, or generic version with the cream centers
- 3 tablespoons salted sweet cream butter, melted and cooled
Chocolate Cheesecake Filling
- ½ cup granulated sugar
- 3 tablespoons cocoa powder, unsweetened
- 1 tablespoon all-purpose flour
- 8 ounces cream cheese, softened
- 4 tablespoons sour cream
- 2 teaspoons pure vanilla extract
- 2 large eggs, room temperature
Topping
- 2 cups whipped topping, thawed
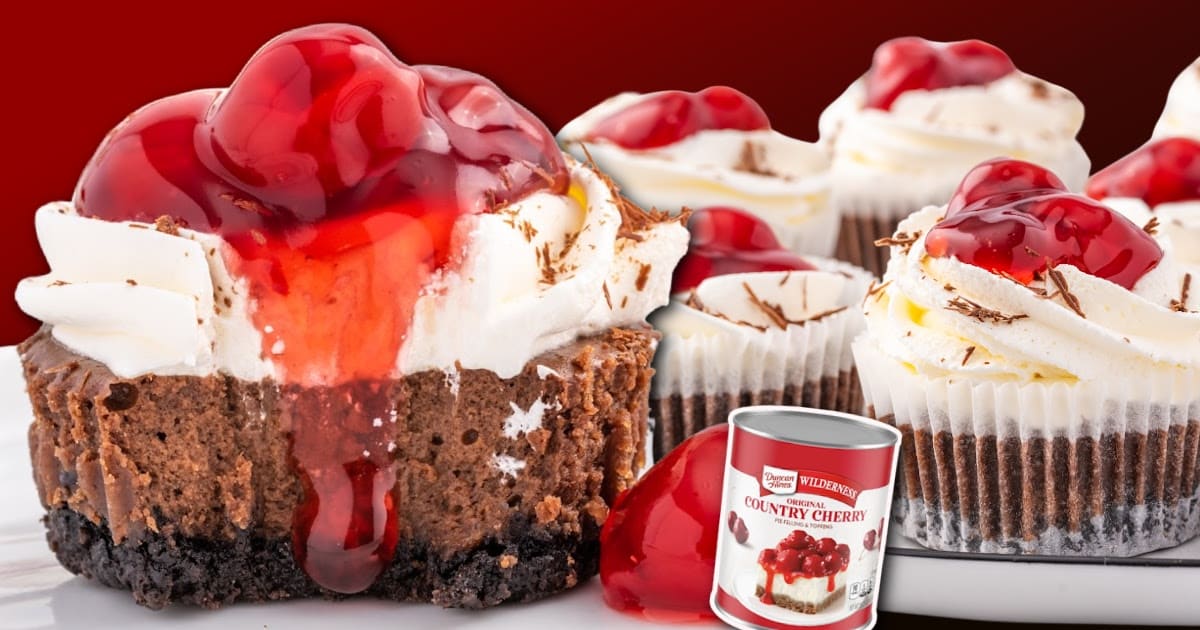
- 1 cup cherry pie filling
- Chocolate shavings, optional garnish
What Makes These Black Forest Mini Cheesecakes Special
🍫 Chocolate-forward
These mini chocolate cherry cheesecakes use real chocolate flavor in both the crust and the cheesecake filling, creating a rich base that tastes unmistakably chocolatey.
🍒 Cherries that balance, not overwhelm
A glossy cherry topping adds the signature Black Forest contrast. It brings sweetness and gentle tartness without soaking into the cheesecake or weighing it down.
🥄 Creamy cheesecake texture
These are true baked cheesecakes, not cake layers with filling. That smooth, creamy texture is what sets black forest mini cheesecakes apart from mini Black Forest cakes.
✨ Individually baked for clean results
Baking them as individual Black Forest cheesecakes gives you defined layers, clean edges, and a dessert that holds its shape from fridge to platter.
How to Make Black Forest Mini Cheesecakes
🧁 Take your time with these steps. Cheesecake rewards patience, and these easy black forest mini cheesecakes are no exception.
Step One: Prepare the Pan. Preheat the oven to 325°F. Line a regular muffin tin with cupcake liners, then lightly spray the liners with nonstick cooking spray. Set aside.
💡 Our Recipe Developer Says:
Parchment paper liners or foil-lined wrappers peel away from the cheesecake filling much more easily than standard paper liners.
Step Two: Crush the Oreos. Add the Oreos to a food processor and pulse until fine crumbs form. If you don’t have a food processor, place the cookies in a gallon-size zip-top bag and crush them with a rolling pin or mallet.
The finer the crumbs, the more evenly the crust will hold together.
Step Three: Make the Crust Mixture. Add the crushed Oreo cookie crumbs and the melted, cooled butter to a small mixing bowl. Stir until fully combined and evenly moistened.
Step Four: Press the Crust. Use a 1-tablespoon cookie scoop to portion the crumb mixture into each cupcake liner. Press the crumbs down firmly with the back of a spoon to form an even crust layer.
⚠️ Pro Tip
Pressing firmly helps the crust stay intact when you remove the mini cheesecakes later.
Step Five: Mix the Dry Ingredients. Add the sugar, cocoa powder, and flour to a small bowl. Whisk to combine, then set aside.
Mixing these together now helps them blend smoothly into the cheesecake filling later.
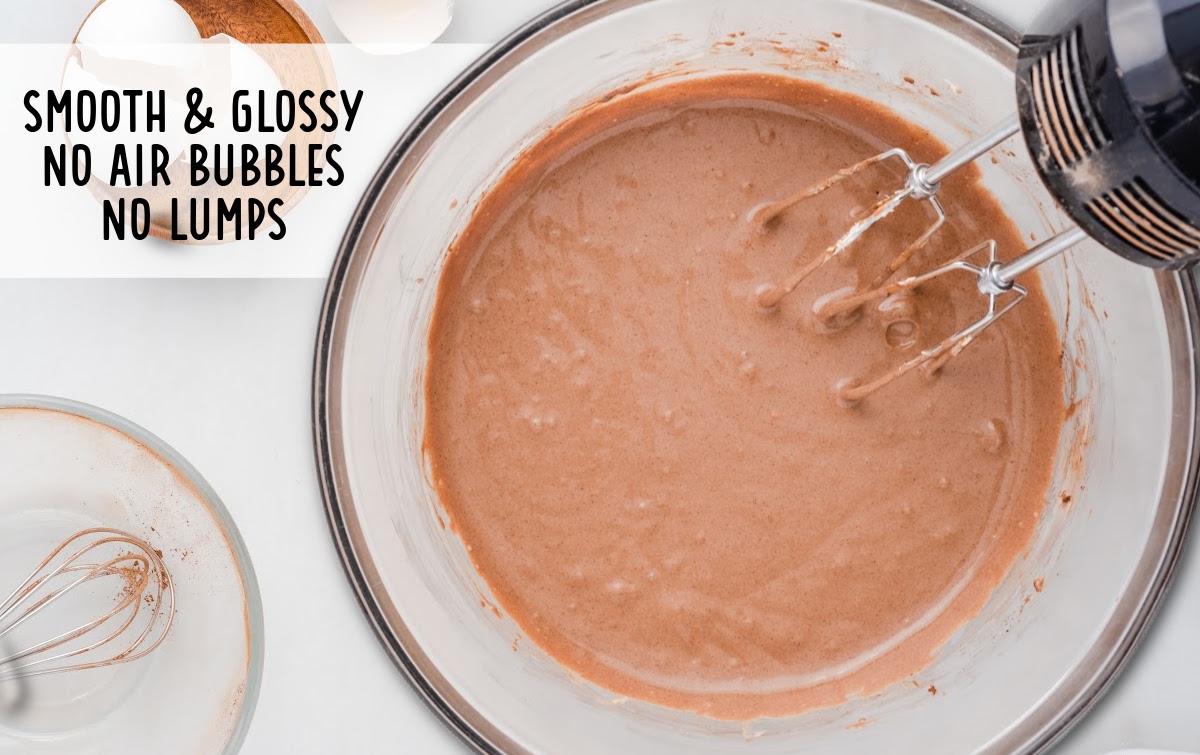
Step Six: Beat the Cream Cheese Mixture. Beat the softened cream cheese, sour cream, and vanilla for 1½ to 2 minutes, until completely smooth. Use a stand mixer or a medium-sized mixing bowl with an electric hand mixer on medium-high speed.
⚠️ Pro Tip
Always use room temperature cream cheese. Cold cream cheese will leave lumps in the batter, and those won’t smooth out later.
Step Seven: Add the Chocolate Sugar Mixture. Add the sugar and cocoa mixture to the cream cheese mixture. Continue mixing for 1 to 1½ minutes, until fully incorporated and smooth.
At this stage, the batter should look glossy and evenly chocolate-colored, with no visible streaks.
Step Eight: Add the Eggs. Reduce the mixer speed to low. Add the eggs one at a time, beating well after each addition.
Mixing on low helps prevent adding too much air to the batter and keeps the cheesecake texture smooth.
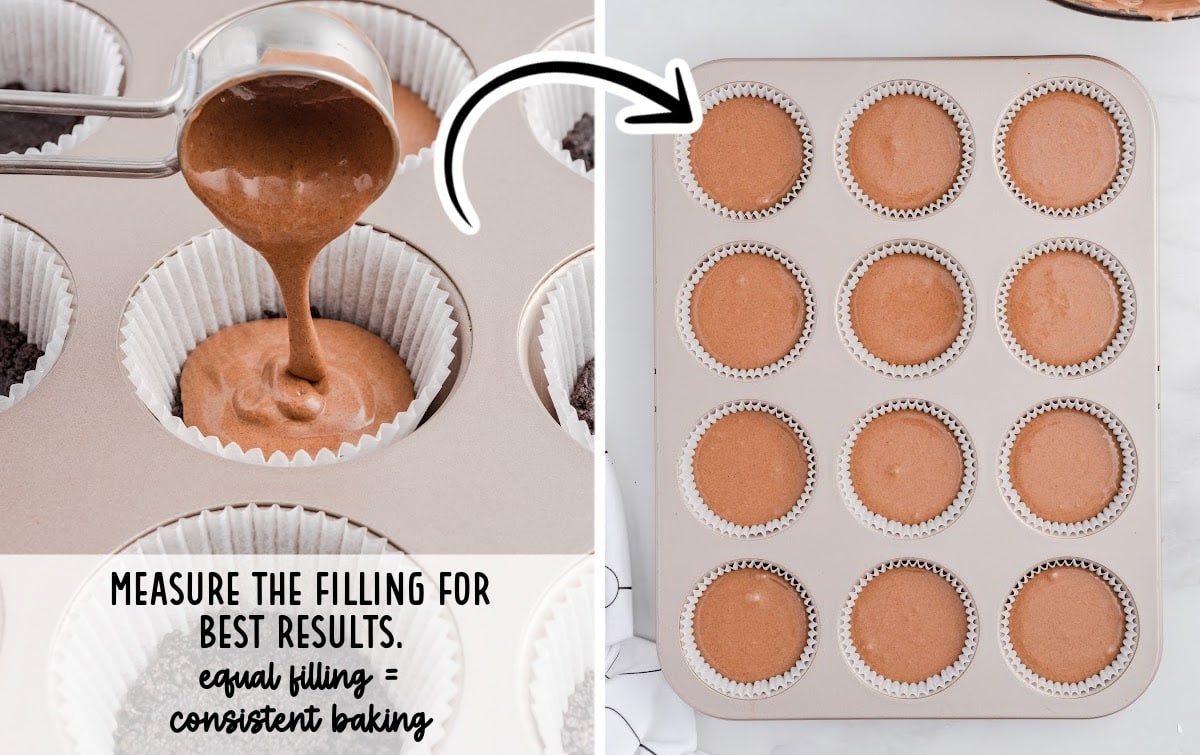
Step Nine: Fill the Muffin Cups. Divide the batter evenly over the prepared crusts, filling each liner about two-thirds full, or approximately 2 tablespoons per cheesecake.
Step Ten: Bake, Rest, and Chill. Bake for 20 minutes. Turn the oven off and leave the pan inside with the oven door slightly ajar for 5 minutes.
Remove the pan from the oven and allow the cheesecakes to rest at room temperature for 30 minutes, then transfer the muffin pan to the refrigerator and chill for 2 hours, or until fully set.

⚠️ Pro Tip:
Oven temperatures can vary and may need periodic recalibration. As the baking time approaches, keep a close eye on your cheesecakes to avoid overbaking.
Step Eleven: Add the Whipped Topping. Just before serving, add the whipped topping to a disposable piping bag fitted with a star-shaped tip, or to a quart-size zip-top bag with a small corner snipped off.
Pipe the whipped topping onto each cheesecake using steady, even pressure in a circular motion.
Step Twelve: Finish with Cherry Topping. Spoon 1 tablespoon of cherry filling into the center of the whipped topping on each cheesecake.
Keep the cheesecakes refrigerated until ready to serve. Add chocolate shavings just before serving, if desired.
Key Tips for Perfect Mini Cheesecakes
Use room-temperature cream cheese.
✖️ Cold cream cheese won’t fully smooth out and can leave lumps in the batter.
Mix gently once the eggs go in.
✔️ After adding the eggs, keep the mixer on low and stop as soon as the batter looks smooth. ✖️ Overmixing adds air, which can cause cracking as the cheesecakes bake and cool.
Fill evenly and don’t overfill.
✔️ Stick to about two-thirds full for each liner. Even portions help the mini cheesecakes bake at the same rate and keep their tops level.
Don’t rush the cooling process.
✔️ Let the cheesecakes rest in the turned-off oven, then cool at room temperature before chilling. This helps prevent sinking and cracking.
Decorate only after fully chilled.
✔️ Whipped topping and cherry filling hold their shape best once the cheesecakes are completely cold.
Make-Ahead, Storage, and Freezing
Make them ahead of time: These black forest mini cheesecakes are a great make-ahead dessert. You can bake and chill them up to 2 days in advance, then add the whipped topping, cherry filling, and chocolate shavings right before serving so they look fresh and polished.
Storing leftovers: Store any leftover mini cheesecakes covered in the refrigerator. They keep well for up to 3 days. If you can, place them in a single layer so the toppings stay neat.
Freezing for later:
You can freeze the baked cheesecakes before decorating. Once they’re fully chilled, transfer them to an airtight container and freeze for up to 1 month. Let them thaw overnight in the refrigerator, then finish with the toppings.
A quick note on freezing: It’s best not to freeze these after they’ve been topped. Whipped topping and cherry filling don’t always thaw smoothly and can lose their shape.
More Recipes ⭐ Reese’s Peanut Butter Cup Mini Cheesecakes | Mini Oreo Cheesecake | Mini Mint Cheesecake
How to Serve Black Forest Mini Cheesecakes
Serve these black forest mini cheesecakes chilled so the layers stay clean and the texture stays creamy. Once fully set, they lift easily from the liners and can be plated individually or arranged on a serving tray.
To create a balanced dessert spread, pair the cheesecakes with simple, contrasting desserts. Vanilla cupcakes, peanut butter chocolate cookies, or bite-sized no-bake desserts work especially well.
For parties or holidays, serve the mini cheesecakes alongside plain shortbread or sugar cookies.
These options complement the chocolate-and-cherry flavors without competing with them, and they give guests a little variety while keeping the dessert table cohesive.
FAQs
Can I make black forest cheesecake cups ahead of time?
Yes. You can bake and chill them up to two days in advance. Add the whipped topping and cherry filling just before serving for the best texture and appearance.
Why did my mini cheesecakes sink in the center?
Cheesecakes can sink if they cool too quickly or if the batter was overmixed. Following the gradual cooling steps and mixing gently after adding the eggs helps prevent this.
Can I use fresh cherries instead of cherry pie filling?
You can, but they’ll need to be cooked down into a thick compote first. Fresh cherries on their own release too much liquid and won’t sit neatly on top.
How do I know when mini cheesecakes are done baking?
They’re done when the edges look set and the centers no longer appear wet. They should not brown. The chilling time finishes setting the texture.
Can I freeze mini cheesecakes with chocolate and cherries?
Yes, but freeze them before adding the whipped topping and cherry filling. Thaw overnight in the refrigerator, then decorate before serving.

Mini Black Forest Cheesecake
Black Forest Mini Cheesecakes feature a rich chocolate cookie crust, a smooth chocolate cheesecake filling, and a classic cherry topping finished with whipped cream. These individual cheesecakes bake evenly, chill beautifully, and are easy to make ahead.
Did you try this recipe?Let our readers know how it turned out by Leaving a Review!
Ingredients
Crust
- 10 Oreos (or generic version with the cream centers)
- 3 tablespoons salted sweet cream butter (melted and cooled)
Chocolate Cheesecake Filling
- ½ cup granulated sugar
- 3 tablespoons cocoa powder (unsweetened)
- 1 tablespoon all-purpose flour
- 8 ounces cream cheese (softened)
- 4 tablespoons sour cream
- 2 teaspoons pure vanilla extract
- 2 large eggs (room temperature)
Topping
- 2 cups whipped topping (thawed)
- 1 cup cherry pie filling
- Chocolate shavings (optional garnish)
DIRECTIONS
- Preheat the oven to 325°F. Line a regular muffin tin with cupcake liners. Lightly spray the liners with nonstick cooking spray. Set it aside.
- Add the Oreos to either a food processor or a gallon ziplock bag. If you are using a food processor, pulse until the cookies are crumbs. If using the ziplock bag, you can pound the cookies with either a mallet or a rolling pin.
- Add the crushed cookies and the melted and cooled butter to a small mixing bowl. Stir to combine completely.
- Use a 1 tablespoon cookie scoop and scoop the buttered crumbs into each cupcake liner. Tamp down the crumbs.
- Add the sugar, cocoa powder, and flour to a small bowl. Whisk to combine. Set it aside.
- Using either a stand mixer or a medium-sized mixing bowl and a handheld mixer on medium-high speed, beat together the softened cream cheese, sour cream, and vanilla for 1½ to 2 minutes until completely smooth.
- Add in the sugar and cocoa mixture. Continue to mix for another 1 to 1½ minutes until well incorporated.
- Lower the mixer speed to low and add the eggs, one at a time, beating well after each egg.
- Spoon the filling on top of the cookie crust ⅔ full (about 2 tablespoons)
- Bake for 20 minutes. Turn the oven off and leave the pan in the oven, with the oven door slightly ajar for a further 5 minutes. Remove the pan from the oven and allow the cheesecakes to rest for 30 minutes. Place the pan in the fridge and allow the cheesecakes to chill for 2 hours.
- Just before serving, add the whipped topping to a disposable decorator’s bag fitted with a star-shaped decorator’s tip or a quart-size ziplock bag with a corner snipped off. Using even and steady pressure, squeeze the whipped topping in a circular pattern on top of the cheesecakes.
- Spoon 1 tablespoon of the cherry pie filling in the center of the whipped topping. Keep in the refrigerator until ready to serve. Add chocolate shavings before serving.
Notes
- Parchment paper liners or foil-lined wrappers are the easiest to peel from the cheesecake filling.
- Always make sure that your cream cheese is at room temperature. This will help ensure that there are no lumps in your cream cheese mixture.
- Oven temperatures vary and may need to be recalibrated periodically to ensure they are accurate. Make sure to keep a close eye on your cheesecake as the suggested baking time approaches.
Nutrition
Calories: 241kcal | Carbohydrates: 27g | Protein: 4g | Fat: 14g | Saturated Fat: 8g | Polyunsaturated Fat: 1g | Monounsaturated Fat: 4g | Trans Fat: 0.1g | Cholesterol: 55mg | Sodium: 150mg | Potassium: 119mg | Fiber: 1g | Sugar: 16g | Vitamin A: 441IU | Vitamin C: 1mg | Calcium: 43mg | Iron: 2mg
HAVE YOU TRIED THIS RECIPE?Follow me on Pinterest @bestblogrecipes


Leave a Comment