
Published on
Red Velvet Cheesecake
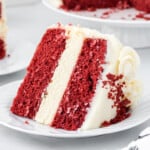
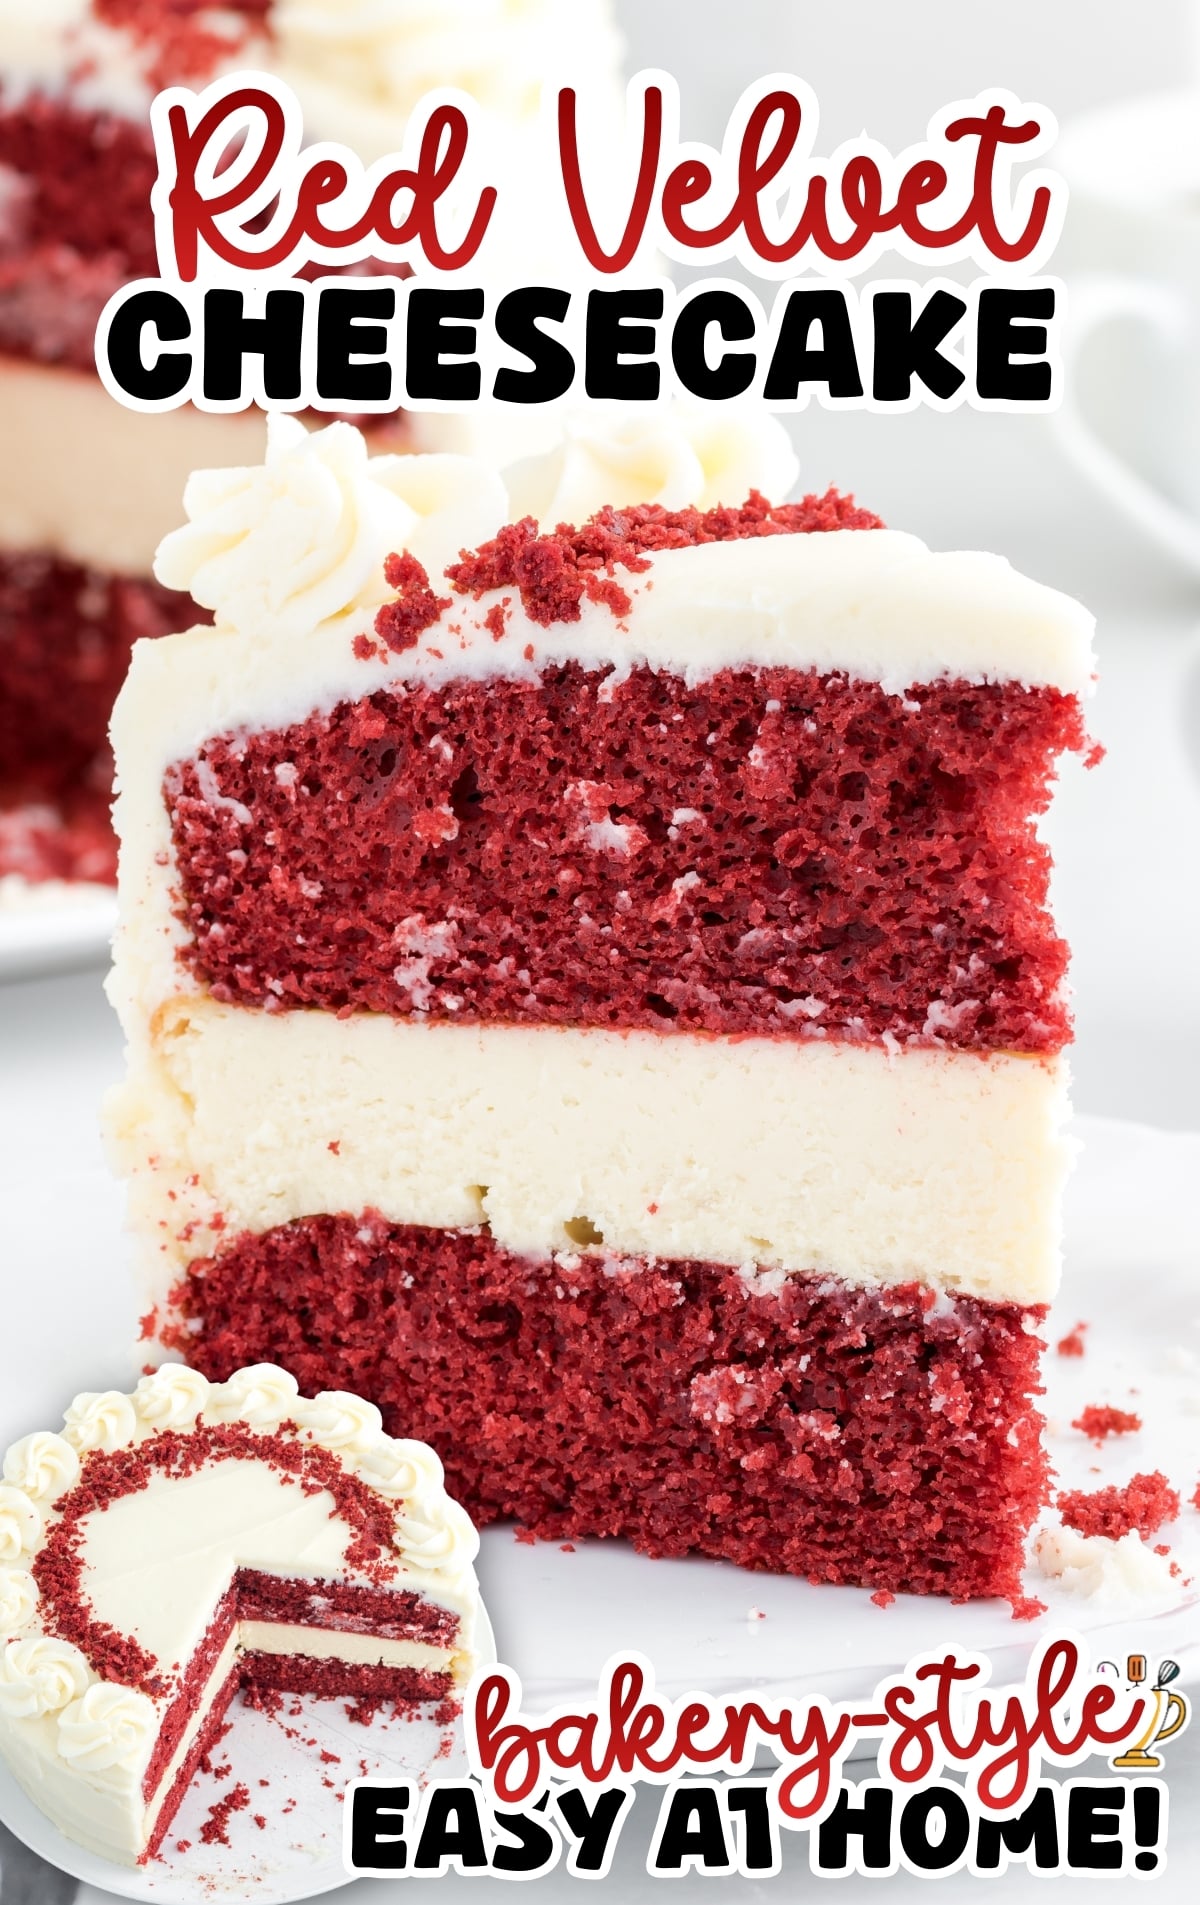
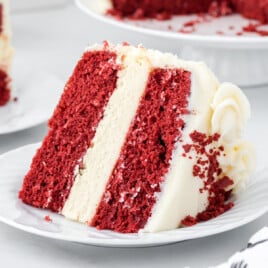
This layered red velvet cheesecake recipe features soft red velvet cake, a smooth baked cheesecake center, and classic cream cheese frosting. It’s a reliable make-ahead dessert that chills well, slices cleanly, and works perfectly for holidays, parties, and special occasions.
Jump to RecipeTable of Contents


This red velvet cheesecake recipe combines two classic desserts into one showstopping cake. Layers of soft red velvet cake sandwich a smooth, baked cheesecake, all finished with cream cheese frosting and a simple red velvet crumb topping.
This layered red velvet cheesecake with cream cheese frosting is made with a from-scratch cheesecake filling and an easy red velvet cake mix, making it approachable without sacrificing texture or flavor. It’s a reliable choice for holidays, parties, and celebrations when you want clean slices and a dessert that looks just as good as it tastes.
What Makes This Classic Red Velvet Cheesecake Work
This recipe uses separate baked layers, which makes the cake easier to assemble and slice cleanly.
- The cheesecake bakes on its own, so it sets fully and holds its shape
- The red velvet cake layers stay soft but sturdy enough to support the cheesecake
- Chilling the assembled cake keeps the layers from shifting before frosting
This method avoids the common problems with swirled or no-bake versions, like uneven texture and messy slices. The result is a red velvet cheesecake that looks clean, slices smoothly, and holds up well for parties and holidays.
Ingredients For Red Velvet Cheesecake
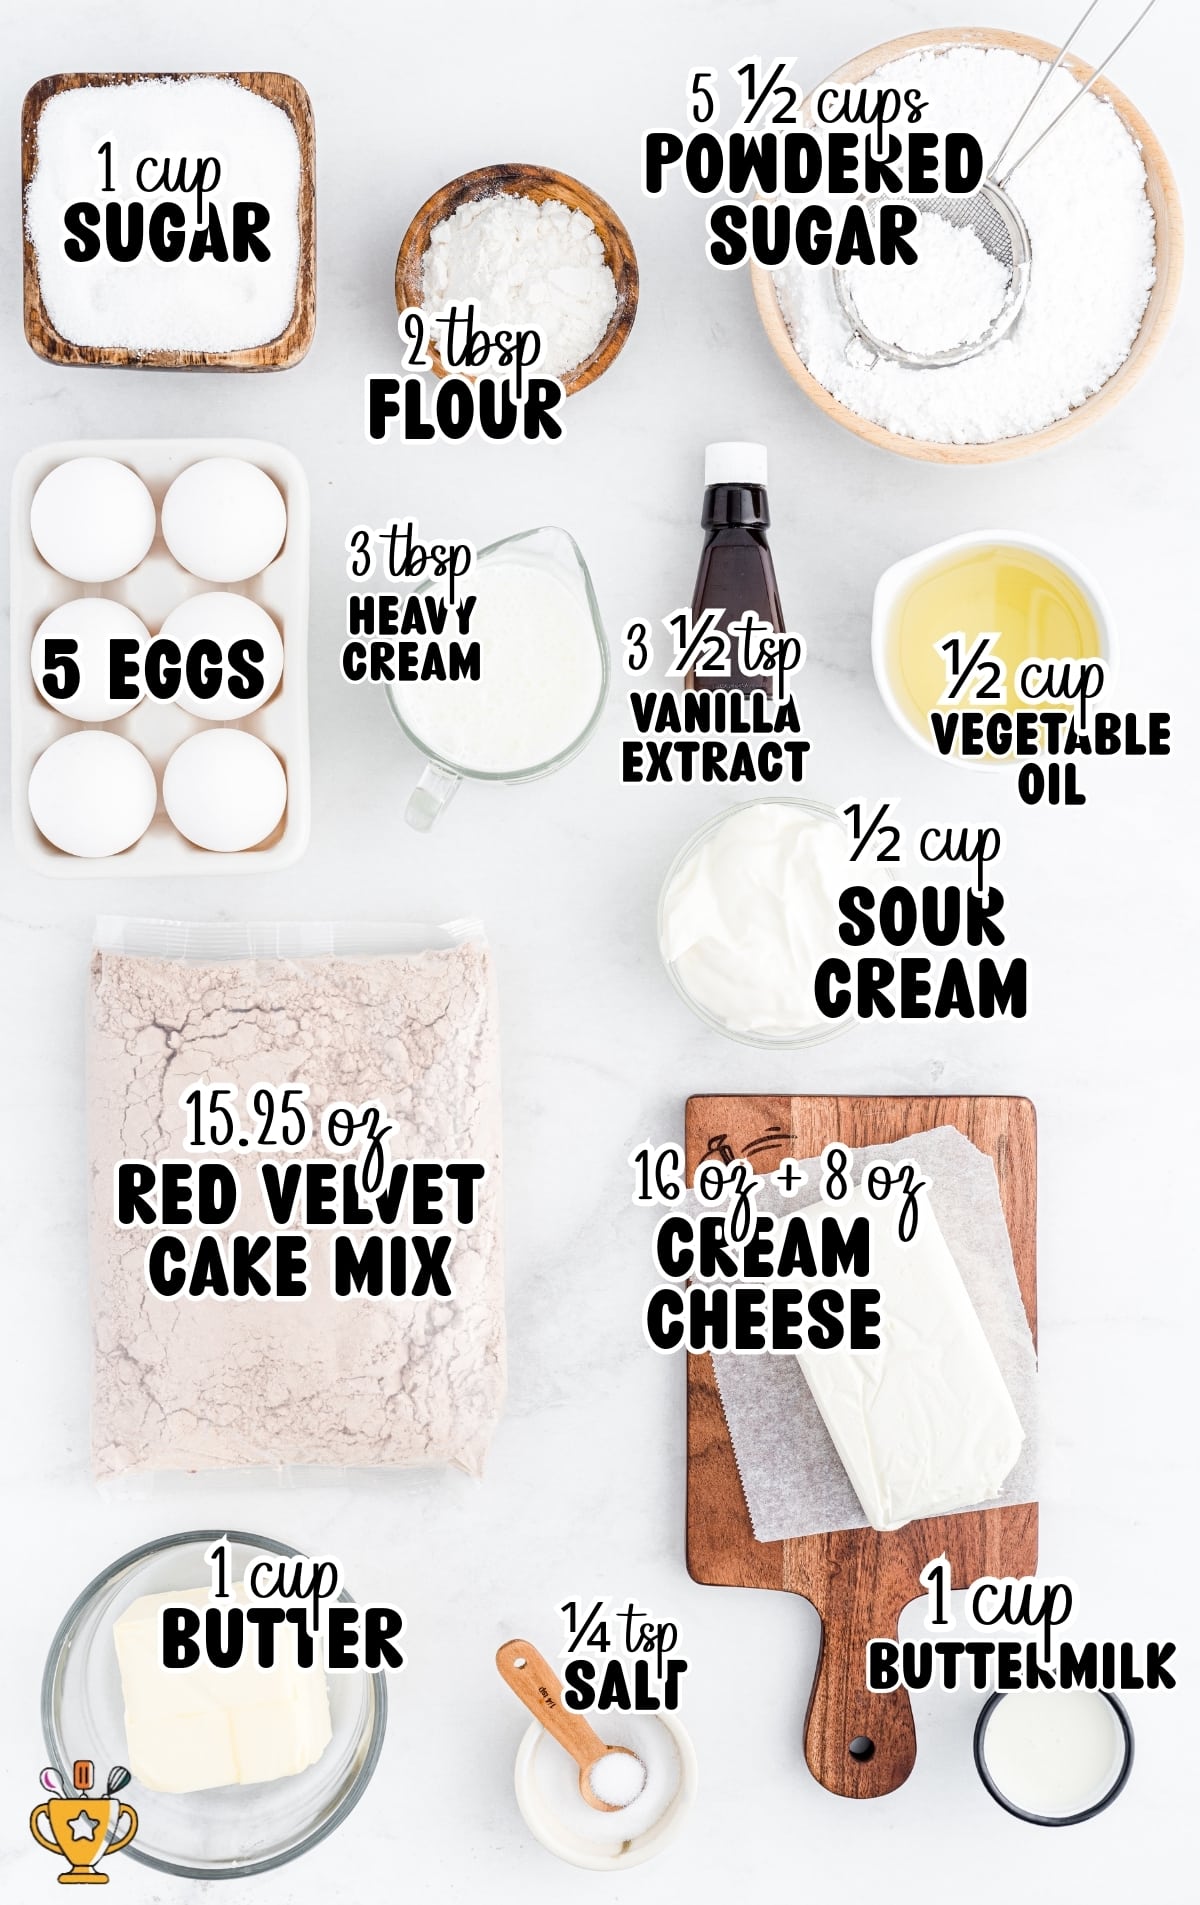
Ingredients You’ll Need
🍰 Red Velvet Cake
- 1 cup buttermilk
- ½ cup vegetable oil
- 3 large eggs
- 15.25 ounces red velvet cake mix
🧀 Cheesecake Layer
- 16 ounces cream cheese, room temperature
- 1 cup granulated sugar
- 2 large eggs, room temperature
- ½ cup sour cream
- 2 tablespoons all-purpose flour
- 1 ½ teaspoons vanilla extract
🎂 Cream Cheese Frosting
- 1 cup unsalted butter, room temperature
- 8 ounces cream cheese, room temperature
- 5 ½ cups powdered sugar, sifted
- 3 tablespoons heavy cream
- 2 teaspoons vanilla extract
- ¼ teaspoon salt
How to Make Red Velvet Cheesecake
Here’s how to bake red velvet cheesecake from scratch: step-by-step instructions for making the layers, making the cheesecake, and assembling the cake so everything sets properly and slices cleanly.
🍰 Make the Red Velvet Cake Layers
FIRST STEP: Preheat the oven to 350°F and lightly spray two 9-inch cake pans with baker’s spray.
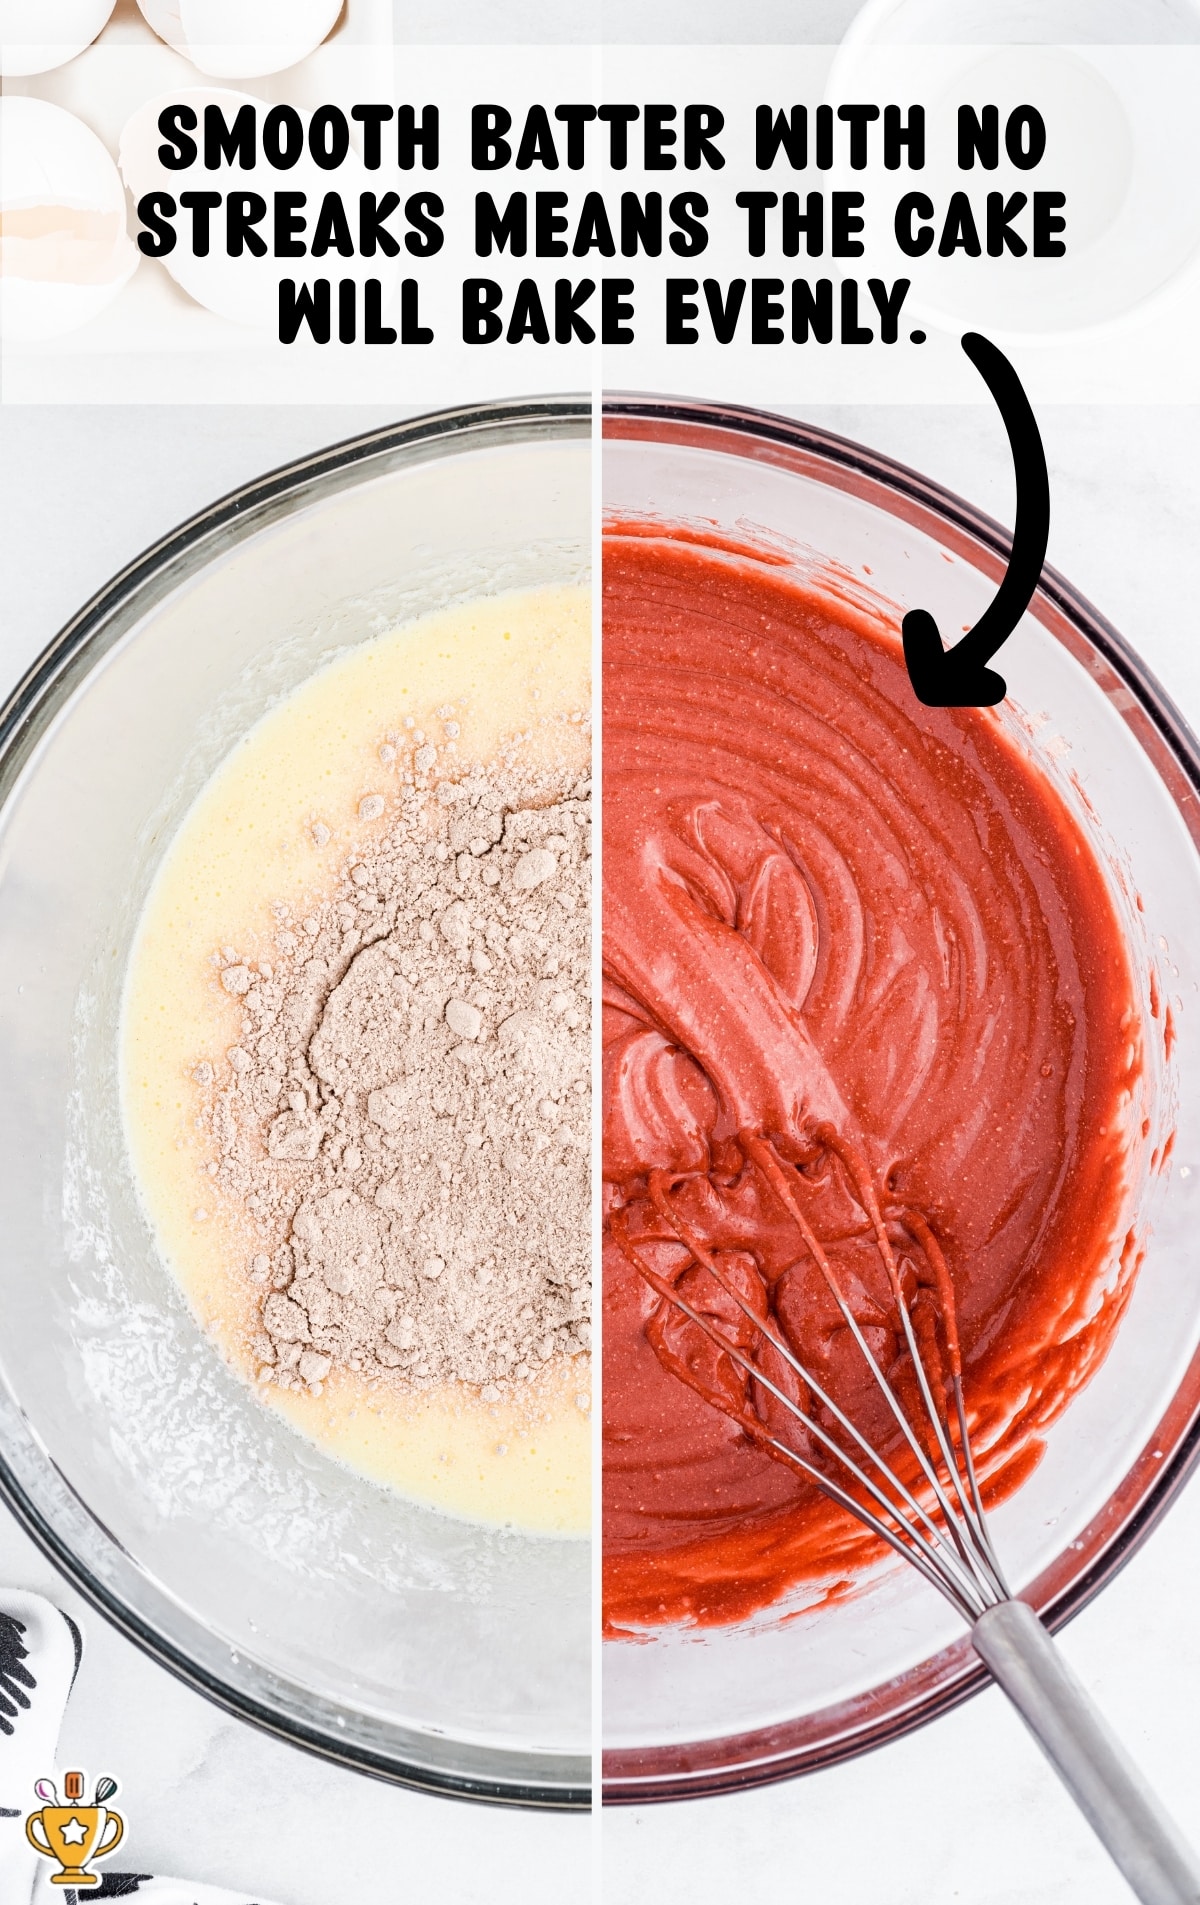
SECOND STEP: In a large mixing bowl, whisk together the buttermilk, vegetable oil, and eggs until fully combined. Add the dry packet from the red velvet cake mix and whisk by hand or with a handheld mixer on low for 2 minutes, until smooth and lump-free.
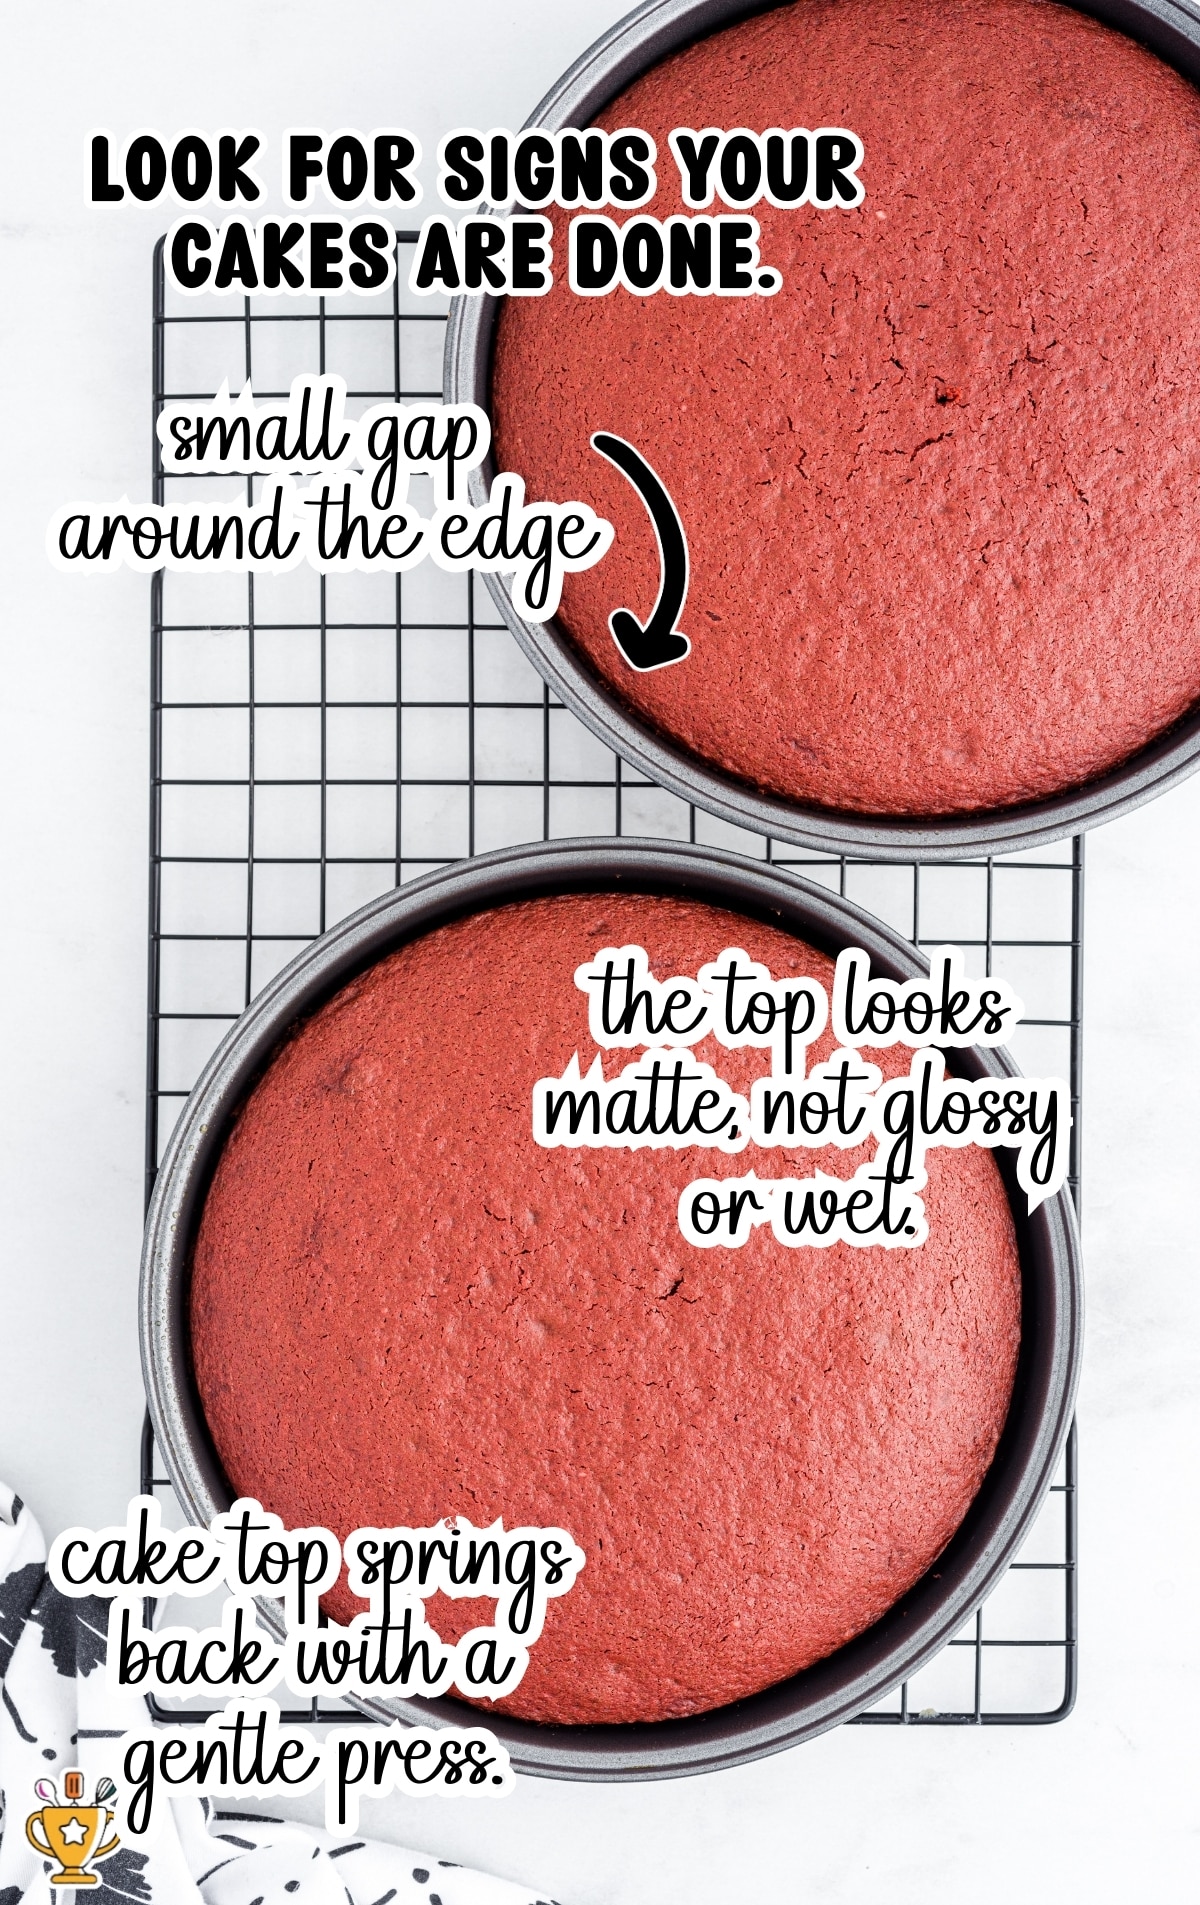
THIRD STEP: Divide the batter evenly between the prepared pans. Bake for 25 to 30 minutes, until a toothpick inserted in the center comes out clean.
FOURTH STEP: Cool the cakes in the pans for 10 minutes, then turn them out onto a wire rack to cool completely.
🧀 Prepare the Cheesecake Layer
FIRST STEP: Lightly spray a 9-inch springform pan with baker’s spray and line the bottom with parchment paper.
Fill an oven-safe 9×13 pan with water to a depth of 1 to 2 inches and set aside.
SECOND STEP: In a large mixing bowl, beat the cream cheese and granulated sugar on low speed for 1 minute, until smooth and lump-free.
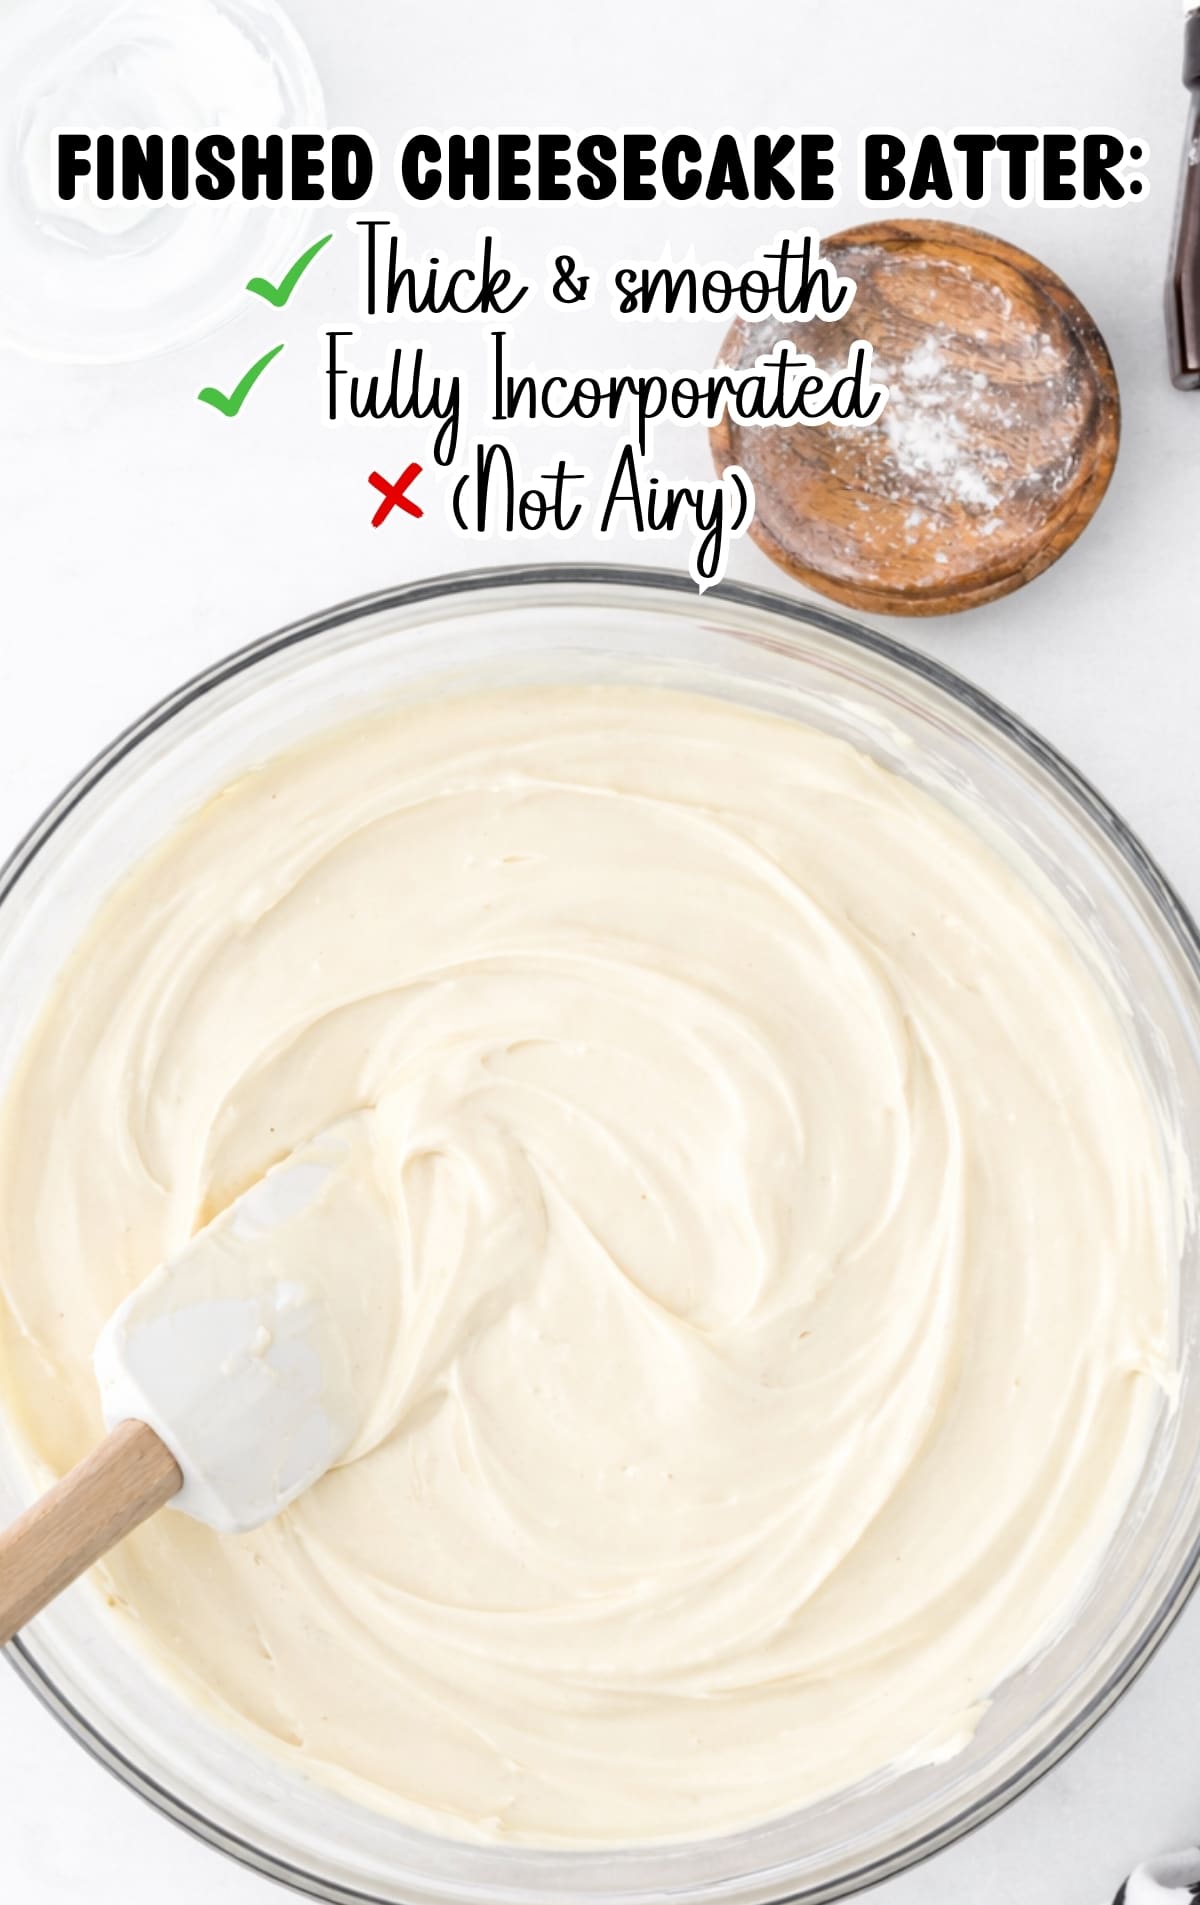
THIRD STEP: Add the eggs and beat on low for 30 seconds. Add the sour cream, flour, and vanilla extract, and mix just until combined. Do not overmix.
🔥 Bake the Cheesecake
FIRST STEP: Pour the cheesecake batter into the prepared springform pan.
SECOND STEP: Place the cheesecake on the middle oven rack and place the water-filled pan on the bottom rack.
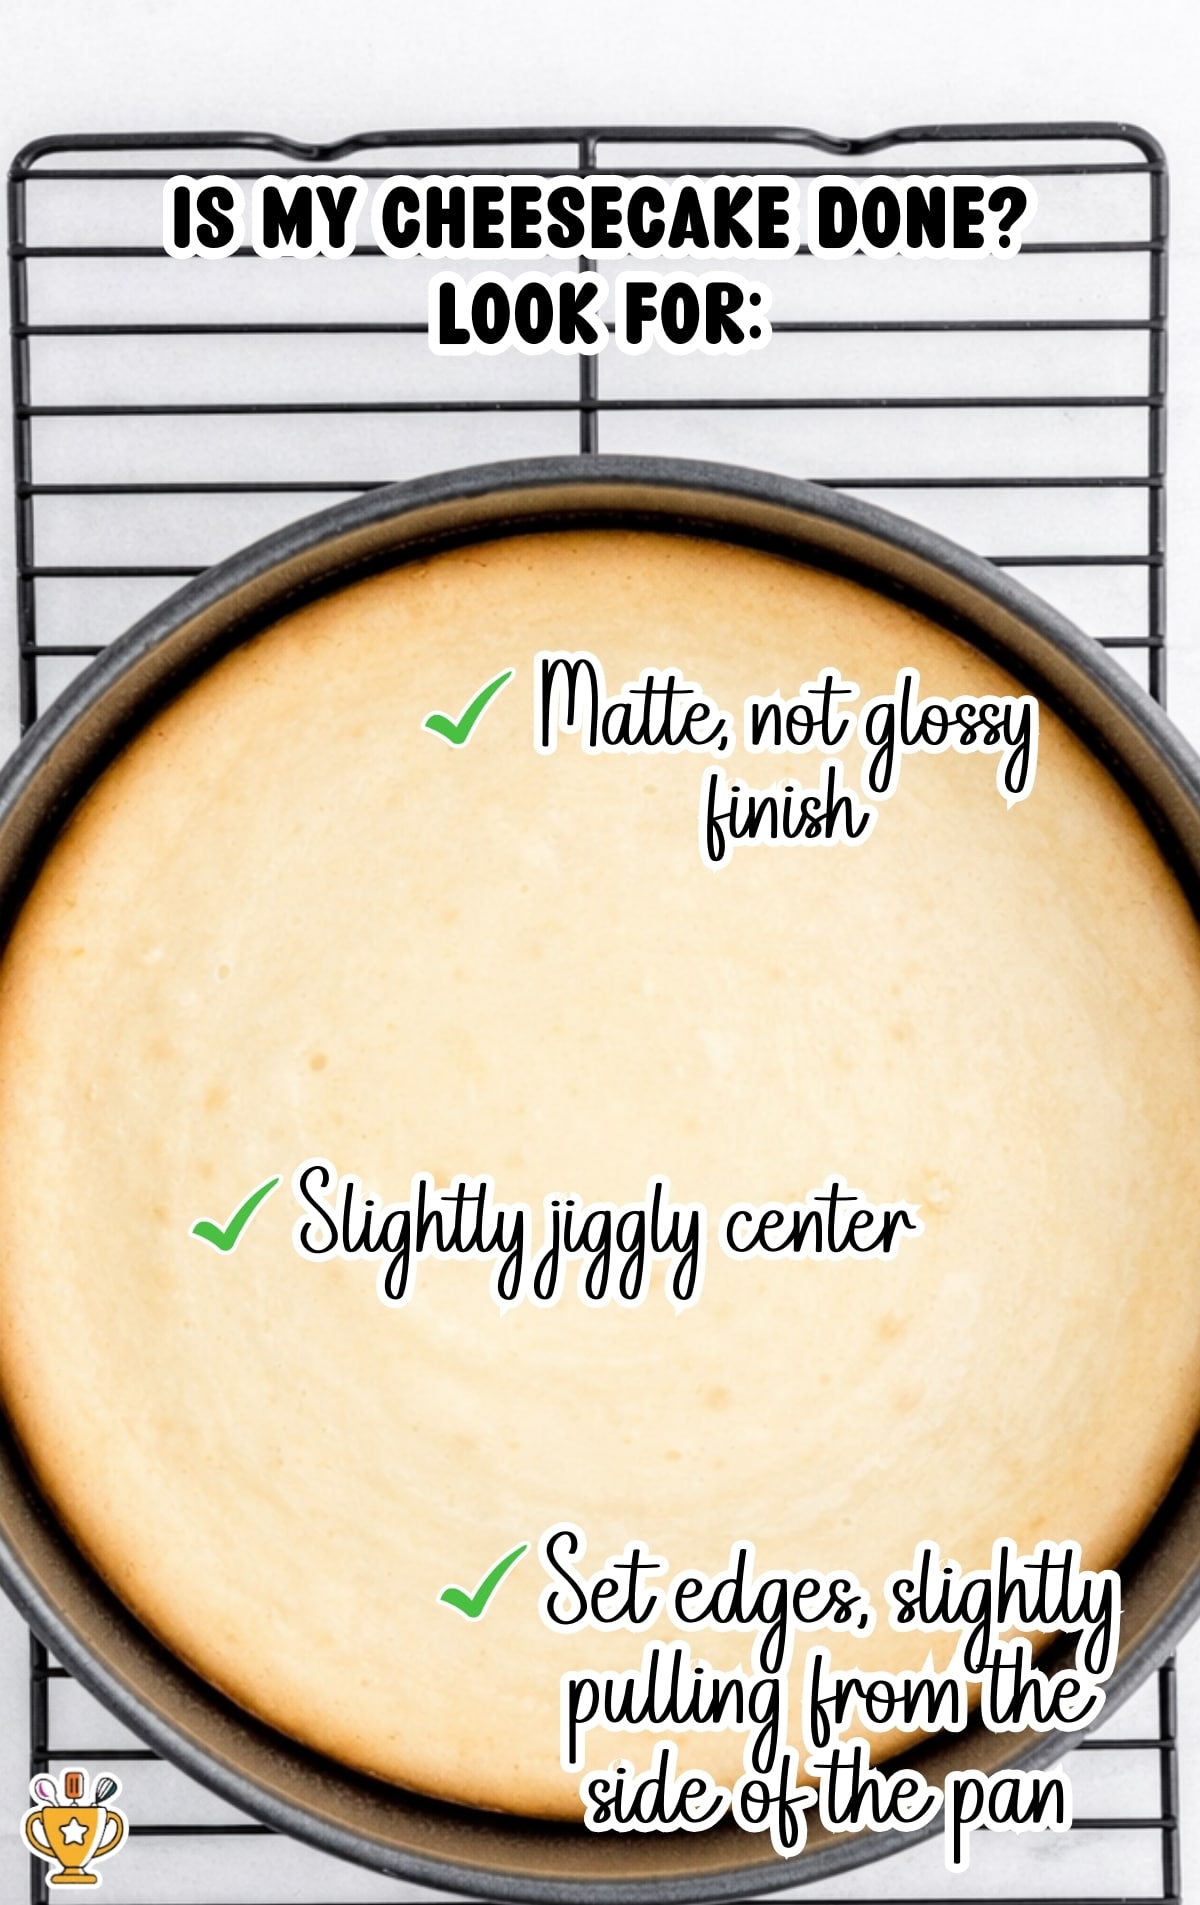
THIRD STEP: Bake for 45 minutes, until the edges are set and the center is just barely jiggly.
❄️ Cool the Cheesecake Slowly
FIRST STEP: Turn off the oven and crack the door open about 1 inch. Leave the cheesecake inside for 1 hour.
SECOND STEP: Remove the cheesecake from the oven and let it cool on the counter for 1 hour. Remove the water-filled pan from the oven as well.
🎂 Red Velvet Cheesecake Assembly
FIRST STEP: Place one red velvet cake layer onto a serving platter.
SECOND STEP: Gently place the cheesecake layer upside down on top of the cake layer and peel off the parchment paper.
THIRD STEP: Add the second red velvet cake layer on top.
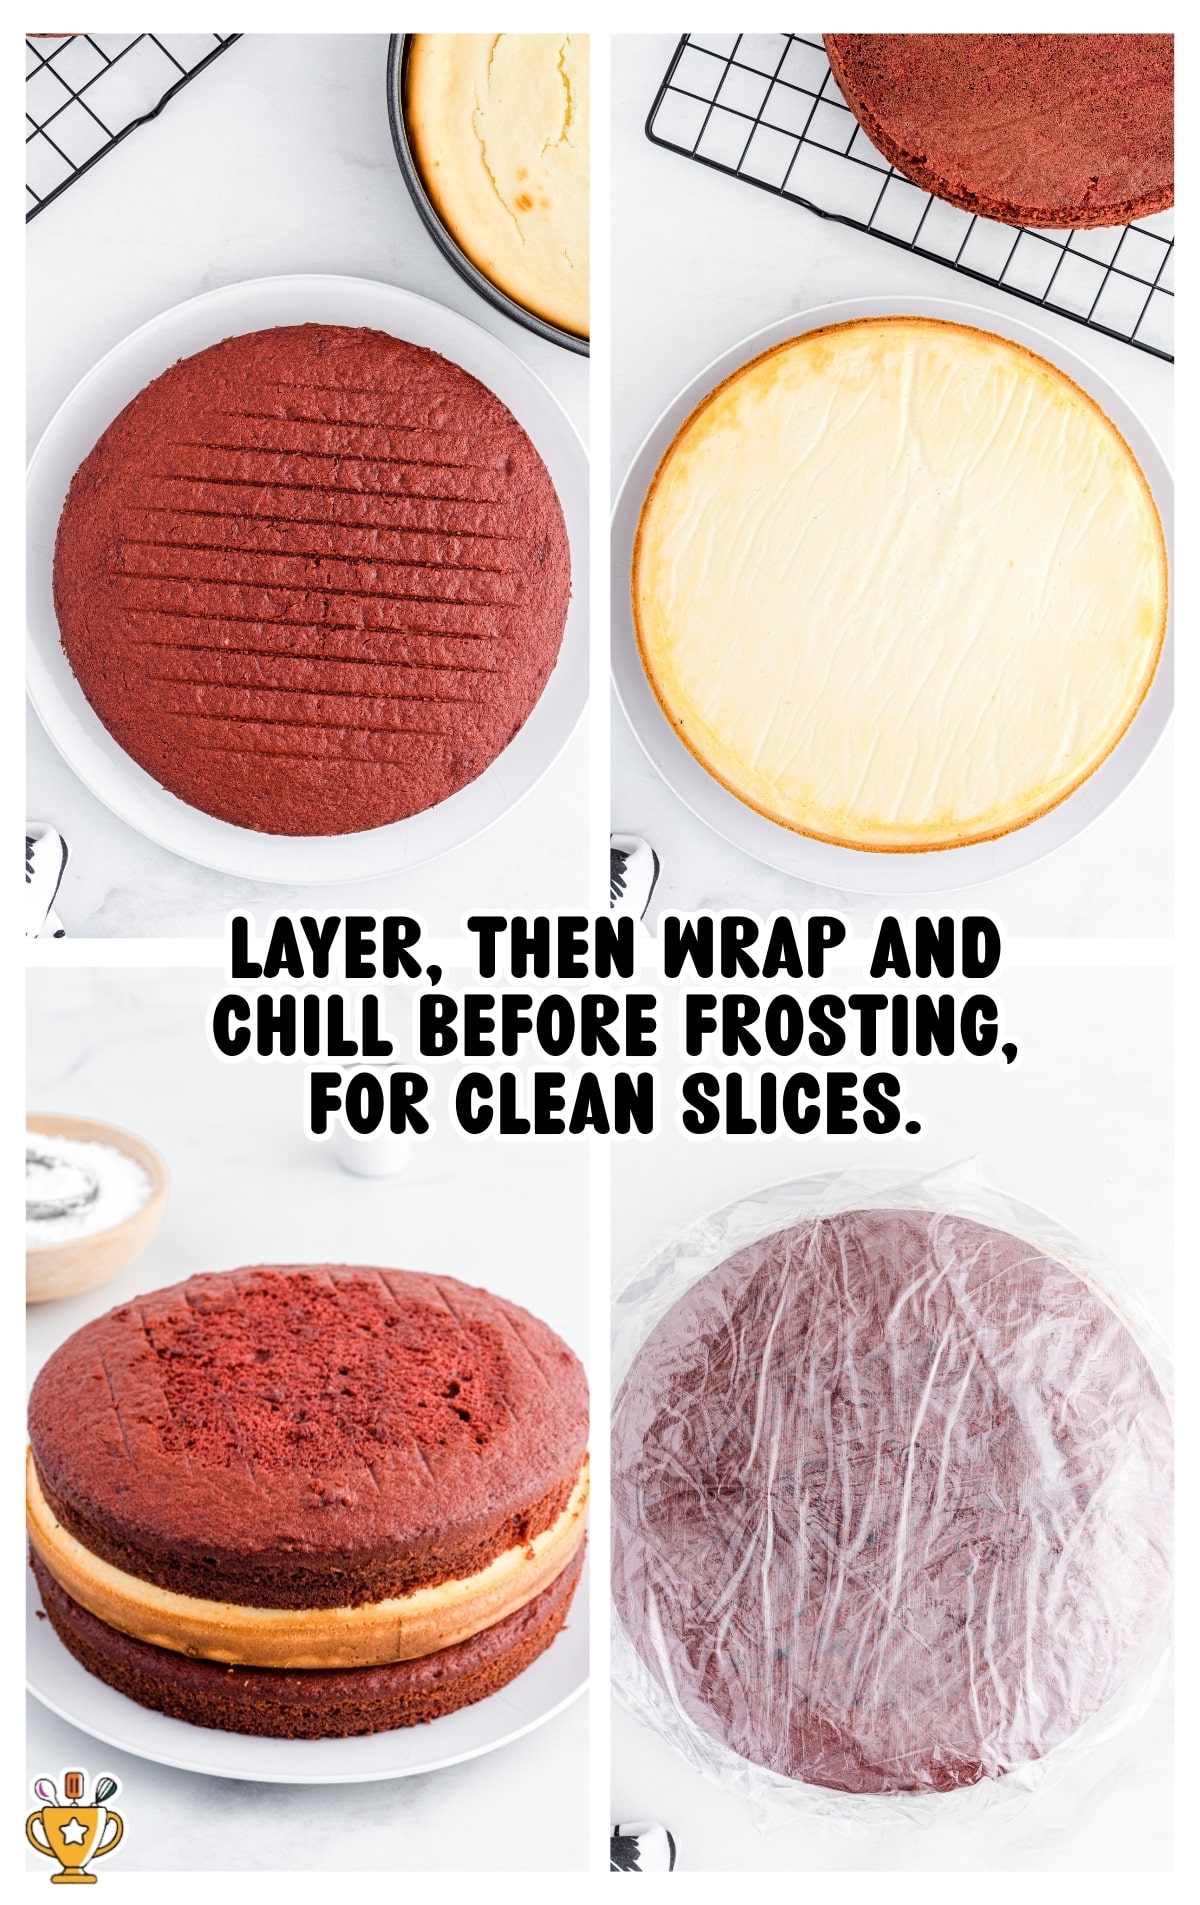
FOURTH STEP: Use a bread knife to level the domed top of the cake. Reserve the cake scraps for garnish.
FIFTH STEP: Lightly cover the cake with plastic wrap and refrigerate for 8 hours or overnight.
🍥 Make the Cream Cheese Frosting
FIRST STEP: In a large mixing bowl, beat the butter and cream cheese on medium speed for 2 minutes, until very smooth.
SECOND STEP: Add the powdered sugar one cup at a time, mixing until incorporated.
THIRD STEP: Add the heavy cream, vanilla extract, and salt, and beat just until light and fluffy.
If the frosting feels too loose, add powdered sugar ¼ cup at a time. If it feels too stiff, add 1 tablespoon heavy cream.
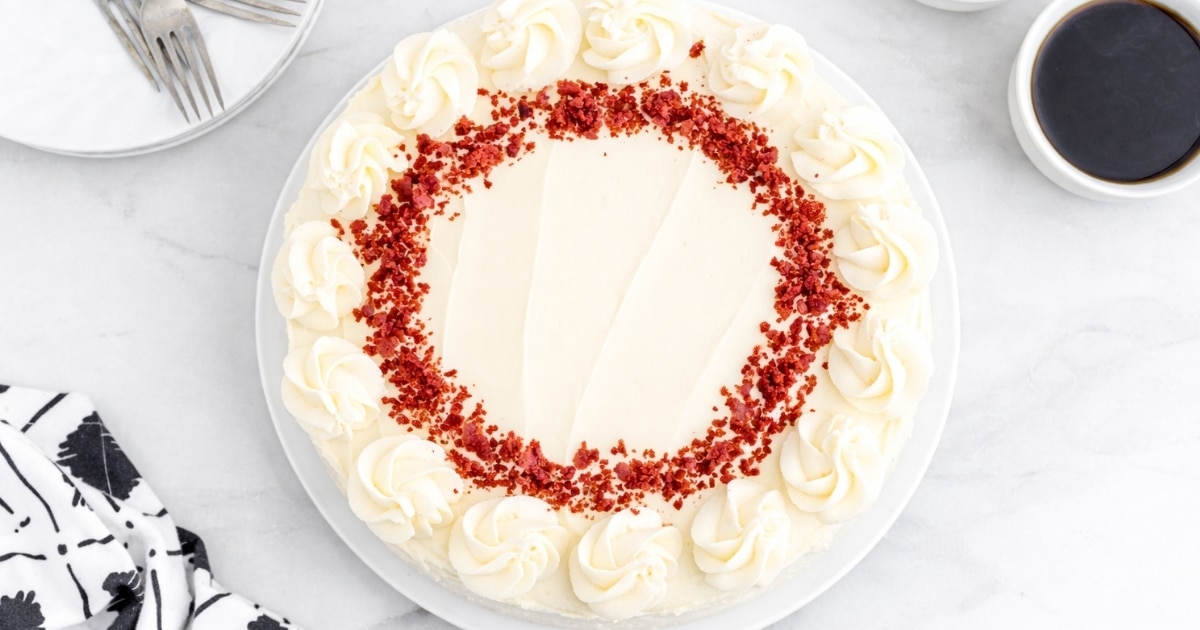
✨ Frost and Decorate
FIRST STEP: Frost the chilled cake with the cream cheese frosting.
SECOND STEP: Transfer about 1 cup of frosting to a piping bag fitted with a star tip and pipe a decorative border on top.
THIRD STEP: Sprinkle the reserved red velvet cake crumbs along the inside border.
Make-Ahead, Storage, and Serving
Because this recipe requires baking multiple cakes and making frosting, plus refrigeration time, it might be easier to bake the cake layers the day before you plan to serve it.
Make Ahead: You can assemble the cake and chill it in the refrigerator up to 24 hours in advance. Once the layers feel firm, frost the cake and keep it covered until you are ready to serve.
Storage: Store the finished cake covered in the refrigerator. It will keep well for 3 to 4 days without drying out.
How To Freeze Leftover Pieces: Wrap individual slices tightly in plastic wrap, then add a layer of foil to prevent freezer burn. Freeze for up to 1 month. Thaw slices overnight in the refrigerator before serving.
How to Serve Red Velvet Cheesecake
This cake works well as a holiday centerpiece and looks especially festive with simple seasonal touches. For Christmas, serve it chilled with a dusting of powdered sugar, extra red velvet crumbs, or a few fresh berries for contrast. For Valentine’s Day, slice it cleanly and add a small garnish of whipped cream or chocolate shavings for a more romantic presentation.
Red velvet cheesecake texture tips: For the best texture, let slices sit at room temperature for about 10 minutes before serving.

More Red Velvet Recipes ⭐ Red Velvet Cookies | Red Velvet Cream Cheese Cookies | Red Velvet Brownies
Red Velvet Cheesecake FAQs
Can I freeze red velvet cheesecake?
Yes. Wrap leftover slices tightly in plastic wrap, then foil, and freeze for up to 1 month. Thaw overnight in the refrigerator before serving.
How do I know when the cheesecake layer is done baking?
The edges should look set, and the center should jiggle slightly when you gently shake the pan. The top should look matte, not wet or glossy.
Why does the cheesecake need to cool in the oven?
Slow cooling helps prevent cracks and keeps the cheesecake from sinking as it finishes setting.
Can I make this cake ahead of time?
Yes. You can assemble and chill the cake up to 24 hours in advance, then frost it once the layers feel firm.
Why is my cheesecake still jiggly after baking?
A gentle jiggle in the center is normal. The cheesecake continues to set as it cools and chills.

Red Velvet Cheesecake
This layered red velvet cheesecake recipe features soft red velvet cake, a smooth baked cheesecake center, and classic cream cheese frosting. It’s a reliable make-ahead dessert that chills well, slices cleanly, and works perfectly for holidays, parties, and special occasions.
Did you try this recipe?Let our readers know how it turned out by Leaving a Review!
Ingredients
Cake
- 1 cup buttermilk
- ½ cup vegetable oil
- 3 large eggs
- 15.25 ounces red velvet cake mix (I used Duncan Hines brand)
Cheesecake
- 16 ounces cream cheese (room temperature)
- 1 cup granulated sugar
- 2 large eggs (room temperature)
- ½ cup sour cream
- 2 tablespoons all-purpose flour
- 1½ teaspoons vanilla extract
Cream Cheese Frosting
- 1 cup unsalted butter (room temperature)
- 8 ounces cream cheese (room temperature)
- 5½ cups powdered sugar (sifted)
- 3 tablespoons heavy cream
- 2 teaspoons vanilla extract
- ¼ teaspoon salt
DIRECTIONS
- Preheat oven to 350°F. Lightly spray 2 (9-inch) cake pans with baker’s spray.
- To make the cake whisk together, in a large mixing bowl, the buttermilk, vegetable oil and eggs until fully combined. Add the dry ingredient packet from the box of red velvet cake mix. Whisk vigorously by hand, or with a handheld mixer on low, for 2 minutes or until no lumps remain.
- Divide the batter evenly between the two prepared cake pans and bake for 25 to 30 minutes. A toothpick inserted into the center of your cake should come out clean. Cool in the pans for 10 minutes before turning them out onto a cooling rack to cool completely.
- While your red velvet cake is baking you can prepare the cheesecake batter.
- Lightly spray a 9-inch springform pan with baker’s spray and line the bottom of the springform pan with a round piece of parchment paper. In an oven-safe 9×13 pan add enough water to fill the pan about 1 to 2 inches. Set both pans aside.
- In a large mixing bowl, with a handheld mixer on low, beat together the cream cheese and granulated sugar for 1 minute. Make sure that your cream cheese is smooth and without lumps.
- Add the eggs and beat for another 30 seconds, on low, to completely incorporate the eggs. Add the sour cream, all-purpose flour, and vanilla extract and beat just until combined. Do not overmix the cheesecake mixture. You do not want to incorporate a lot of air into your batter.
- Pour the cheesecake batter into the prepared springform pan. Add the springform pan to the middle rack in the oven and place the water filled pan on the bottom rack in the oven. This will create a moist environment for the cheesecake to cook evenly. Bake for 45 minutes or until the center is just barely jiggly.
- Turn off the oven and crack the oven door open about 1 inch. Leave the cheesecake in the oven for an additional 1 hour. This allows the cheesecake to continue to cook and set as it cools. After one hour, remove the cheesecake from the oven and allow it to cool for an additional 1 hour on the counter. Don’t forget to remove the water-filled dish as well.
- Once your cheesecake has cooled on the counter for 1 hour you can assemble your cake.
- Place your first layer of red velvet cake onto a serving platter. Gently place the cheesecake layer, upside down, onto the bottom red velvet cake layer. Peel the parchment paper off the bottom of the cheesecake before placing the second red velvet cake layer on top of the cheesecake.
- Using a bread knife, gently level off the domed part of the top red velvet cake layer. Save those scraps of red velvet cake because you can crumble them and use them as a garnish on the top of your red velvet cheesecake.
- Lightly cover the cake with plastic wrap and chill in the refrigerator for 8 hours up to overnight.
- Once your red velvet cheesecake has chilled, remove the plastic wrap and frost your cake with the cream cheese frosting.
- To make the cream cheese frosting, you will place the unsalted butter and cream cheese into a large mixing bowl. Using a handheld mixer, on medium speed, beat the butter and cream cheese for 2 minutes or until very smooth.
- Slowly add the powdered sugar, one cup at a time, until all the powdered sugar is incorporated. Add the heavy cream, vanilla extract and salt and continue to beat just until the frosting is light and fluffy. It should be stiff enough to hold its shape when frosting the cake. If the frosting is too loose, then you can add additional powdered sugar, ¼ cup at a time, to thicken it up. If it is too stiff you can add an additional 1 tablespoon heavy cream.
- Reserve about a cup of the frosting and place into a small piping bag, fitted with a star tip, to add a decorative border on the top of your cake once you have frosted it. You can also add the little red velvet crumbles (from leveling off the cake layers) on the inside border of the top of your cake.
- This recipe needs plenty of cooking and cooling time before assembling and frosting it. It is best to start this recipe early in the day so that you can assemble your layers before wrapping the cake in plastic wrap and refrigerating it to allow the cheesecake layer to set up completely before you frost the cake and serve it. Alternatively, you can make the cheesecake layer the day before, and refrigerate it overnight, then bake the red velvet layers the next day.
- I substituted the 1 cup water, in the instructions of the red velvet box mix, for the buttermilk. I think it makes the cake more tender, however, you can make the cake according to the box directions (with the water) and your cake will still be delicious.
- The water is a key step to ensuring that the outside of the cheesecake doesn’t cook faster than the inside.
- Save those scraps of red velvet cake because you can crumble them and use them as a garnish on the top of your red velvet cheesecake.
Notes
- This recipe needs plenty of cooking and cooling time before assembling and frosting it. It is best to start this recipe early in the day so that you can assemble your layers before wrapping the cake in plastic wrap and refrigerating it to allow the cheesecake layer to set up completely before you frost the cake and serve it. Alternatively, you can make the cheesecake layer the day before, and refrigerate it overnight, then bake the red velvet layers the next day.
- We substituted the 1 cup of water in the instructions of the red velvet box mix for buttermilk. It will make the cake more tender; however, you can make the cake according to the box directions (with water), and your cake will still be delicious.
- The water bath is a key step to ensuring that the outside of the cheesecake doesn’t cook faster than the inside.
- Save the scraps of red velvet cake because you can crumble them and use them as a garnish on the top of your red velvet cheesecake.
Nutrition
Calories: 913kcal | Carbohydrates: 105g | Protein: 9g | Fat: 53g | Saturated Fat: 26g | Polyunsaturated Fat: 9g | Monounsaturated Fat: 15g | Trans Fat: 1g | Cholesterol: 173mg | Sodium: 589mg | Potassium: 271mg | Fiber: 1g | Sugar: 88g | Vitamin A: 1447IU | Vitamin C: 0.02mg | Calcium: 162mg | Iron: 2mg
HAVE YOU TRIED THIS RECIPE?Follow me on Pinterest @bestblogrecipes

Leave a Comment