
Published on
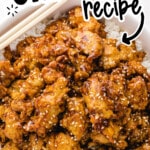
Easy Sesame Chicken Recipe

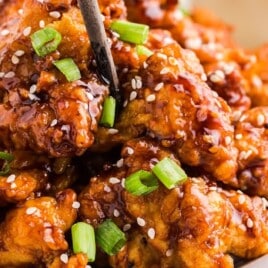
A crispy, sticky homemade sesame chicken made with a buttermilk double-dredge coating and a sweet, savory sesame glaze. Better than takeout and on the table in under an hour.
Jump to RecipeTable of Contents

Sesame chicken has a way of disappearing fast. Crispy, golden chicken in a sticky, sweet-savory sauce with just enough heat to keep things interesting. This homemade version delivers everything you love about restaurant sesame chicken, made with simple pantry ingredients you likely already have on hand.

Why This Sesame Chicken Recipe Is the Best
I think this recipe for homemade sesame chicken is even better than takeout. For real.
The chicken gets a buttermilk bath before it hits the flour, which gives it a thicker, crunchier coating than you'll find in most homemade recipes.
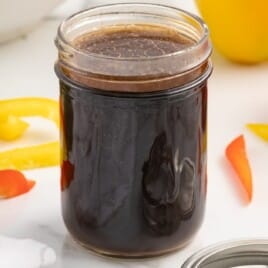
The sauce comes together in one saucepan using pantry staples: sesame oil, soy sauce, rice vinegar, brown sugar, garlic, and ginger. It thickens into a glossy, syrup-style glaze that clings to every piece. Toss it all together, serve it over white rice, and dinner is done.
If your family orders takeout sesame chicken on rotation, this is the recipe that replaces it, comes together even faster than delivery, and gets requested again and again.
What Is Sesame Chicken?
Sesame chicken is a Chinese-American takeout dish made with bite-sized pieces of chicken coated in seasoned flour and buttermilk, fried until golden, and tossed in a sweet, savory, and slightly tangy sesame sauce.
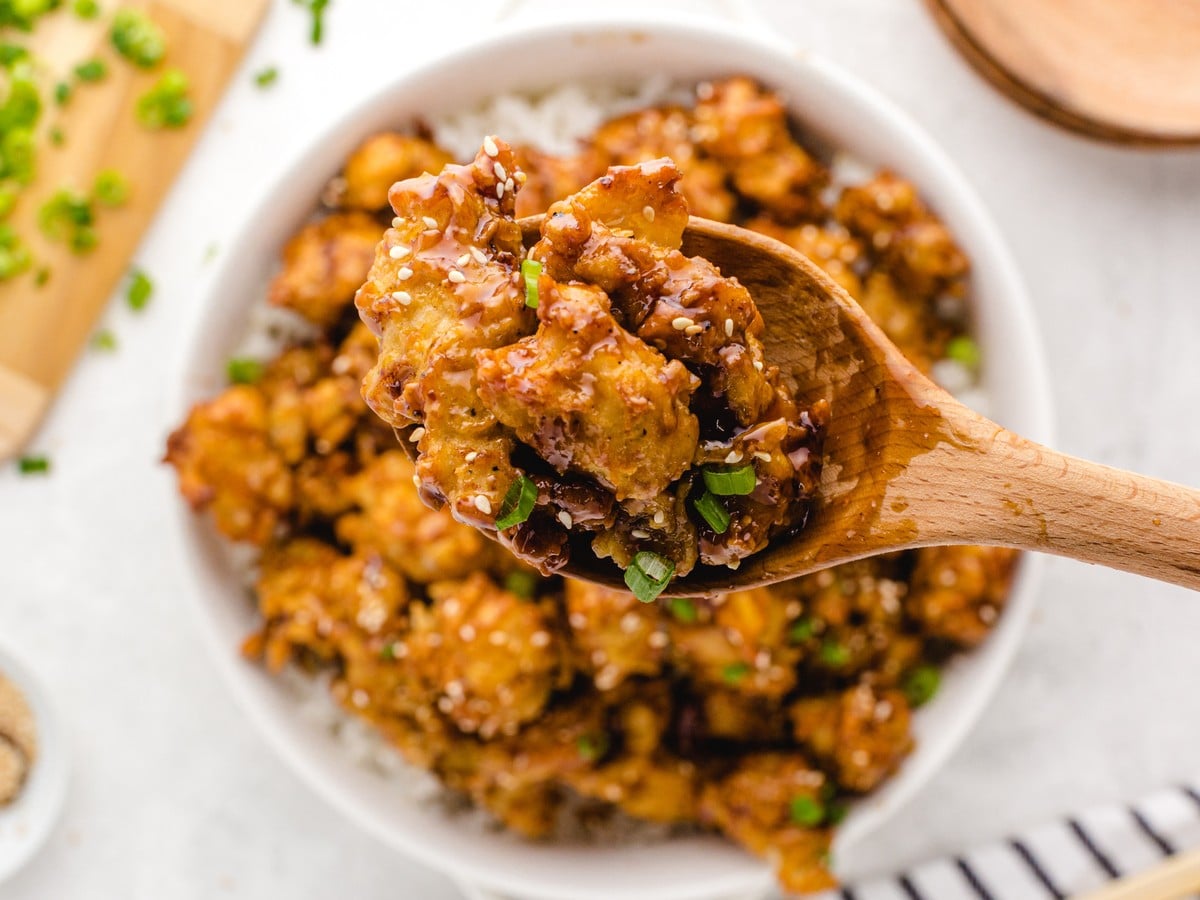
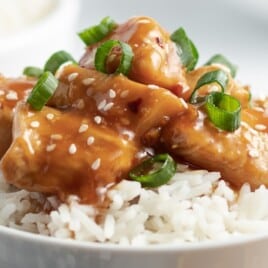
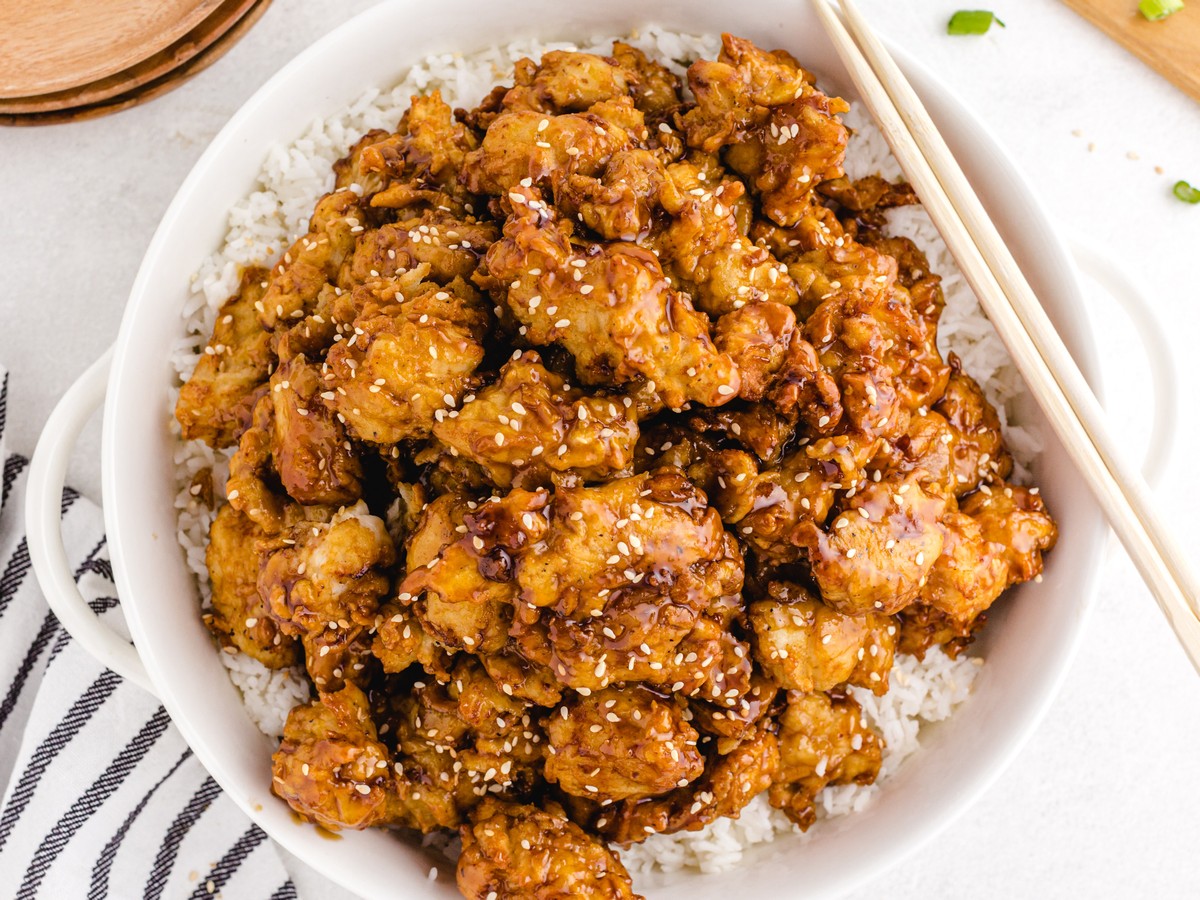
I like to serve mine the way my neighborhood Chinese take-out place serves it: garnished with toasted sesame seeds and sliced green onions, and served over steamed white rice. Yummy, simple, and completely kid-friendly.
Unlike authentic Chinese sesame dishes, this is a restaurant-style Chinese-American recipe. It's milder, sweeter, and built around that glossy, clingy sauce that makes it so satisfying.
If you've ever compared it to General Tso's chicken, the main difference is the spice level. General Tso's tends to be spicier and sharper. Sesame chicken is sweet and mellow, which is a big part of why it's such a hit, especially with kids.
Ingredients
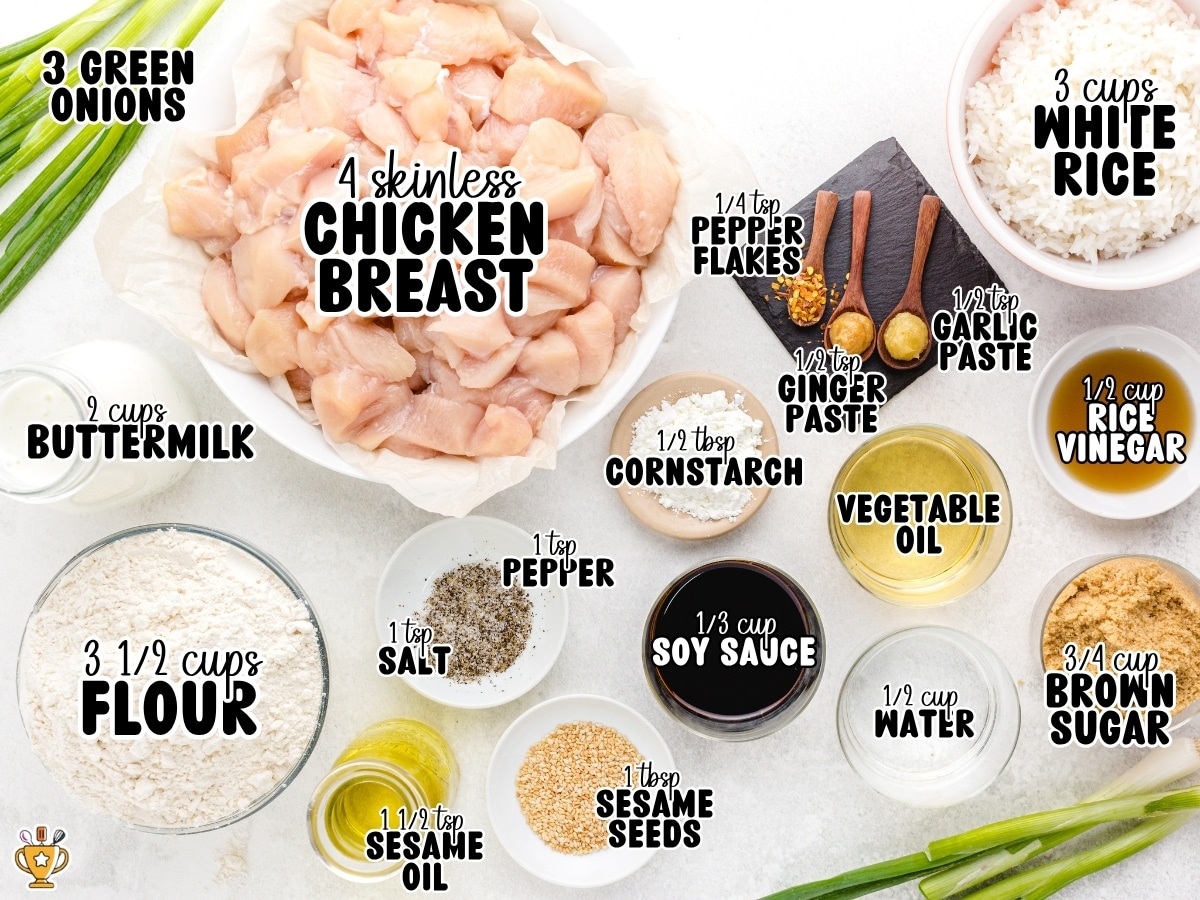
For the Chicken
- Boneless, skinless chicken breasts, diced into 1-inch cubes
- All-purpose flour, salt, and black pepper (for the coating)
- Buttermilk (the double-dredge method gives the crust its thickness)
- Vegetable or peanut oil for frying (peanut oil handles high heat well)
For the Sesame Sauce
- Sesame oil
- Garlic paste
- Ginger paste
- Lite soy sauce
- Rice vinegar
- Light brown sugar
- Cornstarch and water
- Red pepper flakes
Garnish
- Toasted sesame seeds
- Green onions, finely sliced
- Cooked white rice for serving
How To Make Sesame Chicken
Make the Sauce
I always start by making the sauce so it's ready when the chicken comes out of the oil.
Heat the sesame oil in a small saucepan over medium heat, then add the garlic paste and ginger paste. Sauté for one to two minutes until fragrant.
Stir the cornstarch into the water separately to make a slurry.
While whisking rapidly, add the slurry to the pan, then incorporate the soy sauce, rice vinegar, brown sugar, and red pepper flakes.
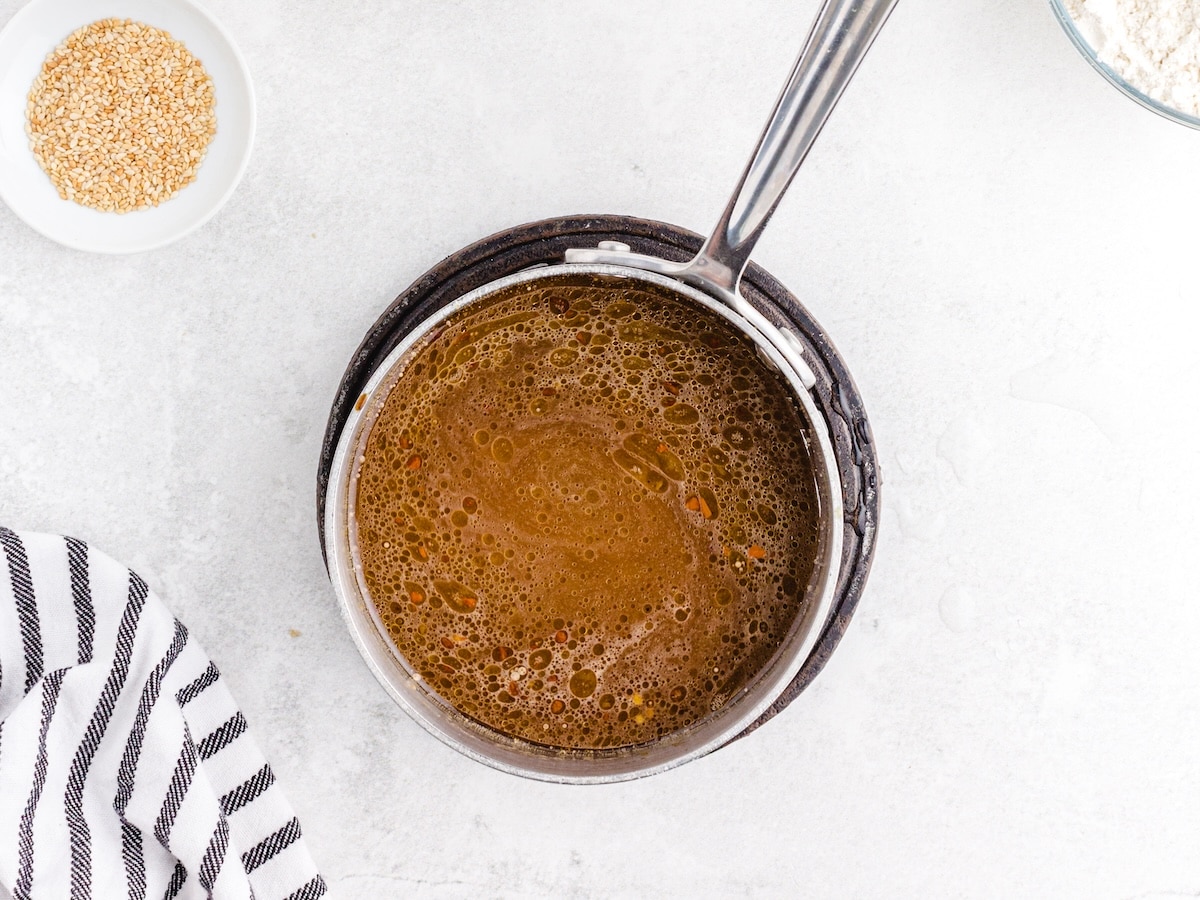
Continue to allow the sauce to cook. Whisk occasionally and let the sauce simmer for about 10 minutes, until it thickens to a syrup-like consistency.
Remove it from the heat and set it aside. It will continue to get thicker and become that desired sticky sweet sauce you're looking for.
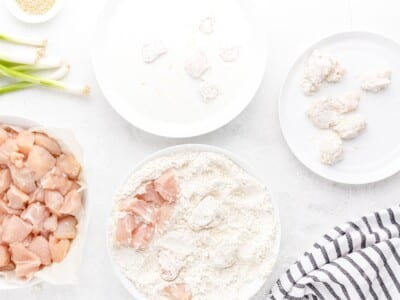
Coat the Chicken
While the oil heats, set up your dredging station.
Whisk the flour, salt, and pepper together in one bowl and pour the buttermilk into a second.
Work a few pieces at a time, and follow this order:
- Dip each chicken cube into the flour mixture first
- Dip the floured chicken into the buttermilk
- Dip them back into the flour
- Set them on a plate to rest
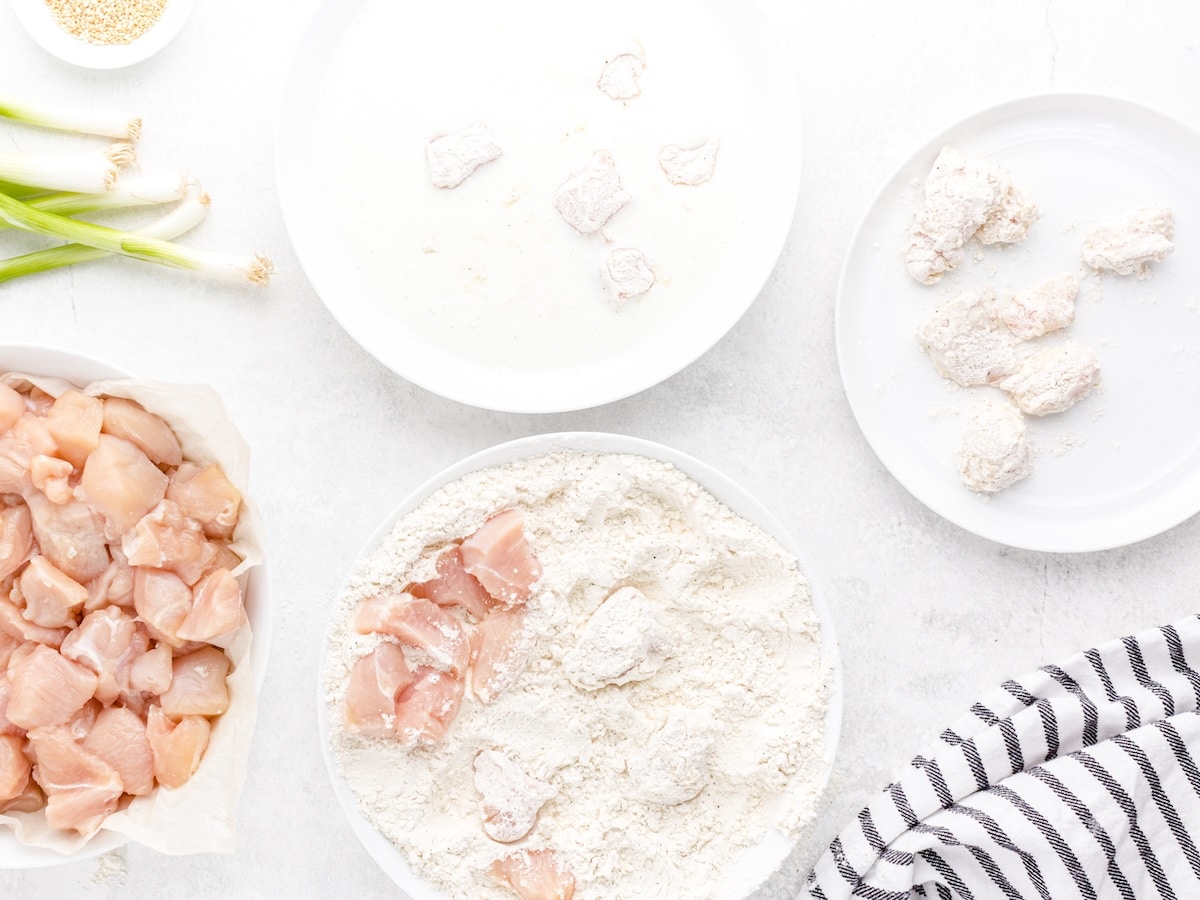
This creates the thick crust that holds up once the sauce goes on.
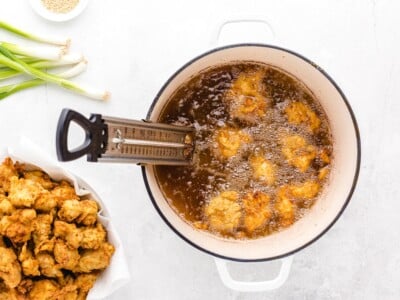
Fry the Chicken
Fill a deep pot or Dutch oven with two to three inches of oil and heat it to 350°F. A thermometer clipped to the side of the pot takes the guesswork out of this.
Once the oil is up to temperature, add five to eight pieces of chicken at a time. Fry for two minutes, flip, and fry for another two minutes until the pieces are uniformly golden brown.

Transfer to a paper towel-lined plate to drain. Keep checking the oil temperature between batches. If the temperature drops too low, the coating absorbs oil instead of crisping up, so give it time to rise again before you add more chicken.
Toss and Serve
When all the chicken is fried, transfer it to a large bowl. Reheat the sauce on the stovetop if it has cooled too much, then pour it over the chicken and toss to coat evenly.
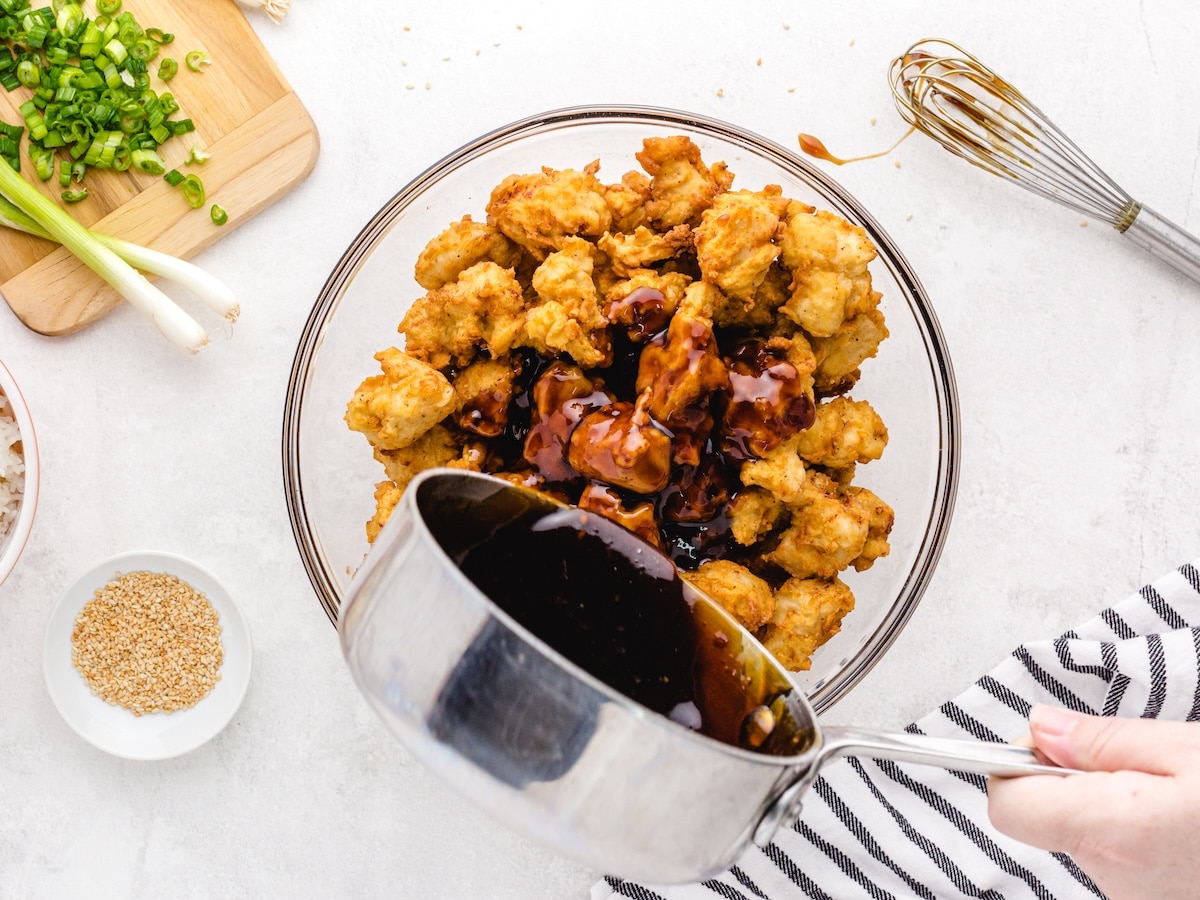
Serve immediately over white rice and garnish with toasted sesame seeds and sliced green onions.
Tips For Crispy Sesame Chicken
I created this recipe to make restaurant-style sesame chicken at home. But you'll only get that crispy, take-out texture if you follow a few simple, but specific, tips.
- Use a thermometer. Oil temperature is the single biggest factor in whether the coating crisps or turns greasy. Aim for 350°F before you begin, and try to keep the temperature consistent. Be sure the temp comes back up to 350° between batches. I use a clip-on thermometer to make it easy to monitor.
- Fry in small batches. Adding too much chicken all at once drops the oil temperature fast. Five to eight pieces at a time is the right range for this recipe. It feels slower, but it's what keeps the crust light and crispy instead of heavy and oily. It will also give you that golden brown color.
- Don't skip the double-dredge. The buttermilk step between the two flour coats is what gives this a thicker crust than other techniques. It's one extra step, but it makes a real difference in the finished texture, especially once the sauce goes on.
- Sauce the chicken right before serving. The coating starts to soften the moment it meets the sauce. Toss everything together just before serving. If you're feeding a crowd and need to work in stages, sauce each batch just before it hits the plate.
Crispy vs. Easy: Choosing Your Cooking Method
Not everyone has the energy to deep fry a weeknight dinner, so if you've wondered if you can cook this in a shallow frying pan or skillet, yes, you can.
Different cooking methods will yield different results. Here's what you can expect:
Deep frying (this recipe as written)
Crispiness - high, your chicken will be very crispy
Effort - medium, a few extra steps, but not overly difficult to do
Best for - feeding a crowd, getting the best possible texture
Shallow frying (in a medium frying pan with a smaller amount of oil)
Crispiness - good, your chicken will be slightly crispy
Effort - low, less clean up, no thermometer needed
Best for - weeknights
Saute (minimal oil, shallow frying pan)
Crispiness - low, your chicken will have a light crust
Effort - low, minimal clean up
Best for - when you need a quick option
What To Serve With Sesame Chicken
Sesame chicken is most commonly served over white rice, and that's how I like it, too. The rice soaks up the extra sweet-savory sauce and gives it so much flavor. Rice is simple to make and can bubble away on the stovetop while I make the chicken.
Steamed jasmine or long-grain white rice are both good options, especially for an easy weeknight dinner
If you want to mix it up, here are a few sides that work well with this recipe:
- Fried rice - adds flavor and makes the meal feel more like a full takeout spread
- Noodles - lo mein or plain steamed noodles both work
- Veggies - steamed or air-fried broccoli, cauliflower, or green beans are a nice addition
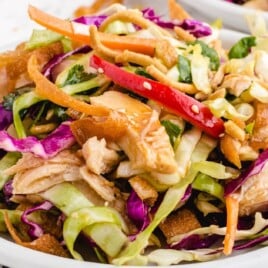
- Asian cucumber salad — a cool, tangy contrast to the sweetness of the chicken
More Asian-Inspired Recipes
Storage and Reheating
Refrigerator: Store leftover chicken in an airtight container for up to four days. Keep the rice in a separate container so it doesn't absorb the sauce and turn mushy.
Freezer: The cooked chicken freezes well for up to three months. The sauce can be frozen separately. Thaw both overnight in the refrigerator before reheating.
Reheating: A skillet over medium heat is the best option for bringing back some crispiness. An air fryer works well, too. A few minutes at 375°F does the job. Avoid the microwave if you can; it reheats the chicken quickly, but the coating turns soft. If the chicken seems dry, add a small splash of water or extra sauce to the pan while reheating.
What to expect: The coating will soften in the fridge overnight. It won't be as crispy as it was when it was fresh, but the flavor holds up well. If texture matters, cook the chicken fresh and only make the sauce ahead.
FAQ
Can sesame chicken be made ahead?
Yes, with some planning. The sauce can be made up to three days ahead and stored in an airtight container in the refrigerator. When you're ready to serve, reheat it on the stovetop before tossing it with the chicken. For the best texture, cook the chicken fresh and toss it with the sauce just before serving. The coating starts to soften once it meets the sauce, so making everything ahead isn't ideal if crispiness matters to your family
How long does sesame chicken last in the fridge?
Leftover sesame chicken keeps well in an airtight container for up to four days. Keep in mind that the coating will soften overnight in the fridge. It won't be as crispy as it was fresh, but the flavor holds up well. Store the rice separately so it doesn't absorb the sauce and turn mushy.
What is sesame chicken made of?
Sesame chicken is made with bite-sized pieces of chicken breast coated in seasoned flour and buttermilk, fried until golden, and tossed in a homemade sesame sauce. The sauce is made from sesame oil, garlic, ginger, light soy sauce, rice vinegar, light brown sugar, and a cornstarch slurry that thickens it into a glaze. It's finished with toasted sesame seeds and sliced green onions.
How do you make sesame chicken crispy?
The key to crispy homemade sesame chicken is cornstarch or flour in the coating, keep the oil at a steady 350°F, and frying in small batches. This recipe uses a buttermilk double-dredge, which builds a thicker crust than a single flour coat. Toss the chicken with the sauce right before serving so the coating stays crispy as long as possible.
What is the safe internal temperature for chicken?
Chicken is safe to eat when it reaches an internal temperature of 165°F. A meat thermometer is the most reliable way to check doneness. In this recipe, the batch frying method and small piece size mean the chicken typically reaches that temperature within the two minutes per side cook time, but it's always worth checking with a thermometer if you're unsure.
Can I make this recipe gluten-free?
Swap the all-purpose flour for a gluten-free, all-purpose flour blend in the coating, and replace the soy sauce with tamari. Tamari is a naturally gluten-free alternative with a similar depth of flavor. Check your tamari label to confirm it's certified gluten-free if you're cooking for someone with celiac disease.
Is sesame chicken kid-friendly?
Sesame chicken is one of the most reliably kid-friendly takeout-style recipes you can make at home. The sauce is sweet and savory without being spicy. If you're cooking for picky eaters or young kids, simply leave out the red pepper flakes entirely or reduce them to a pinch. You can also serve the sauce on the side so kids can control how much goes on their chicken.
Is this recipe suitable for sesame or soy allergies?
This recipe contains both sesame and soy, so it's not suitable as written for anyone with either allergy. Sesame oil and sesame seeds are core to the dish and can't be substituted without significantly changing the flavor. The soy sauce can be replaced with coconut aminos for a soy-free version, though the flavor will be slightly sweeter and milder.
More Recipes ⭐ Asian Turkey Meatballs | CrockPot Pepper Steak Recipe | Honey Walnut Shrimp


Sesame Chicken Recipe
A crispy, sticky homemade sesame chicken made with a buttermilk double-dredge coating and a sweet, savory sesame glaze. Better than takeout and on the table in under an hour.
Did you try this recipe?Let our readers know how it turned out by Leaving a Review!
Ingredients
Sauce
- 1½ tbsp sesame oil
- ½ tsp garlic paste
- ½ tsp ginger paste
- ⅓ cup light soy sauce
- ½ cup rice vinegar
- ¾ cup light brown sugar
- ¼ tsp crushed red pepper flakes
- 1½ tbsp cornstarch
- ½ cup water
Chicken
- 4 boneless (skinless chicken breasts, cut into 1-inch pieces)
- 3½ cups all-purpose flour
- 1 tsp salt
- 1 tsp black pepper
- 2 cups buttermilk
- Vegetable or peanut oil (for frying)
To Serve
- 3 cups cooked white rice
- 1 tsp toasted sesame seeds
- 3 green onions (thinly sliced)
DIRECTIONS
- Heat the sesame oil in a small saucepan over medium heat. Add the garlic paste and ginger paste and sauté for 1 to 2 minutes until fragrant.
- In a small bowl, whisk the cornstarch into the water until smooth. Add the cornstarch mixture, soy sauce, rice vinegar, brown sugar, and red pepper flakes to the saucepan. Whisk to combine.

- Simmer over medium heat, whisking occasionally, until the sauce thickens to a syrup-like consistency, about 10 minutes. Remove from heat and set aside.

- Fill a deep pot or Dutch oven with 2 to 3 inches of oil and clip a thermometer to the side. Heat the oil to 350°F, about 10 minutes.
- While the oil heats, set up your dredging station. Whisk the flour, salt, and pepper together in one bowl. Pour the buttermilk into a second bowl.
- Working a few pieces at a time, dip each piece of chicken into the flour, then the buttermilk, then back into the flour. Set aside on a plate.
- Once the oil reaches 350°F, add 5 to 8 pieces of chicken at a time. Fry for 2 minutes, flip, and fry for another 2 minutes until golden brown and cooked through to 165°F internal temperature. Transfer to a paper towel-lined plate to drain.
- Repeat with the remaining chicken, allowing the oil to return to 350°F between batches.
- Transfer all the fried chicken to a large bowl. Reheat the sauce if needed, then pour it over the chicken and toss to coat evenly.

- Serve immediately over white rice and garnish with toasted sesame seeds and sliced green onions.

Notes
- Oil temperature matters more than timing. Keep the oil at a steady 350°F and let it return to temperature between batches. If it drops too low, the coating absorbs oil instead of crisping up.
- Fry in small batches. Five to eight pieces at a time is the right amount for this recipe. Overcrowding the pot drops the oil temperature fast.
- Check the sauce before tossing. If it has cooled and thickened too much while the chicken was frying, reheat it briefly on the stovetop. Cold sauce won't coat as evenly.
- Toasted sesame seeds and green onions are optional but recommended. They add visual contrast and a little texture to the finished dish.
- To make this recipe gluten-free, substitute the all-purpose flour with a gluten-free flour blend and replace the soy sauce with certified gluten-free tamari.
- To make this recipe soy-free, replace the soy sauce with coconut aminos. The sauce will be slightly sweeter and milder but still delicious.
- To reduce the heat for kids, leave out the red pepper flakes entirely or serve the sauce on the side. Leftovers keep in an airtight container in the fridge for up to four days. Store rice separately. Reheat chicken in a skillet or air fryer at 375°F for best results.
Nutrition
Calories: 2510kcal | Carbohydrates: 112g | Protein: 342g | Fat: 67g | Saturated Fat: 20g | Polyunsaturated Fat: 8g | Monounsaturated Fat: 26g | Cholesterol: 931mg | Sodium: 1923mg | Potassium: 5777mg | Fiber: 3g | Sugar: 31g | Vitamin A: 218IU | Vitamin C: 1mg | Calcium: 222mg | Iron: 12mg
HAVE YOU TRIED THIS RECIPE?Follow me on Pinterest @bestblogrecipes

Leave a Comment