
Last updated on
Valentine Sugar Cookies

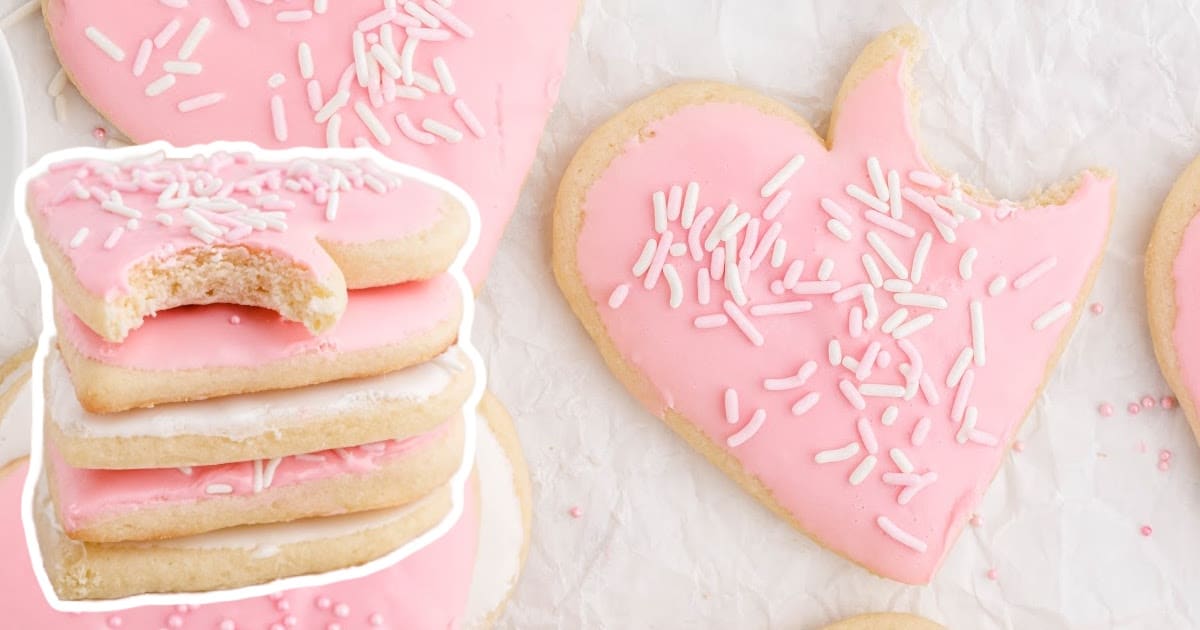
Valentine sugar cookies are a fun and festive treat, perfect for decorating and sharing with loved ones. These buttery cookies bake beautifully and hold their shape, making them ideal for any special occasion!
Jump to RecipeTable of Contents


Valentine sugar cookies are the perfect treat to make your celebrations extra sweet. These buttery cookies bake to golden perfection and hold their shape beautifully for decorating. Add colorful icing and sprinkles to create edible masterpieces that everyone will adore. This fun and easy recipe is great for kids and adults to enjoy together.
Making these valentine cookies is simple with the guide below! Follow the step-by-step photos and directions for flawless results every time. Don’t miss the pro tips and tricks to ensure your cookies turn out perfectly. We’ve also answered the most frequently asked questions to help you master this recipe effortlessly.

More Recipes ⭐ MORE RECIPES: Shortbread Cookies | Chocolate Covered Peanut Butter Hearts | Oatmeal Chocolate Chip Cookies
Decorated with sweet Valentine’s Day designs, these heart sugar cookies are a festive treat for friends and family. They are easy to make, decorate, and enjoy, with a light, airy texture that melts in your mouth. Heart-shaped and topped with frosting and sprinkles, they add the perfect touch of fun to your holiday. These homemade cookies can be customized however you like, making them an irresistible Valentine’s Day activity for everyone!
Ingredients for Valentine Sugar Cookies
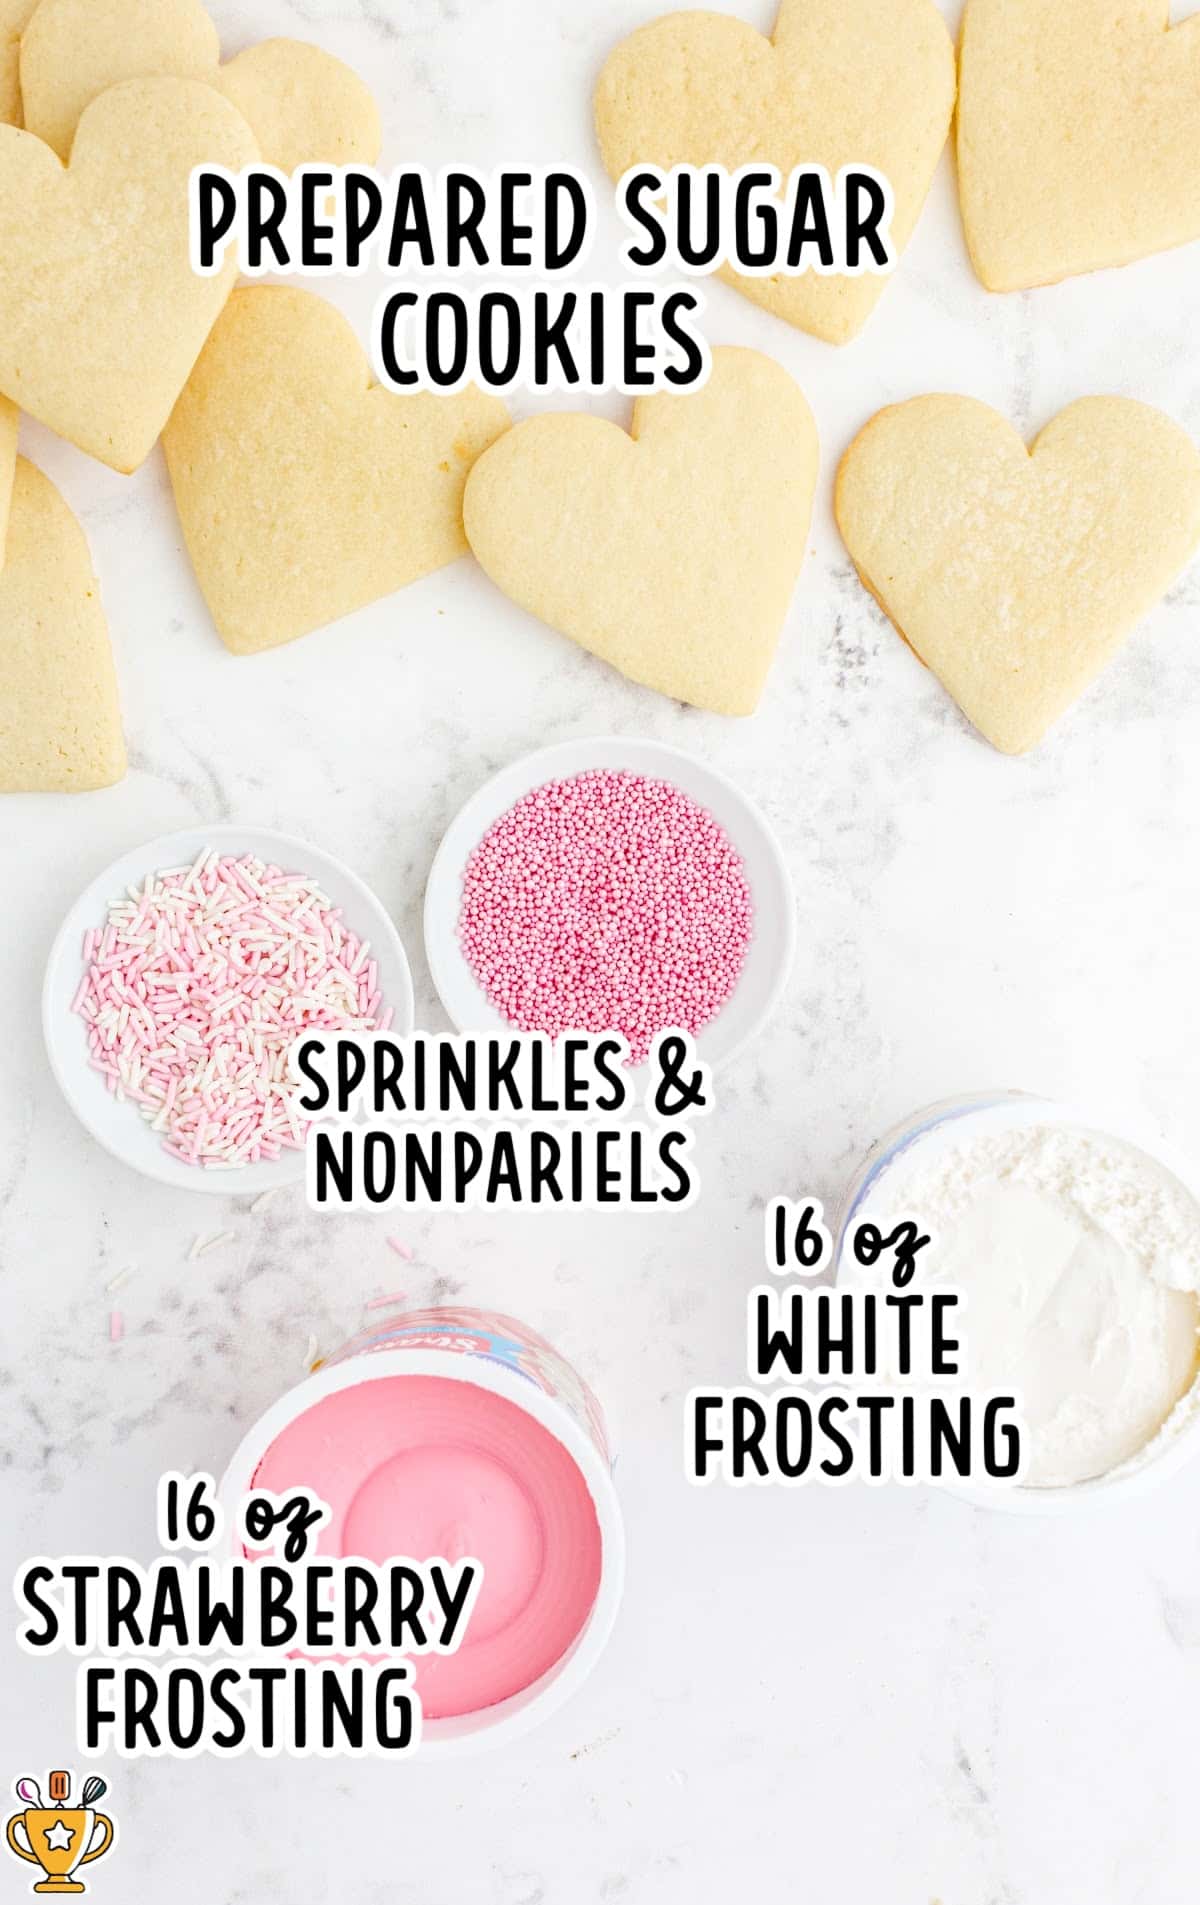
What you'll need to make this Valentine Cookies recipe:
For The Cookies
- 2 cups cake flour
- ½ cup all-purpose flour
- 1½ teaspoons baking powder
- ¼ teaspoon cream of tartar
- 1 cup of sugar
- ½ cup salted butter, softened
- ¼ cup butter flavored shortening, softened
- 3 teaspoons vanilla extract
- 1 whole egg + 1 egg white
- ⅓ cup sugar, for dusting the top of the cookies after they bake
For The Frosting
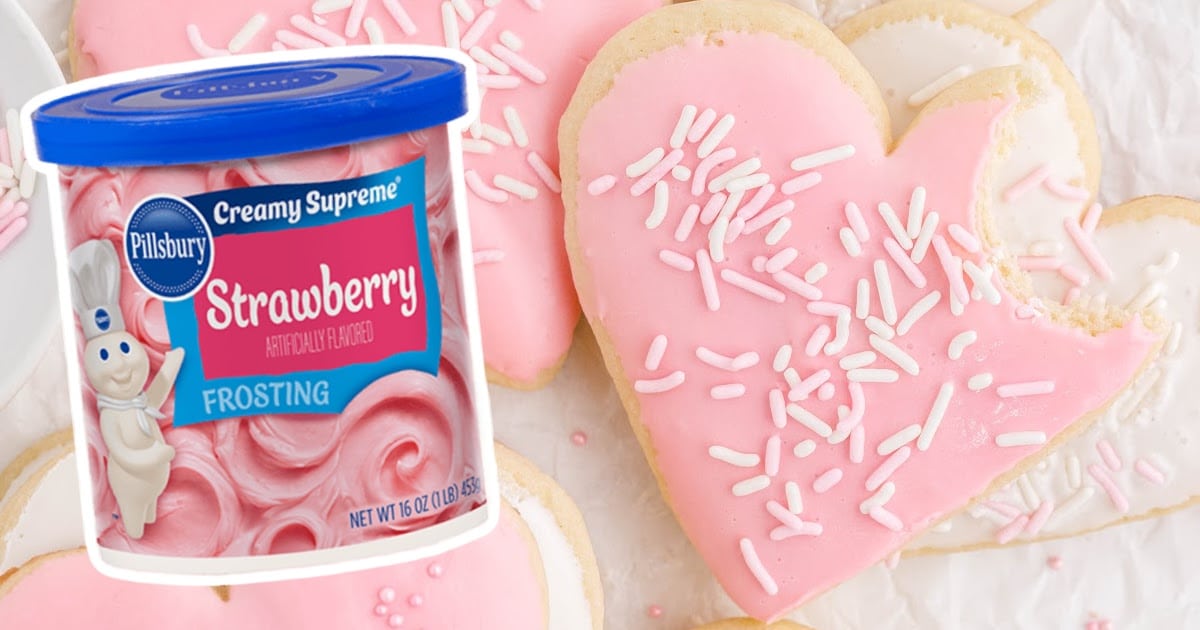
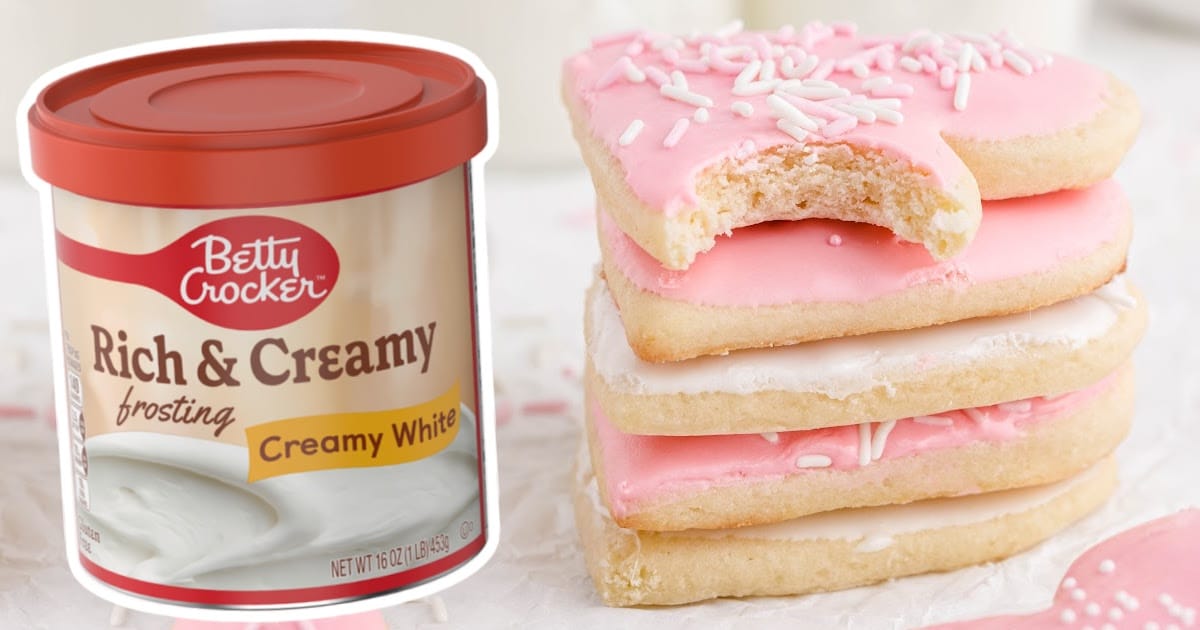
- 16-ounce tub white frosting, vanilla will be a creamy color, so be sure to use white if you want a pure white frosting
- 16-ounce tub pink frosting, strawberry
- Sprinkles and nonpareils
Substitutions and Additions
- Shortening: You can substitute butter or margarine. Increase the butter or margarine just a little bit to compensate for the shortening’s extra fat content. So, for ¼ cup of shortening substitute about ¼ cup of margarine or butter plus 1½ teaspoons.
- Swap Vanilla Extract: Try almond or lemon extract to give your cookies a fresh, unique twist.
- Add Cocoa Powder: Mix in a tablespoon of cocoa powder to create chocolate valentine sugar cookies.
- Cream of tartar: You can replace the cream of tartar with lemon juice. Lemon juice has the same acidity as the cream of tartar – use an equal amount of lemon juice for the best results.
These easy swaps and additions let you create valentine cookies that suit your taste perfectly!
How to Make Valentine Sugar Cookies
Follow our step-by-step instructions, complete with helpful pictures, to create the perfect valentines day cookies. Check out the tips and tricks below to ensure your cookies turn out amazing every time. Let’s get started and make something sweet!
For The Cookies
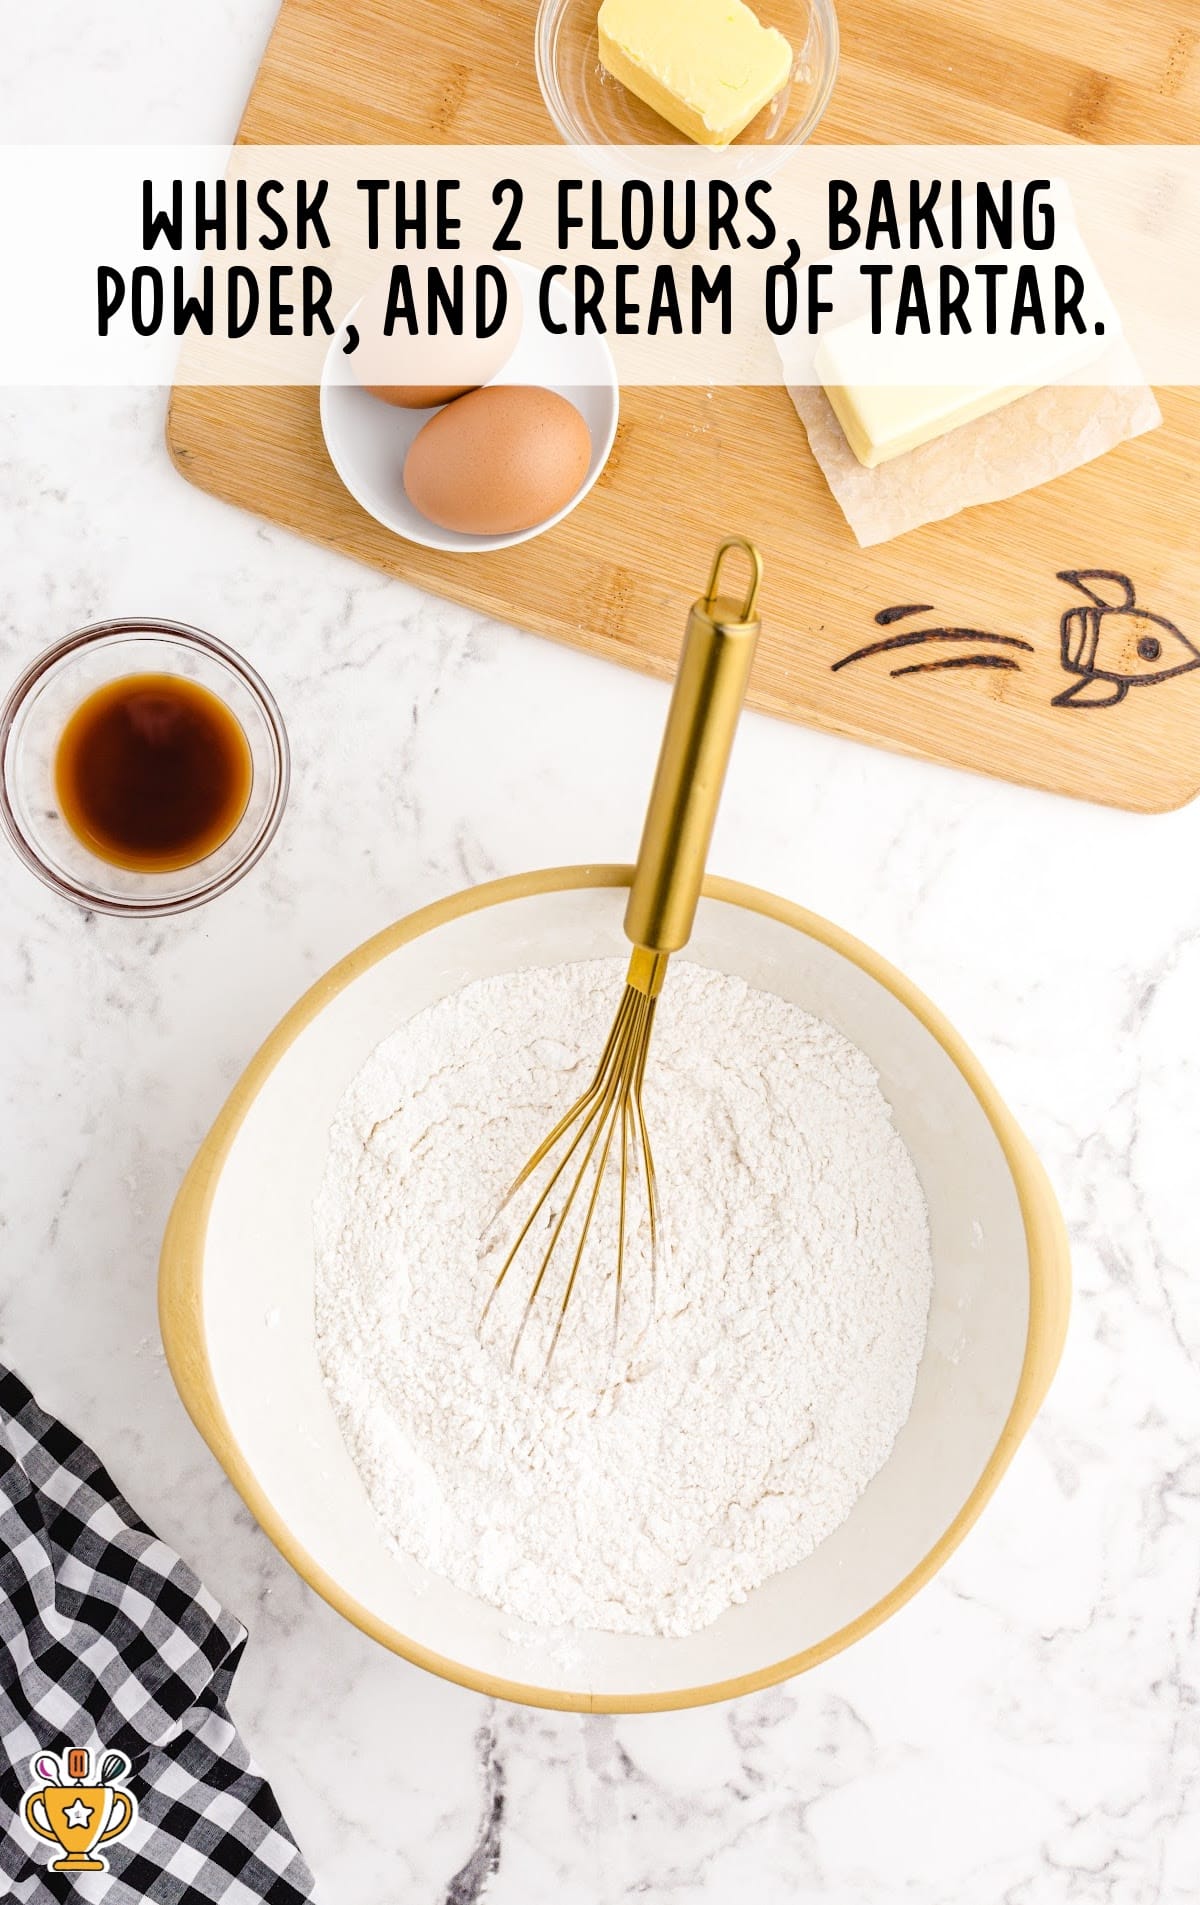
FIRST STEP: In a large bowl, add the cake flour, all-purpose flour, baking powder, and cream of tartar. Then, whisk the flour mixture together and set it aside.
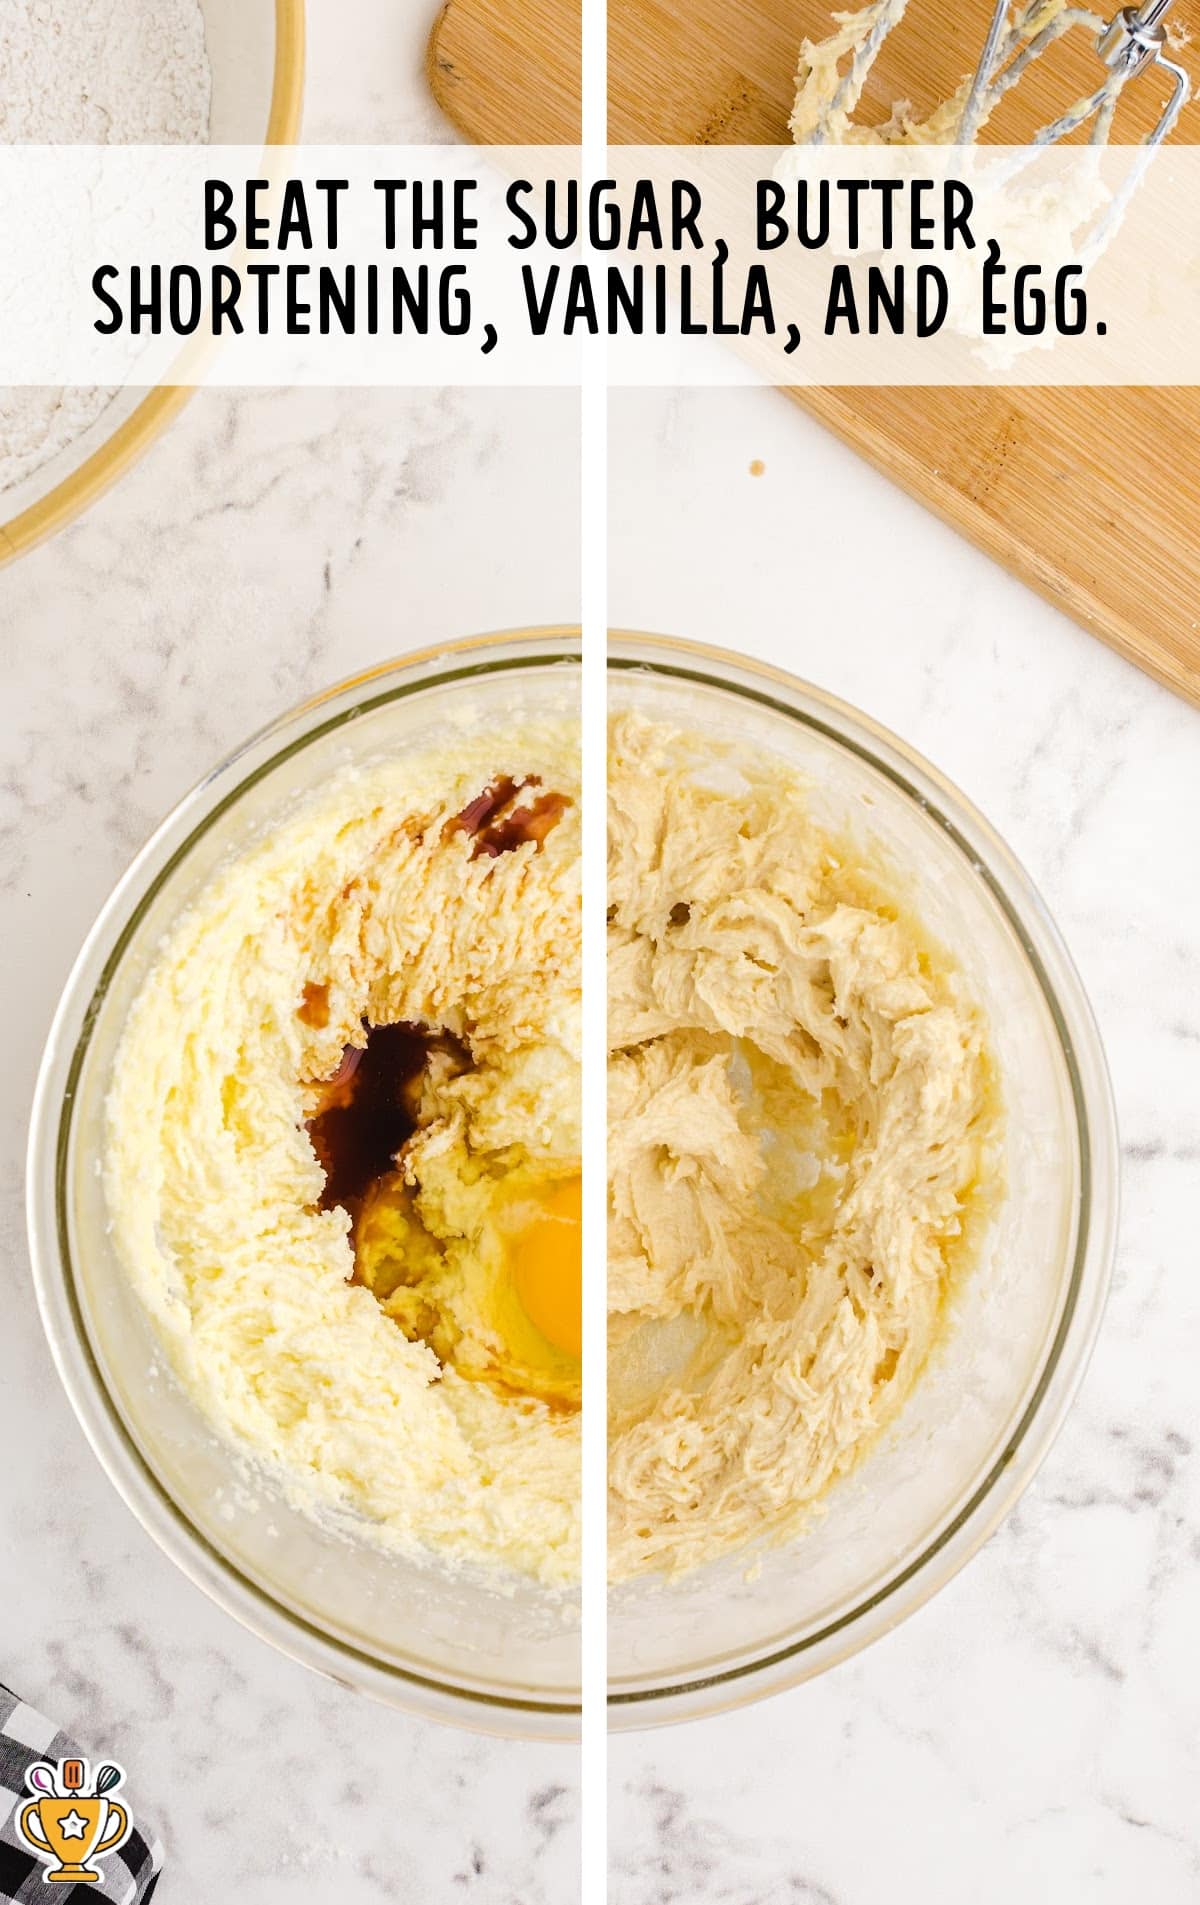
SECOND STEP: Beat together at medium speed the sugar, butter, and shortening until it’s light and fluffy. Add in vanilla extract and the whole egg. Beat them together until they are fully combined. Add in an egg white and continue to beat until it’s well mixed. Turn off the electric mixer and use a rubber spatula to scrape the sides of the bowl.
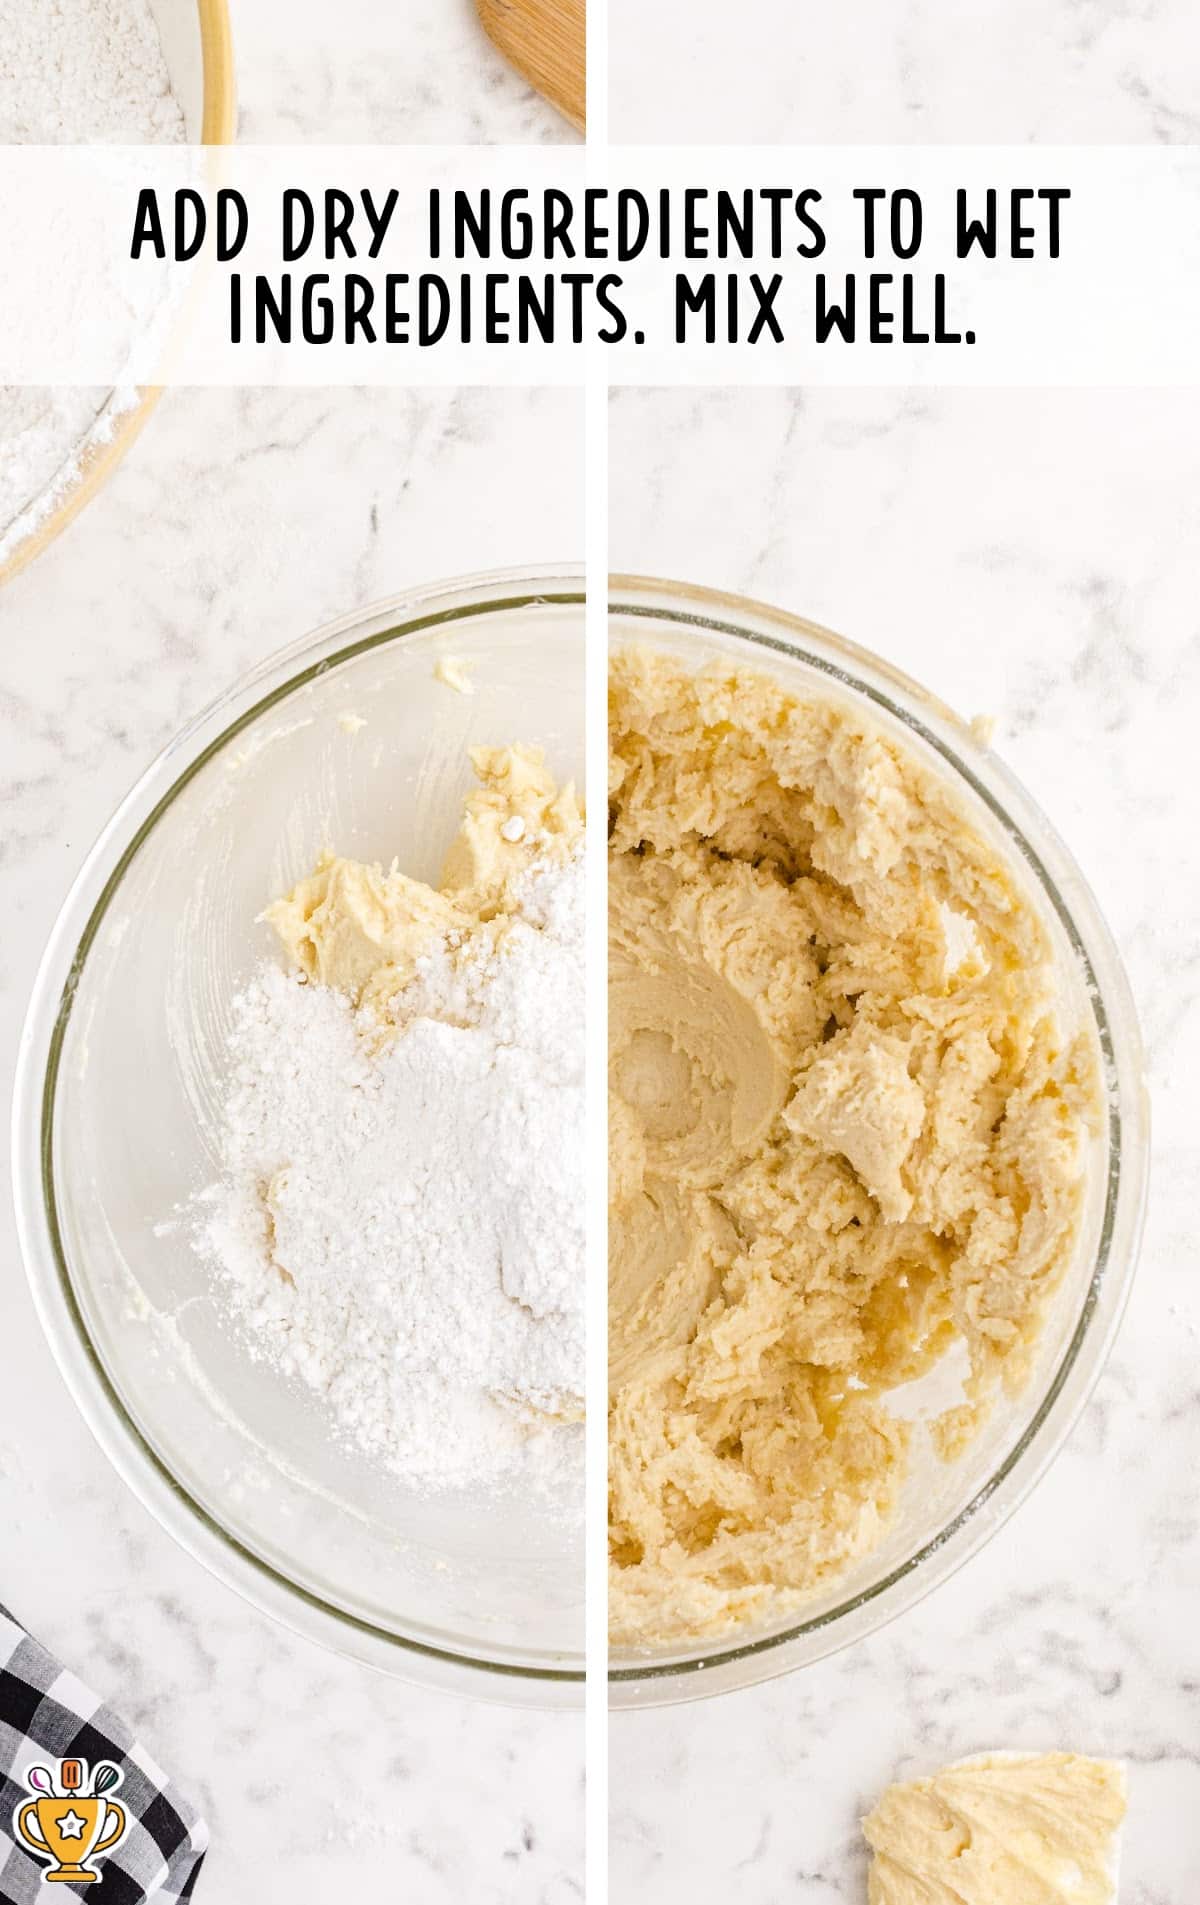
THIRD STEP: Turn the hand mixer down to low speed and gradually add the dry ingredients to the wet ingredients. Mix until no flour pockets remain.
FOURTH STEP: Cover the mixing bowl with plastic wrap and place the sugar cookie dough in the refrigerator overnight.
FIFTH STEP: Preheat your oven to 375°F and line 2 baking sheets with parchment paper. Set them aside.
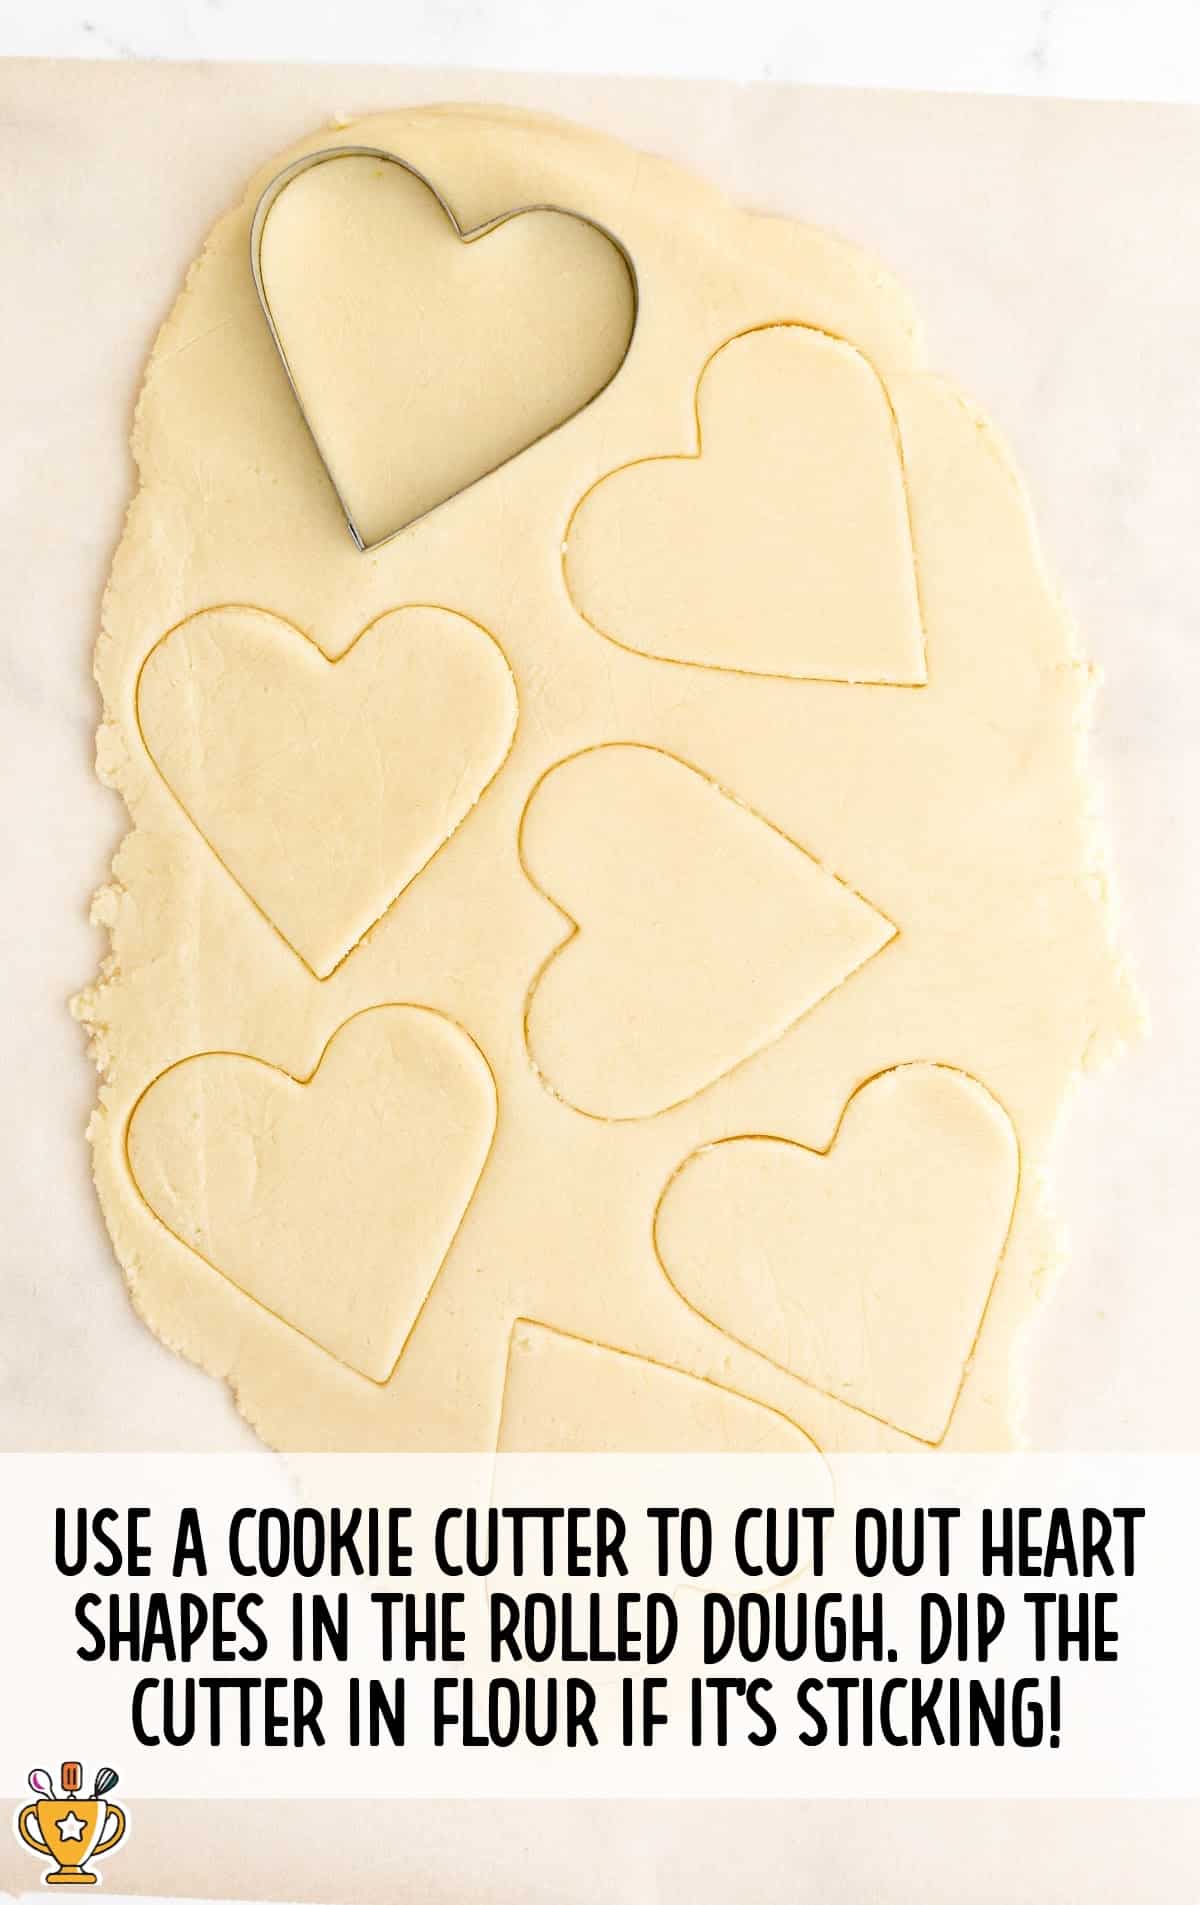
SIXTH STEP: Remove the cookie dough from your refrigerator and roll the dough onto a flat surface with a rolling pin to about ½ inch thick. Cut out heart shapes, or any other desired shape, with floured cookie cutters. Place 6 cookies onto one lined baking sheet, and 6 onto another.
Pro Tip
If you don’t want to frost your cookies, you can add sprinkles or sanding sugar now, before you bake.
SEVENTH STEP: Place one cookie sheet in the oven at a time and cook for 10 to 12 minutes. You want the edges to be firm without turning brown. Let the warm cookies cool for 2 to 3 minutes on the baking sheet and then transfer cookies to a wire rack. Place the other baking sheet in the oven and cook.
Pro Tip
If you’d like to custom color your icing or you don’t want the flavor of a colored tub of icing, you can use gel food coloring to tint store-bought icing as well.
For The Frosting
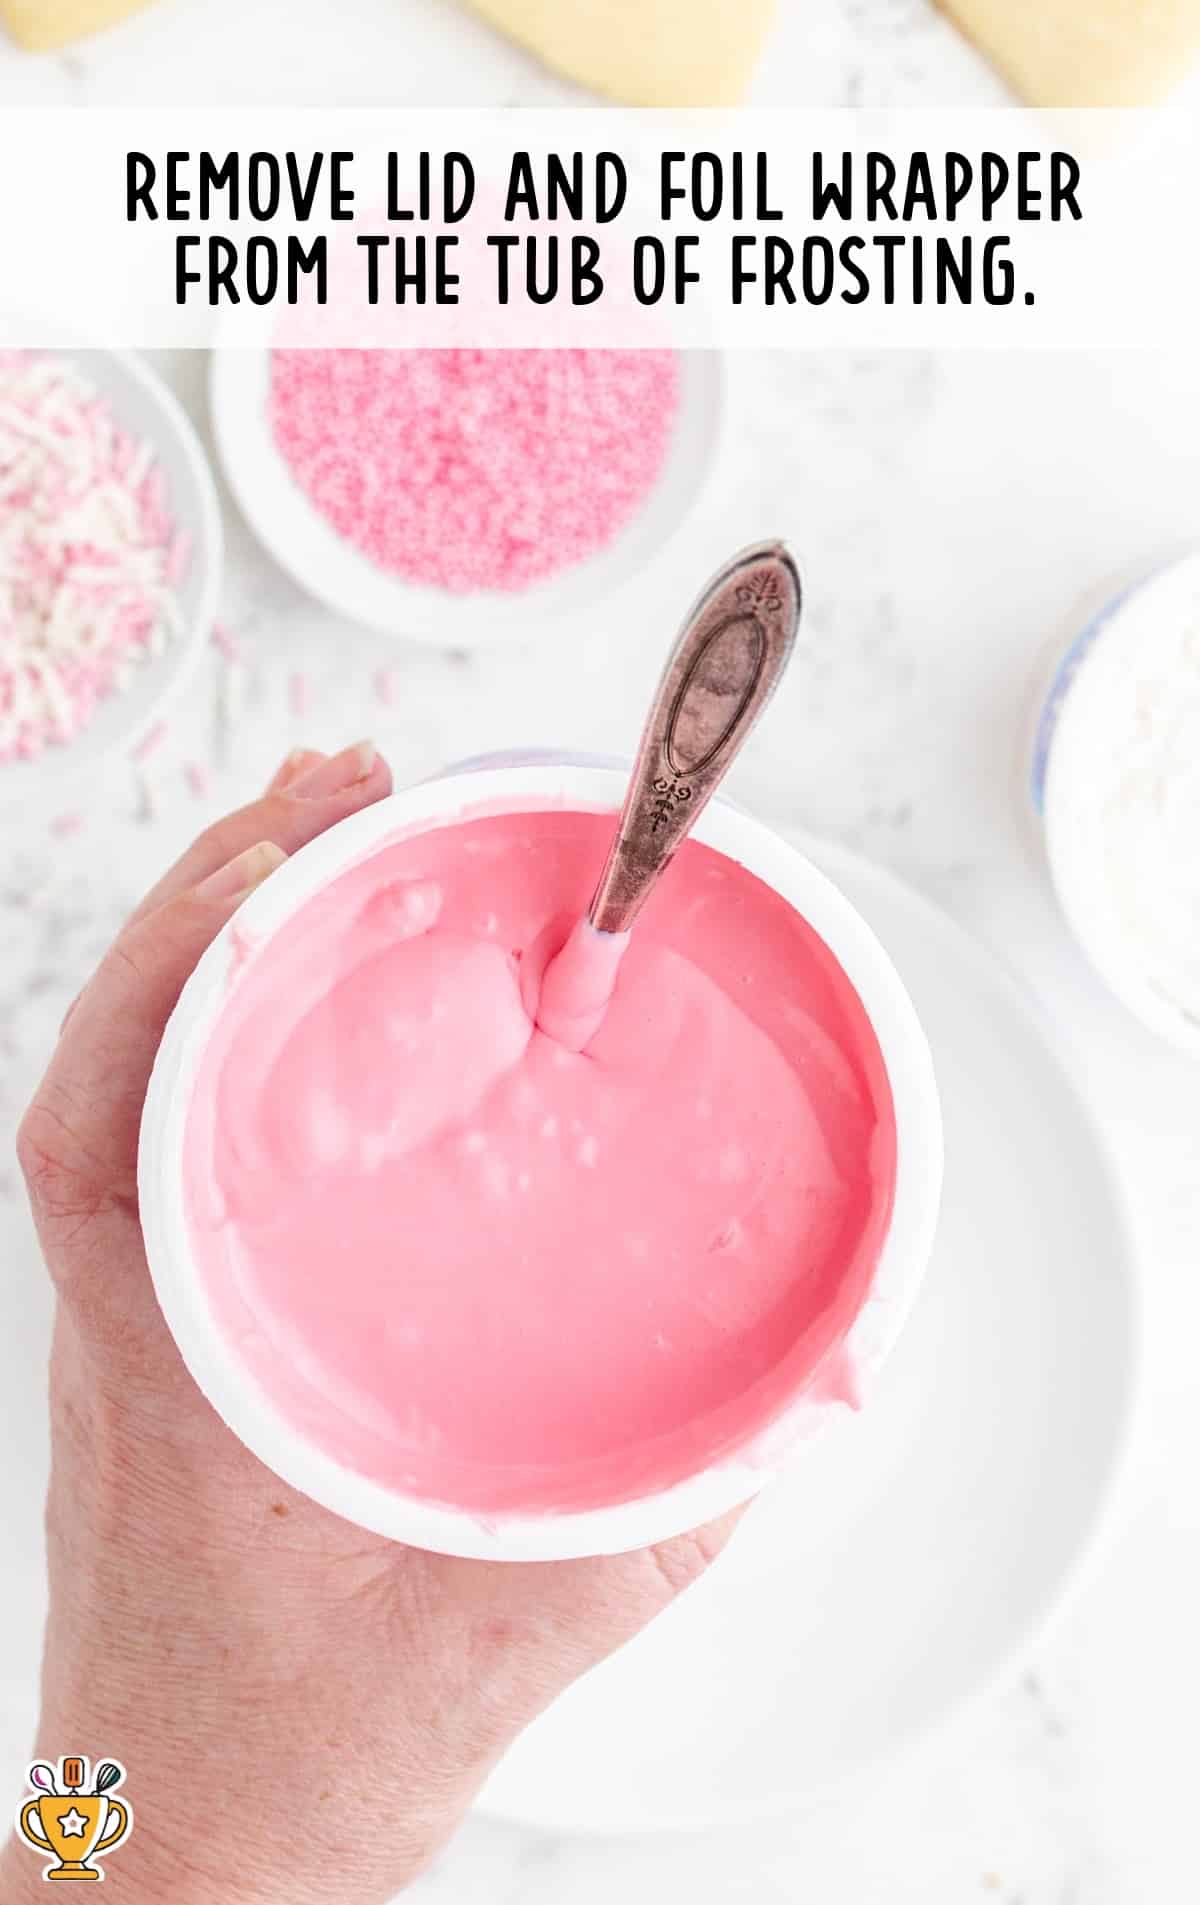
FIRST STEP: Remove the lid and foil wrapper from the tub of frosting. Transfer it to a microwave-safe container, if desired.
Pro Tip
If you overheat the frosting, place the tub in the refrigerator until it resolidifies. Then, beat it with a hand or stand mixer to whip it back into a frosting texture. A warning: The frosting may not be salvageable, so it’s best to heat it in small increments from the beginning and avoid separation altogether.
SECOND STEP: Heat the frosting for 30 seconds in the microwave and stir. Heat for an additional 15 seconds until it’s the right consistency to pour. Do not overheat as the frosting will separate and become unusable. You just want it warm enough that a drizzle smooths back into a flat surface.
Pro Tip
You can use a thin royal icing to achieve the same smooth frosting effect. This is a secret trick to imitate royal icing and it also tastes a lot better than royal icing.
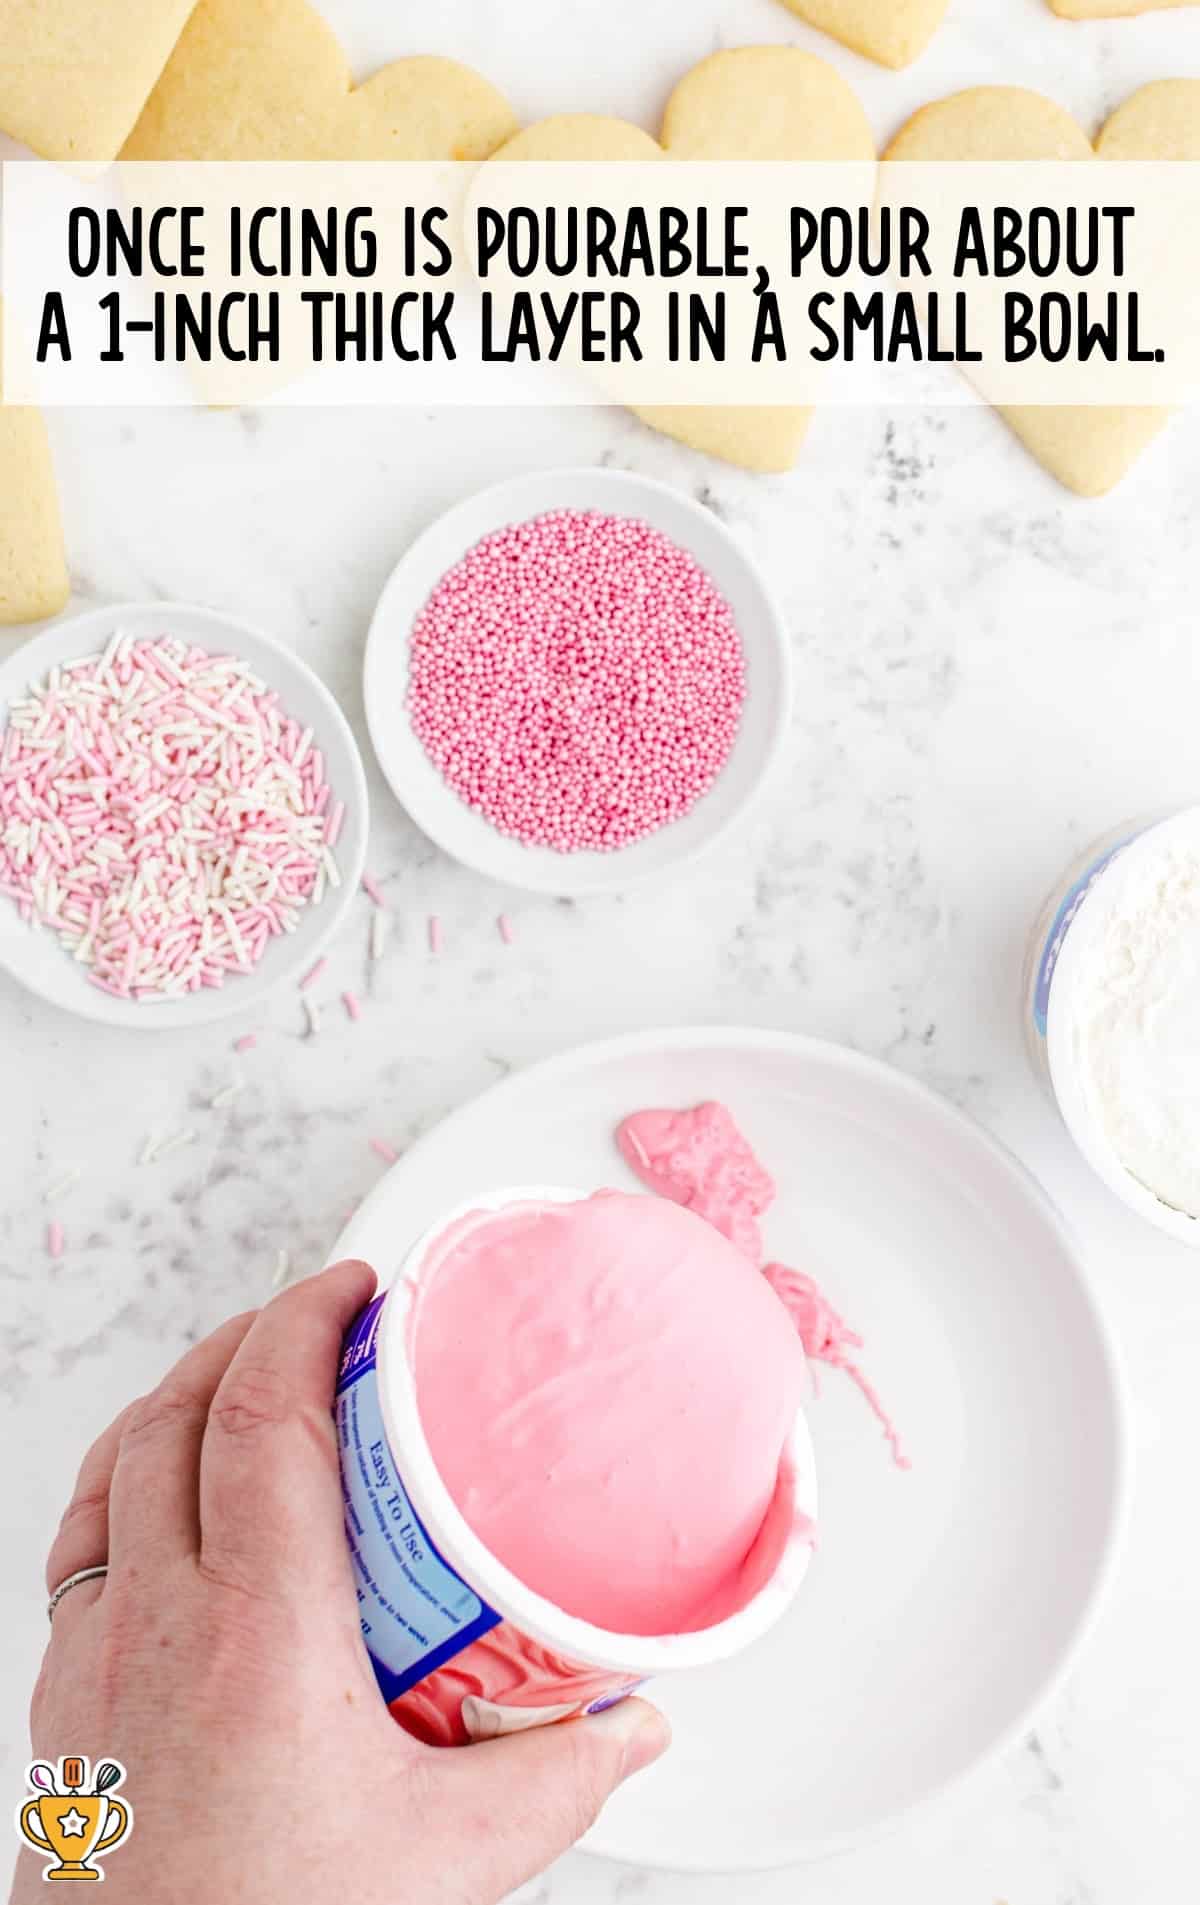
THIRD STEP: Pour a ¾ to 1-inch thick layer of frosting into a shallow bowl.
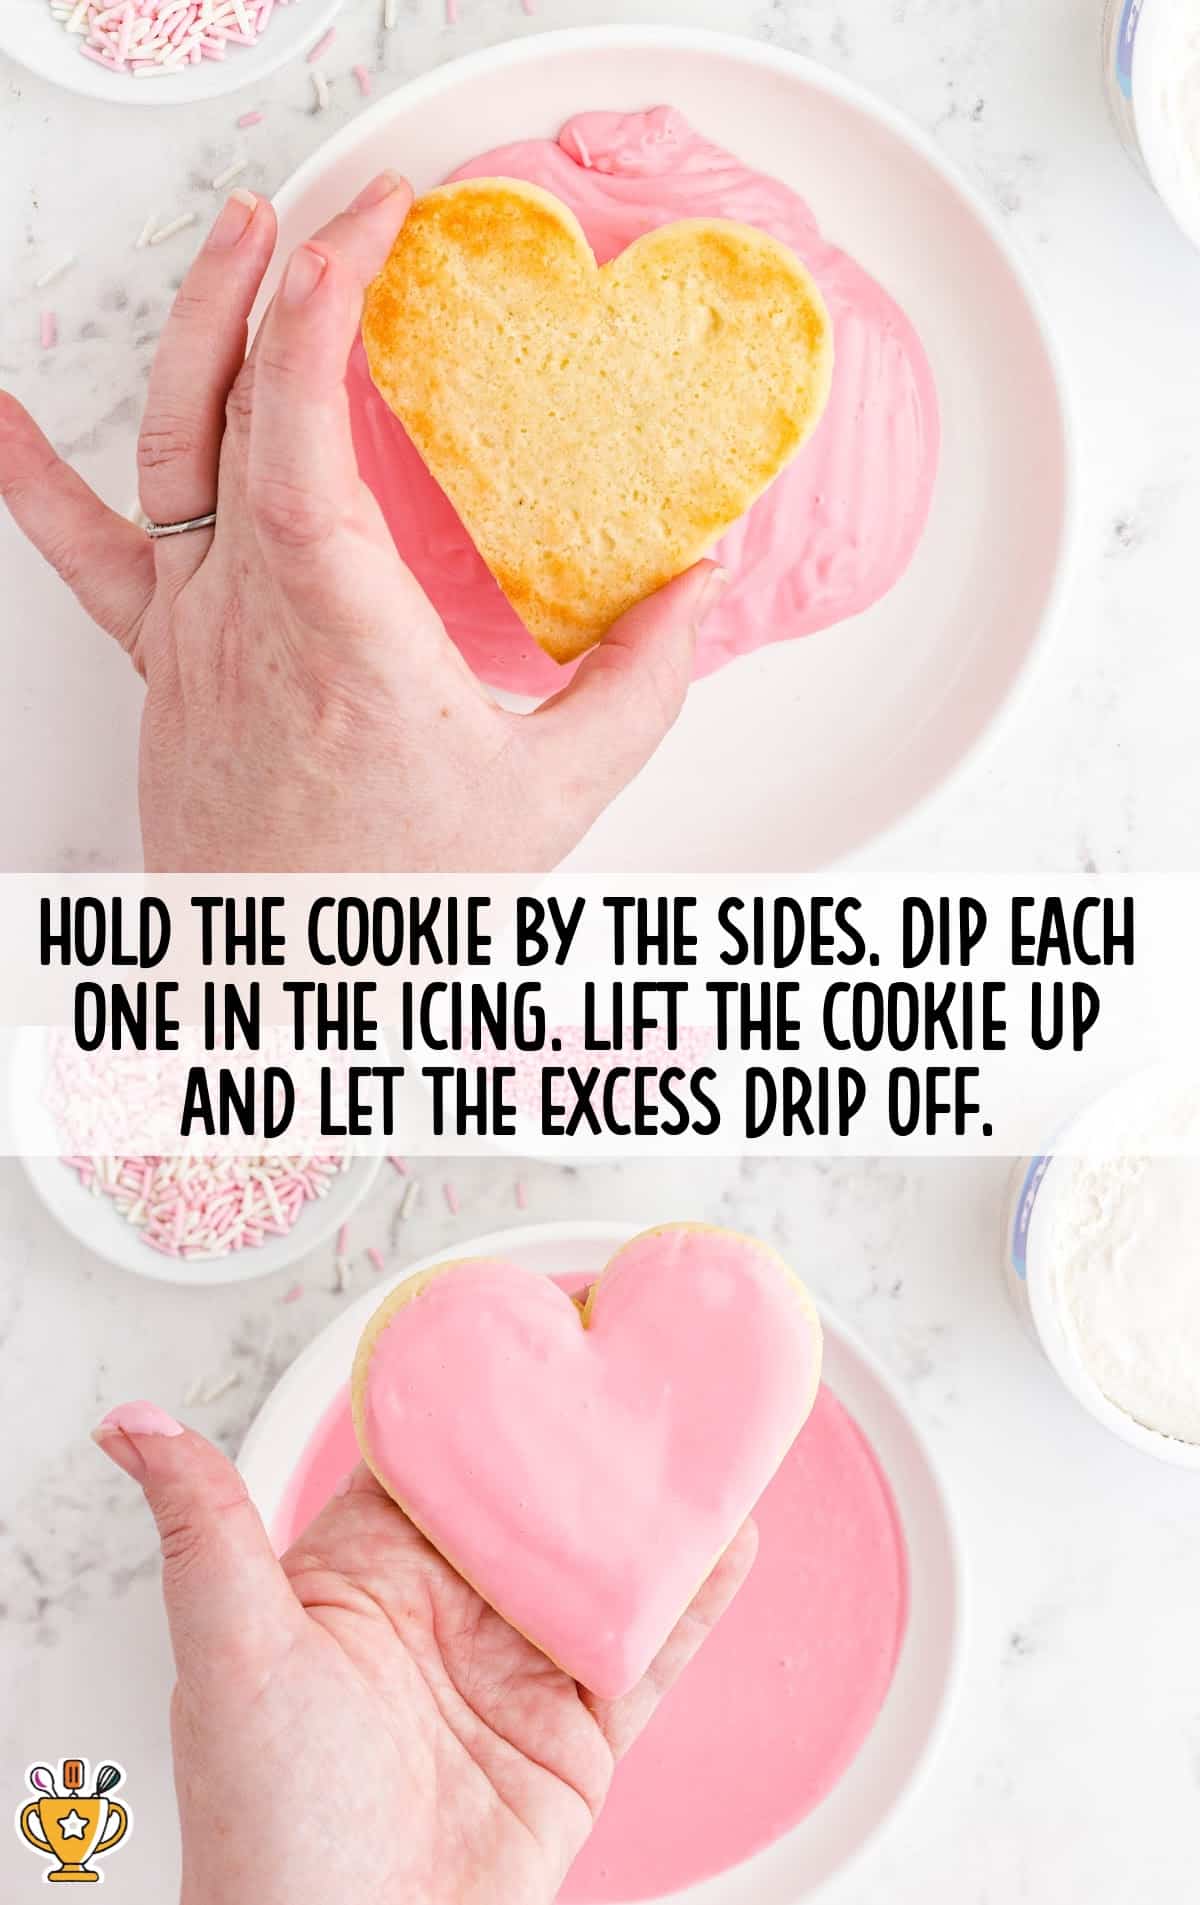
FOURTH STEP: Hold the sides of the cookie, dip the top face of the cookie straight down into the liquid frosting being sure to coat the entire top of the cookie. Lift the cookie back up, allowing the excess frosting to drop off, and then flip the cookie face up and place it on a sheet of parchment paper.
Pro Tip
While dipping the remaining cookies, reheat and add frosting as needed to ensure smooth dipping.
FIFTH STEP: Top with sprinkles and leave it to dry.
Pro Tip
Add sprinkles right away as the frosting dries a bit on the surface after a few minutes and they won’t stick as well.
SIXTH STEP: Allow the cookies to dry for about 1 hour in a single layer before stacking them.
How To Serve these Valentine Sugar Cookies
Decorated valentines day cookies are perfect for celebrating holidays, hosting parties, or simply enjoying with loved ones. Here are some fun and creative ways to serve this recipe:
- Valentine’s Day Parties: These heart-shaped cookies are perfect for spreading love. Serve them with cheesecake stuffed strawberries and frozen peanut butter hot cocoa for a festive touch. Guests of all ages will enjoy decorating their own cookies as a fun activity.
- Kid-Friendly Treats: Kids will love these colorful, sweet cookies. Pair them with an Oreo milkshake or a fruit salad for the ultimate snack. Let kids help with decorating to make it a fun and creative experience.
- Holiday Gift Ideas: These cookies make wonderful homemade gifts for any season. Package them with hot chocolate mix or greek yogurt bark for extra charm. Personalize each cookie with icing to make them thoughtful and memorable.
This recipe adds sweetness to any occasion and complements so many other delightful treats!

Why You'll Love This Recipe for Valentine Sugar Cookies
There are many reasons why valentine's cookies have become a go to favorite among our readers. Try some and see for yourself!
- A Classic Holiday Delight: This recipe combines buttery, soft cookies with endless decorating options, making it a go-to treat for festive occasions. The cookies' perfect balance of sweetness and texture ensures they melt in your mouth with every bite.
- A Fun Activity for All Ages: Decorating these cookies is as enjoyable as eating them. Kids and adults alike love creating personalized, edible works of art. Whether you're celebrating Valentine’s Day or hosting a party, these cookies bring everyone together.
- Customizable and Timeless: From classic hearts to creative shapes, these cookies fit any holiday or occasion. Add sprinkles, icing, or unique designs to make them your own. Their versatility makes them a recipe you'll want to bake again and again.
Recipe FAQ
What’s the best way to decorate valentine sugar cookies?
Use colorful icing and sprinkles to create fun designs. Add heart shapes, dots, or personalized messages for extra charm.
Can I use a different cookie cutter shape for this recipe?
While hearts are classic for Valentine’s Day, stars, flowers, or circles work just as well for any occasion.
How do I make sure my sugar cookies hold their shape?
Chill the dough before rolling and cutting the cookies. This prevents spreading and keeps the shapes crisp during baking.
Why are my sugar cookies too hard after baking?
Overbaking can make cookies hard. Remove them from the oven when edges are just set, and let them cool completely.
Serving FAQ
What’s the best way to serve valentine sugar cookies at a party?
Arrange the cookies on a decorative platter. Keep icing and sprinkles nearby for guests to personalize their own cookies.
Should I serve valentine sugar cookies plain or decorated?
Decorated cookies are always a hit! Add colorful frosting and sprinkles for a festive and eye-catching presentation.
How can I make serving valentine sugar cookies more interactive?
Set up a cookie-decorating station with icing, sprinkles, and tools. Guests will love creating their personalized treats.
Are valentine sugar cookies better served fresh or after they cool completely?
Always let the cookies cool completely before serving. This ensures the frosting sets and decorations stay in place perfectly.
Storage FAQ
From prepping dough in advance to keeping cookies fresh, we’ve got you covered. Read on for all the best advice!
Can I make valentine sugar cookies ahead of time?
Yes, prepare the dough up to two days in advance and store it in the fridge, wrapped tightly in plastic wrap.
What’s the best way to store valentine sugar cookies?
Store baked and decorated cookies in an airtight container at room temperature. They’ll stay fresh for up to one week.
Can I freeze valentine sugar cookies?
Yes, freeze undecorated cookies in an airtight container or freezer bag for up to three months. Decorate after thawing.
How do I thaw frozen valentine sugar cookies?
Thaw frozen cookies at room temperature for about an hour. Decorate them once completely thawed for the best results.
More Valentine's Day Desserts

Valentine Sugar Cookies
Valentine sugar cookies are a fun and festive treat, perfect for decorating and sharing with loved ones. These buttery cookies bake beautifully and hold their shape, making them ideal for any special occasion!
Did you try this recipe?Let our readers know how it turned out by Leaving a Review!
Ingredients
Cookies
- 2 cups cake flour
- ½ cup all-purpose flour
- 1½ teaspoons baking powder
- ¼ teaspoon cream of tartar
- 1 cup sugar
- ½ cup salted butter (softened)
- ¼ cup butter flavored shortening (softened)
- 3 teaspoons vanilla extract
- 1 whole egg
- 1 egg white
- ⅓ cup sugar (for dusting the top of the cookies after they bake)
Frosting
- 16 ounces white frosting (vanilla will be a cream color, so be sure to use white if you want a pure white frosting)
- 16 ounces pink frosting (strawberry)
- sprinkles and nonpareils
DIRECTIONS
Cookies
- In a large mixing bowl, add the cake flour, all-purpose flour, baking powder, and cream of tartar. Whisk together then set aside.
- In a large mixing bowl, add the sugar, butter, and shortening. Use a hand mixer to beat together until light and fluffy. Add vanilla extract and the whole egg. Beat together until combined. Add egg white and continue beating until well combined. Turn off the mixer and use a rubber spatula to scrape the sides of the mixing bowl.
- Turn the hand mixer on low and gradually add dry ingredients to wet ingredients. Mix until no flour pockets remain. Cover the mixing bowl with saran wrap and place in the refrigerator overnight.
- Preheat the oven to 375°F and line 2 baking sheets with parchment paper. Set aside.
- Remove cookie dough from the refrigerator and roll the dough out on a flat surface to about ½ inch thick. Cut out desired shapes with floured cookie cutters. Place 6 cookies on one baking sheet, and 6 on another.
- Place one cookie sheet in the oven at a time and cook for 10 to 12 minutes. You want the edges to be firm without turning brown. Let the cookies cool for 2 to 3 minutes on the baking sheet. Place the other baking sheet in the oven and cook.
Frosting
- Remove lid and foil wrapper from the tub of frosting. Transfer to a microwave-safe container, if desired.
- Heat frosting for 30 seconds in the microwave and stir. Heat for an additional 15 seconds at a time JUST until frosting is pourable. Do not overheat as the frosting will separate and become unusable. You just want it warm enough that a drizzle smooths back into a flat surface.
- Pour a ¾ to 1-inch thick layer of frosting into a shallow bowl. Holding on to the sides of the cookie, dip the top face of the cookie straight down into the liquid frosting, being sure to coat the entire top of the cookie. Lift the cookie back up, allowing excess frosting to drip off, and then flip the cookie face up and place it on a sheet of parchment paper.
- Top with sprinkles and leave to dry.
- Continue dipping remaining cookies, reheating/adding frosting as needed to ensure smooth dipping.
- Allow the cookies to dry for about 1 hour before stacking.
Notes
- If you don’t want to frost your cookies, you can add sprinkles or sanding sugar now, before you bake.
- If you’d like to custom color your icing or you don’t want the flavor of a colored tub of icing, you can use gel food coloring to tint store-bought icing as well.
- If you overheat the frosting, place the tub in the refrigerator until it resolidifies. Then, beat it with a hand or stand mixer to whip it back into a frosting texture. A warning! The frosting may not be salvageable so it’s best to heat it in small increments from the beginning and avoid separation altogether.
- You can use a thin royal icing to achieve the same smooth frosting effect.
- This is a secret trick to imitate royal icing and it also tastes a lot better than royal icing.
- While dipping the remaining cookies, reheat and add frosting as needed to ensure a smooth dipping.
- Add sprinkles right away as the frosting dries a bit on the surface after a few minutes and they won’t stick as well.
HAVE YOU TRIED THIS RECIPE?Follow me on Pinterest @bestblogrecipes

Leave a Comment