
Last updated on
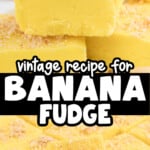
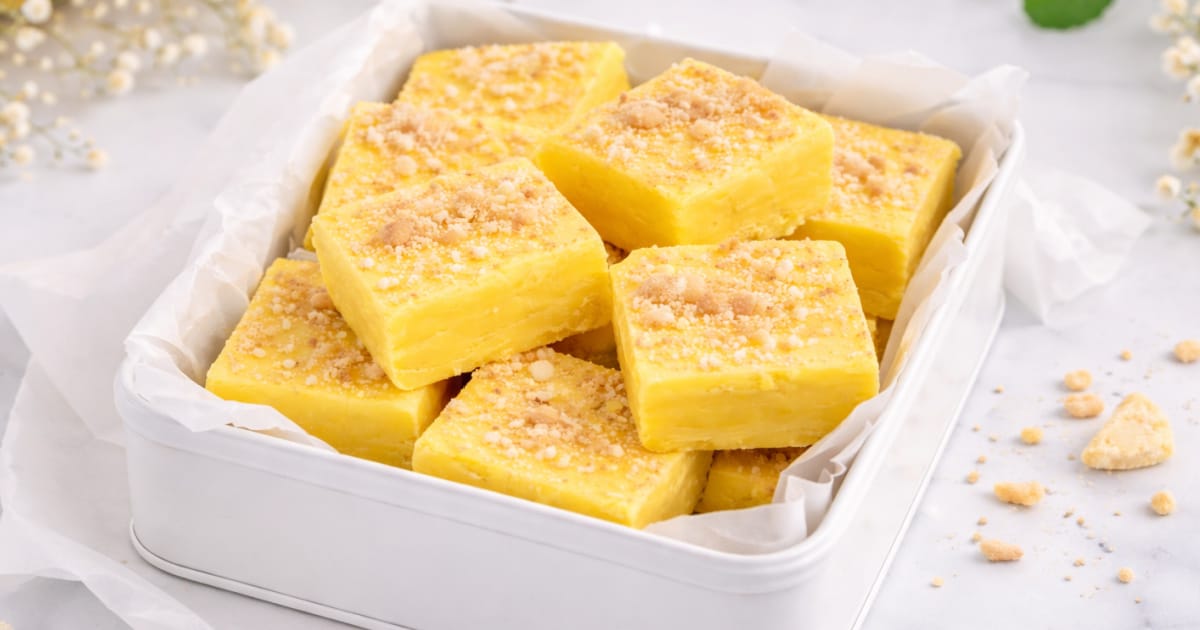
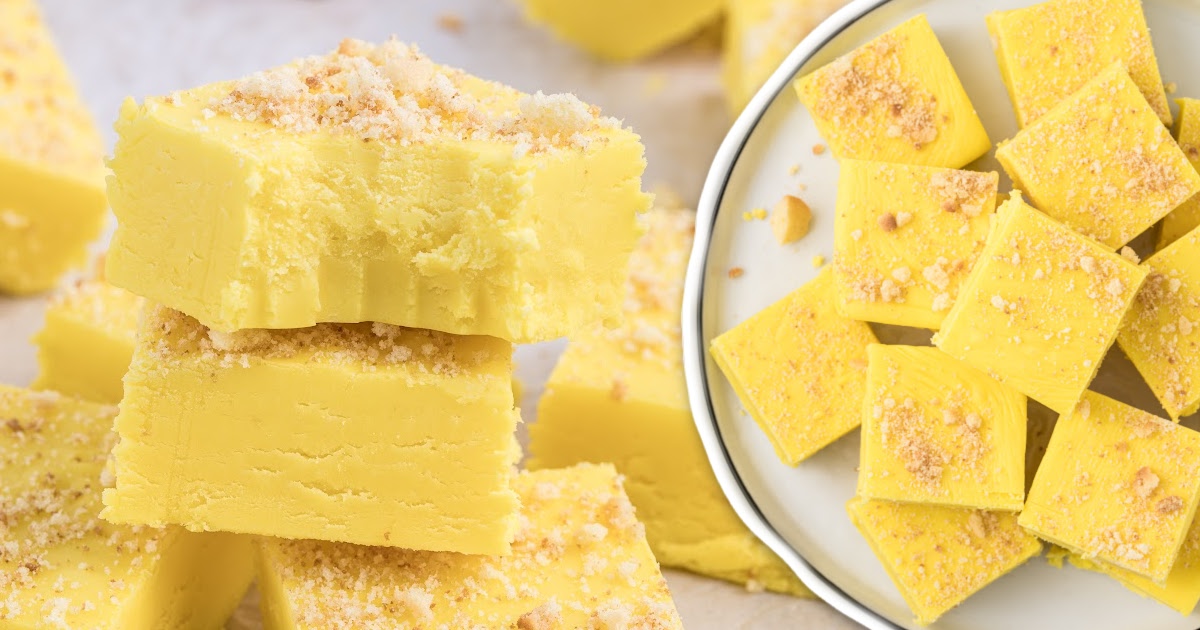
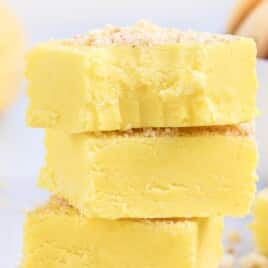
Banana Fudge

Creamy, no-bake banana fudge made on the stovetop with marshmallow fluff and white chocolate for a smooth, reliable set. Bold banana flavor without the fuss, no candy thermometer needed.
Jump to RecipeTable of Contents

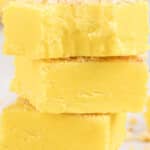
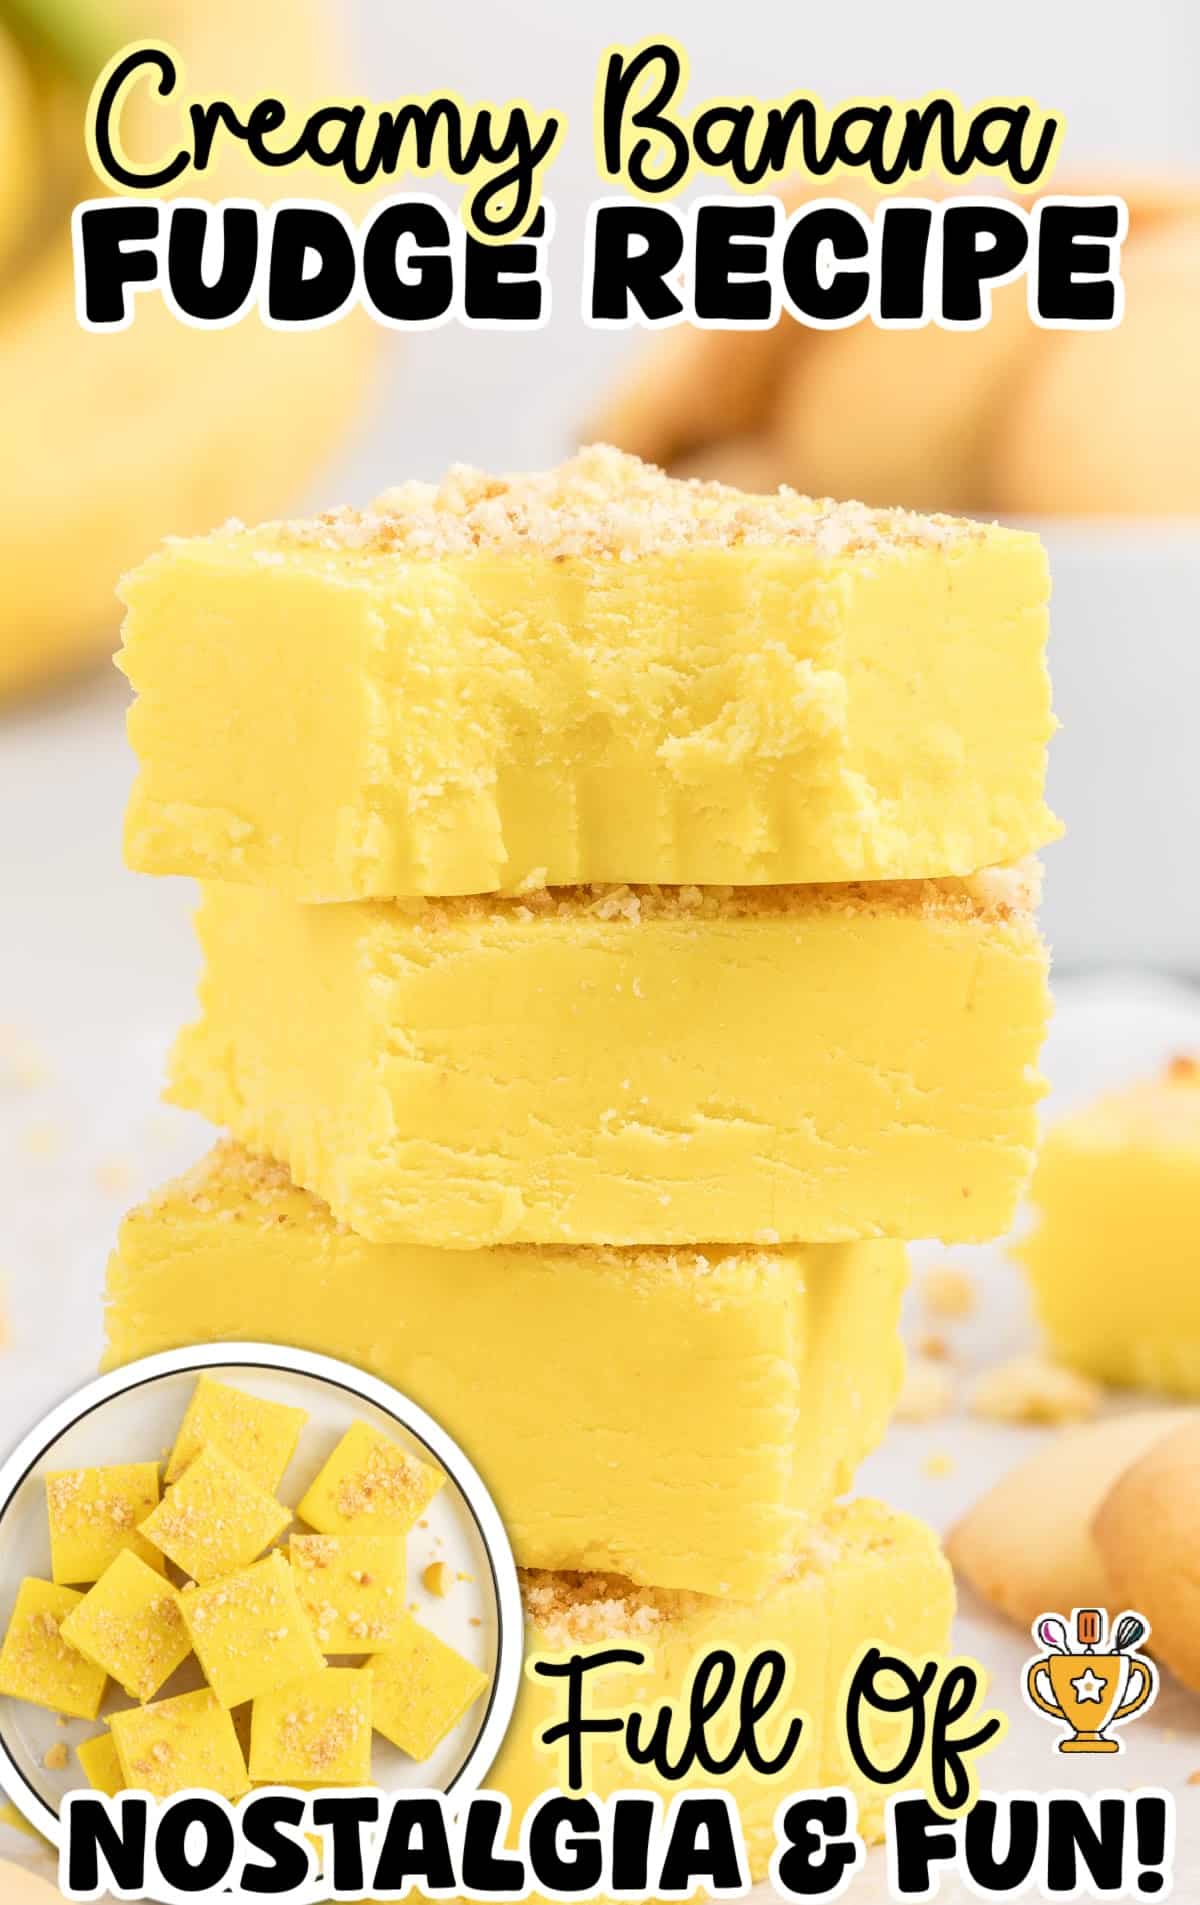
This banana fudge is exactly the kind of treat that makes you think of cozy afternoon picnics at Grandma's house. Full of vintage old-school charm, it’s creamy, dreamy, and packed with banana bliss.
No candy thermometer or fuss, just good-old-fashioned fun and flavor in every melt-in-your-mouth bite. Whether you’re feeding a crowd or just giving yourself a nostalgic hug in fudge form, this recipe hits all the best childhood sweet spots. 🍌✨
More of our Vintage Candy Recipes ⭐ Homemade Caramels | Peanut Brittle Recipe | Homemade Peanut Butter Cups
🍌 Banana Fudge Recipe Overview
⏱️ Prep Time: 15 minutes (plus chill time)
🍽️ Servings: 25 pieces
🧈 Key Ingredients: Banana flavor, white chocolate chips, sweetened condensed milk
🍬 What to Expect: Creamy, smooth banana fudge with real banana flavor
❄️ Method: No-bake, no candy thermometer - Just melt on the stovetop, mix things together, chill, and slice
We’ve made a lot of fudge over the years, and every recipe we share has been tested until it works the way it should - smooth, creamy, and set just right.
From classic chocolate fudge to fun flavors like cookies and cream, Rolo, or mint chocolate chip, our fudge recipes are designed to be simple, reliable, and totally doable at home.
If you’ve ever had fudge turn grainy or refuse to set, you’re in the right place. We’ve already done the troubleshooting for you.
Ingredients to Make Banana Fudge
What you'll need to make this old-fashioned banana fudge with marshmallow fluff:
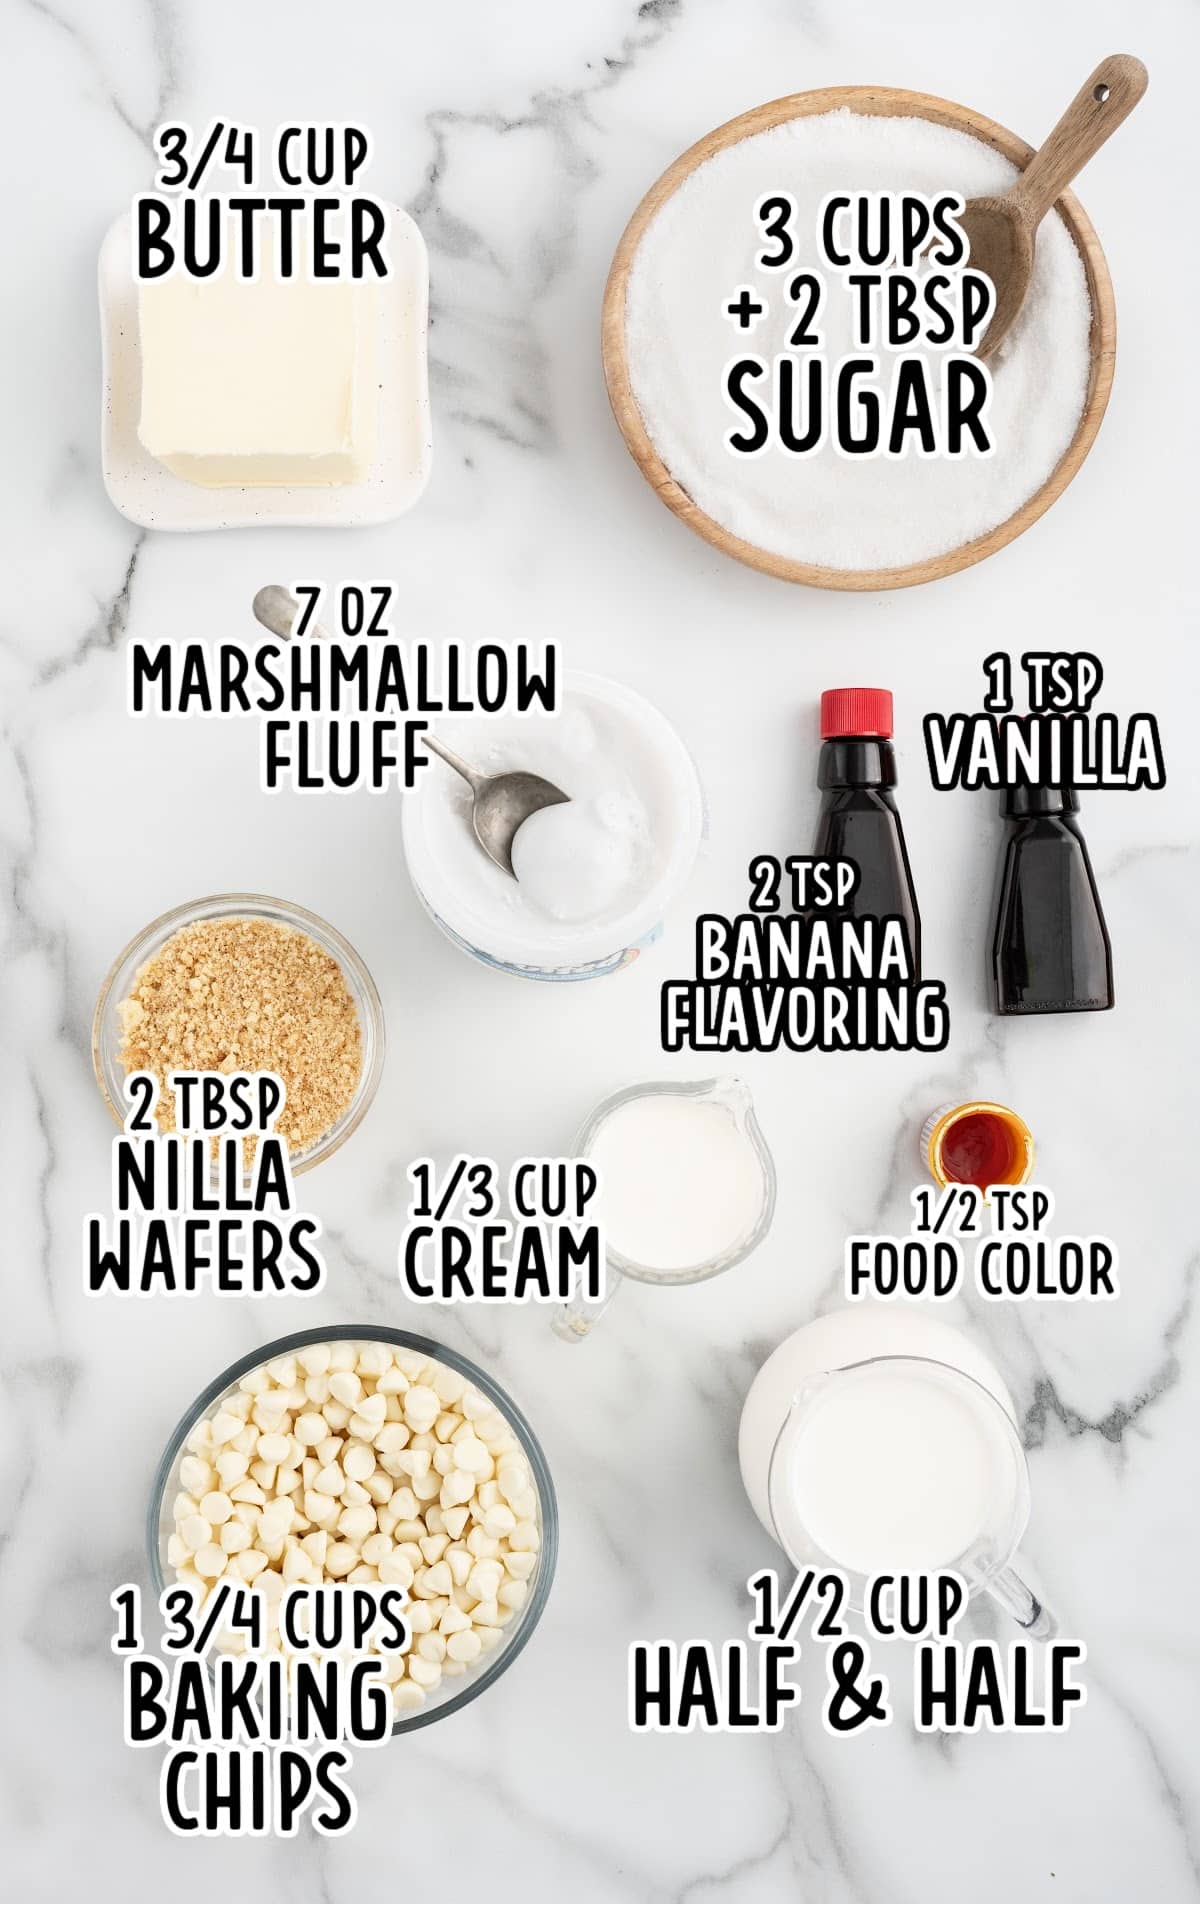
- 2 teaspoons of banana flavoring
- ½ teaspoon of yellow food color gel
- ¾ cup of salted sweet cream butter
- ½ cup of half and half
- ⅓ cup of heavy cream
- 1 teaspoon of clear vanilla flavoring
- 3 cups + 2 tablespoons of granulated sugar
- 1¾ cups of white baking chips
- 1 (7-ounce) container of marshmallow fluff
- 2 tablespoons of crushed Nilla wafers
Ingredient Notes
🍫 White Chocolate Chips: White chocolate baking bars can be chopped and used in place of chips. Avoid candy melts or almond bark — they don’t set the same way.
🥛 Sweetened Condensed Milk: This is not interchangeable with evaporated milk, half-and-half, or cream. No reliable substitute here.
🌿 Vanilla Extract: Clear vanilla or vanilla bean paste can be used 1:1.
❌ What Not to Swap
- Do not reduce or omit the sweetened condensed milk.
- Do not use low-sugar or sugar-free chocolate.
- Do not add any real banana. It will add too much moisture and prevent the fudge from setting.
How to Make Banana Fudge
FIRST STEP: Line a 9×9-inch baking dish with parchment paper, making sure the parchment paper goes up all four sides of the baking dish.
Lightly spray the parchment paper with nonstick cooking spray. Set it aside.
SECOND STEP: Add the banana flavoring and yellow food color gel to a small glass bowl. Stir to combine. Set it aside.
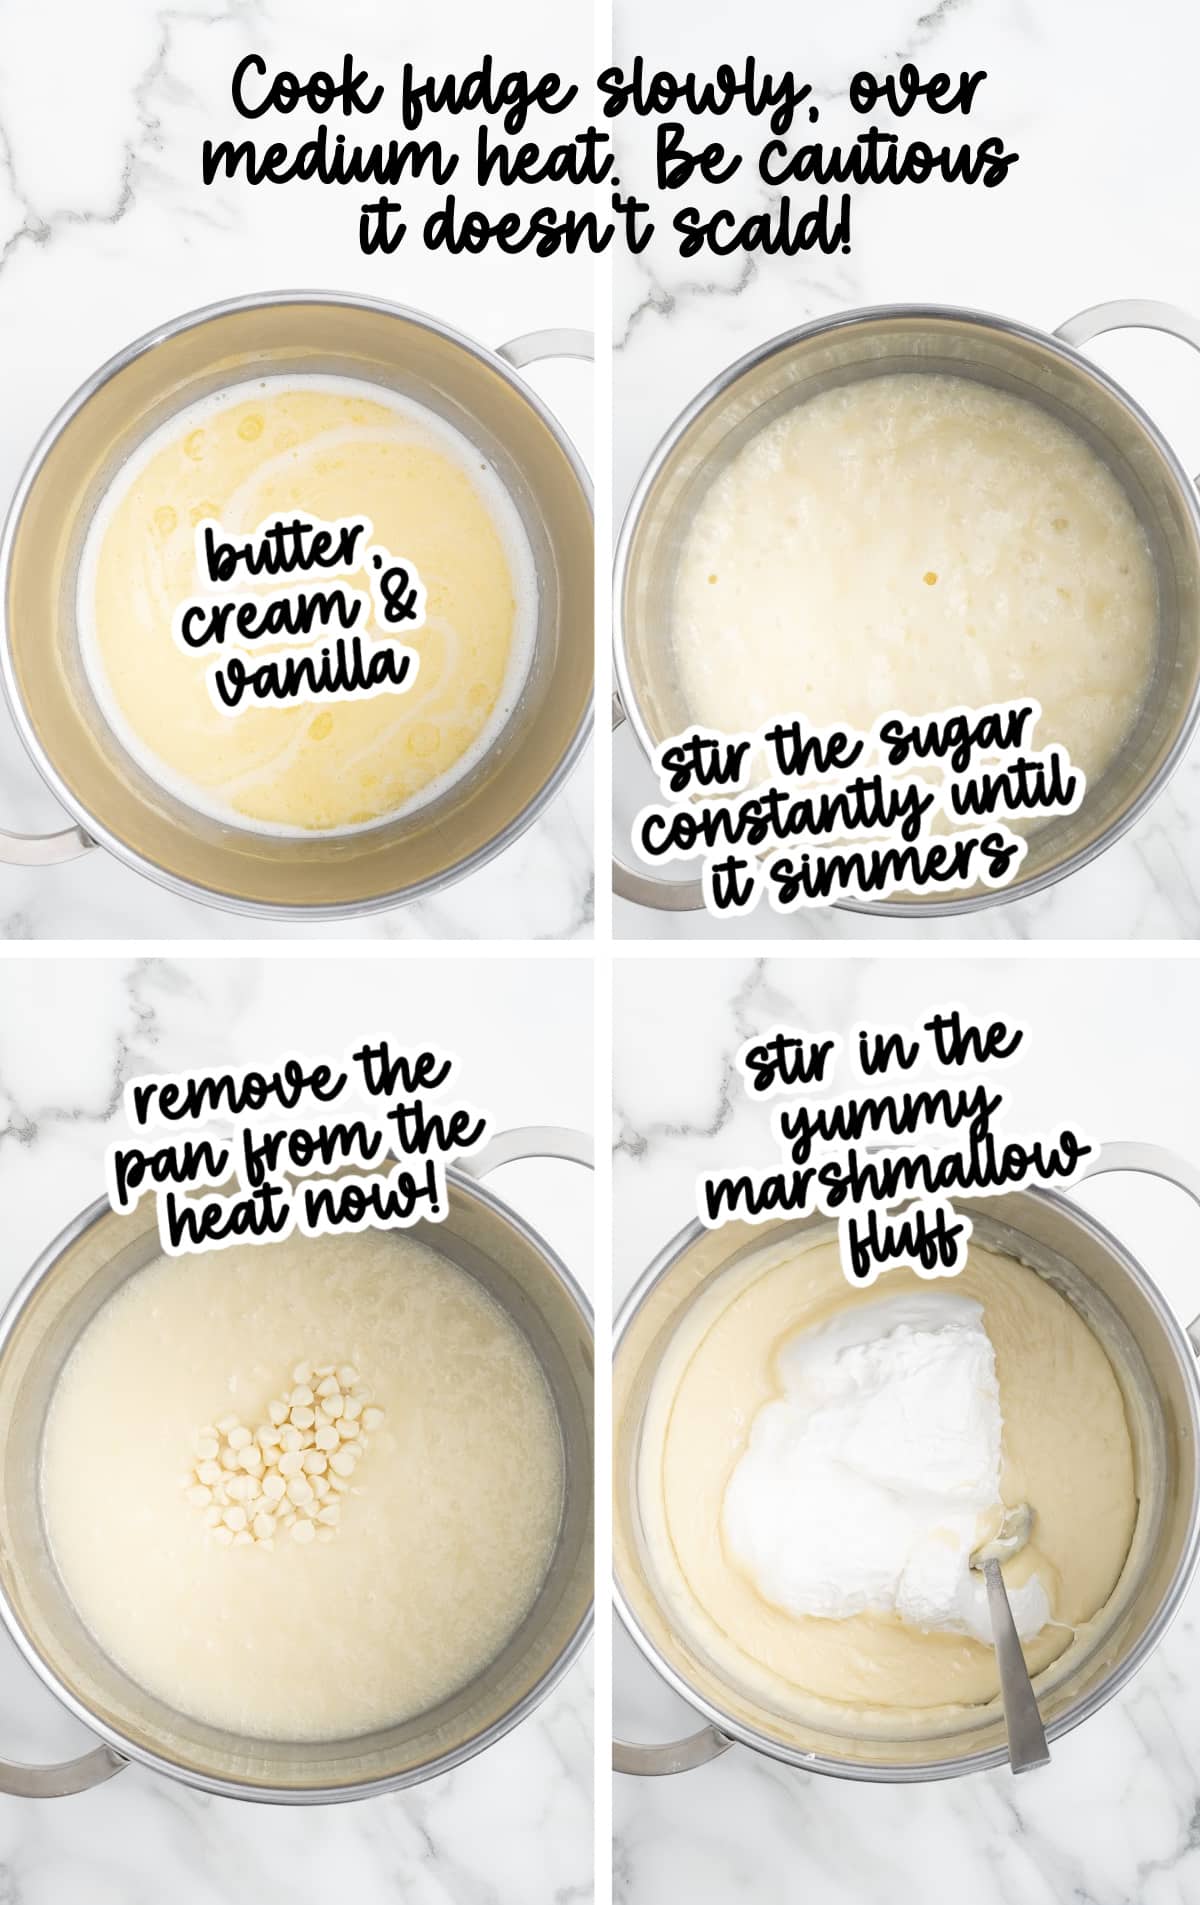
THIRD STEP: Add the butter, half-and-half, heavy cream, and clear vanilla flavor to a three- to four-quart heavy-bottomed saucepan over medium heat.
Stir until the butter is melted.
Pro Tip
When heating the butter, half and half, heavy cream, and clear vanilla, be sure to stir continuously. This prevents the mixture from sticking or burning at the bottom of the saucepan.
FOURTH STEP: Add the sugar and continue stirring until the mixture comes to a simmer. This should take between six to seven minutes.
Keep stirring, and allow the mixture to simmer for another three minutes.
What a “Simmer” Looks Like
When the fudge mixture reaches a simmer, you should see small, steady bubbles forming around the edges of the pan, with gentle movement across the surface.
It should not be boiling rapidly or bubbling aggressively. Keep the heat at medium and stir constantly. This controlled simmer allows the sugar to dissolve smoothly without scorching, which is key for a creamy fudge texture.
Remove from the heat.
FIFTH STEP: Add in the white baking chips. Cover the saucepan and let the mixture rest for three to four minutes. Stir until the white baking chips are melted.
SIXTH STEP: Add the marshmallow fluff and stir until completely incorporated.
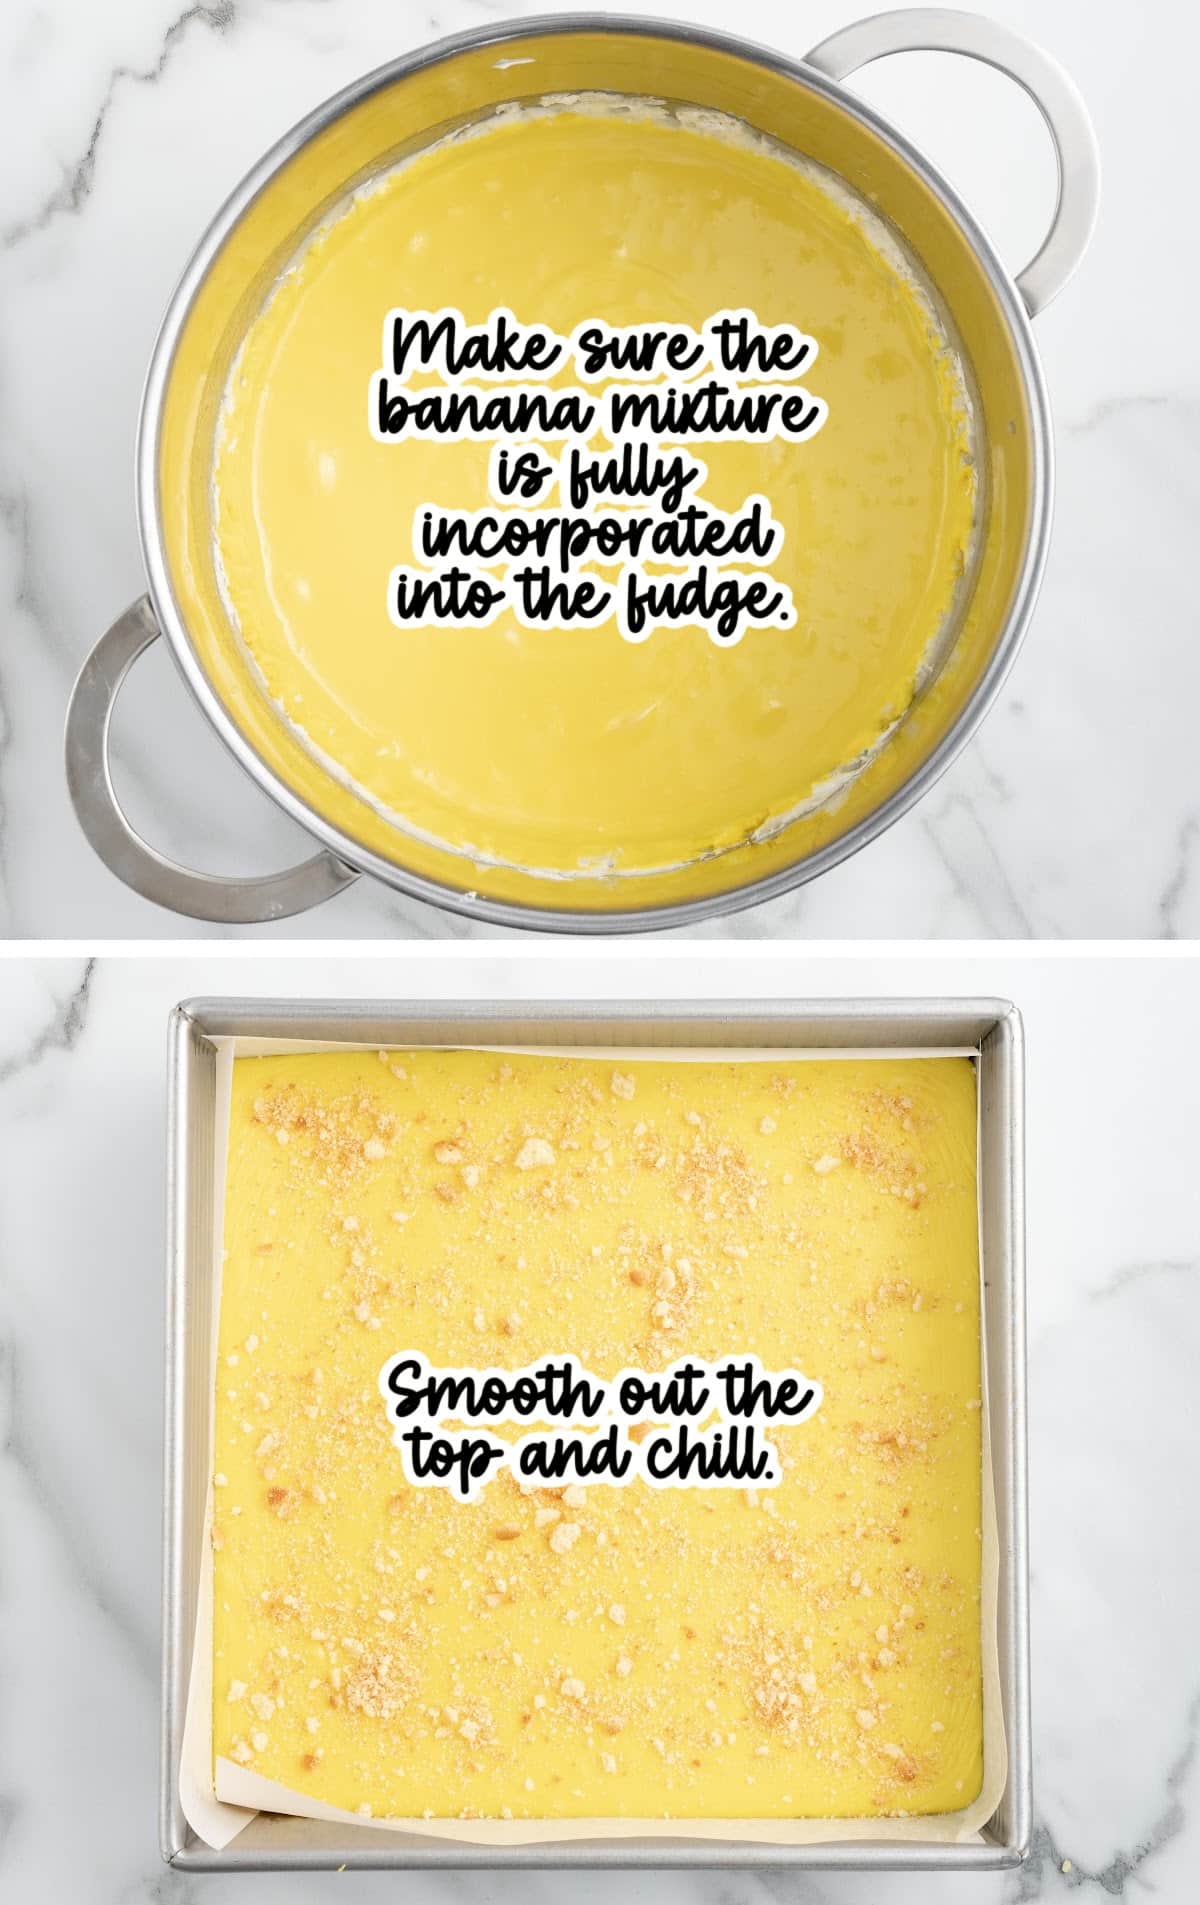
SEVENTH STEP: Stir in the yellow food gel and banana extract mixture into the fudge. Continue stirring until the color is uniform.
EIGHTH STEP: Use either a silicone or offset spatula to evenly spread the banana fudge in an even layer into the prepared baking dish.
Sprinkle the crushed Nilla wafers over the top of the fudge. Cover with aluminum foil.
NINTH STEP: Allow the fudge to sit at room temperature for 30 minutes before chilling in the refrigerator for at least four hours.
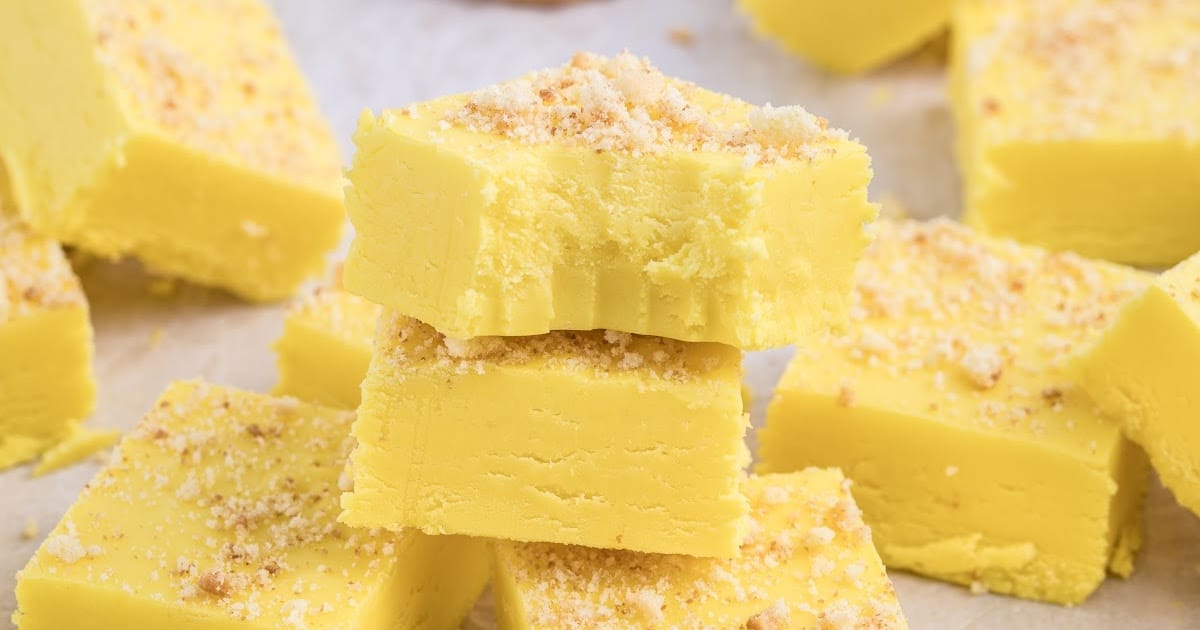
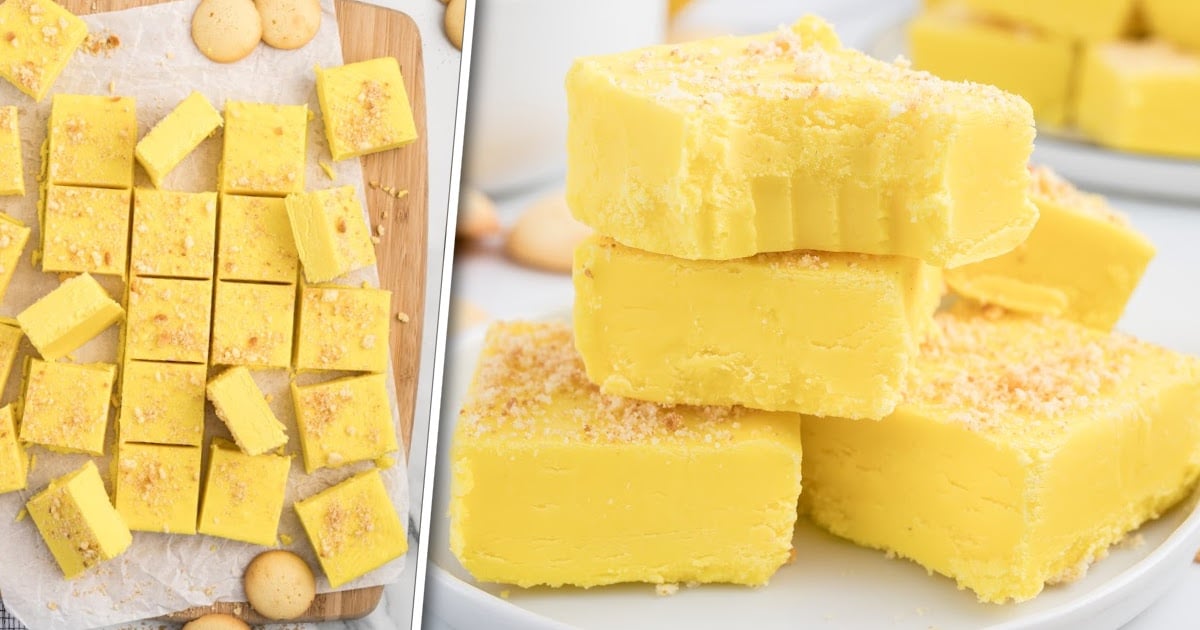
Once the fudge is set, lift the fudge out of the pan with the parchment paper.
Use a large sharp knife to cut the fudge into five slices by five slices, giving you 25 pieces of fudge.
Keep refrigerated until ready to serve.
Pro Tip
When ready to serve, cut the fudge into pieces with a large sharp knife. Wipe the knife between cuts for cleaner edges.

Why This No Bake Banana Fudge Works
We designed this easy banana fudge recipe to set properly and stay creamy, no guesswork required!
- The sugar is cooked correctly so it fully dissolves, giving the fudge a smooth texture instead of a grainy one.
- Marshmallow fluff and white chocolate help the fudge set while keeping it soft and sliceable.
- Banana flavoring adds a bold banana taste without adding extra moisture that can prevent fudge from setting.
The result is a homemade banana fudge that’s rich, smooth, and reliable every time you make it.
Common Banana Fudge Mistakes (And How to Avoid Them)
Why didn’t my banana fudge set?
This usually means the sugar wasn’t cooked long enough or the mixture never reached a proper simmer.
How to avoid it: Bring the mixture to a gentle simmer with small bubbles around the edges. Continue cooking while stirring until the sugar is fully dissolved before proceeding to the next step.
Why does my fudge taste burnt or look dark?
This happens when the heat is too high or the mixture isn’t stirred consistently.
How to avoid it: Keep the heat at medium and stir constantly. If the mixture starts to darken quickly or smell caramelized, remove it from the heat immediately.
Can I add the banana flavor earlier in the process?
No, adding banana flavor too early can interfere with the structure.
How to avoid it: Always add the banana flavor after the sugar has cooked and the pan has been removed from direct heat.
Can I swap the sweetened condensed milk or cream?
Unfortunately, no. These ingredients are essential for the fudge to set correctly.
How to avoid it: Use the ingredients listed and measure carefully. Substitutions in this recipe will change the texture and prevent proper setting.
Make-Ahead & Gifting Tips
For gifting: Store your fudge in an airtight container or decorative tin to keep it fresh and gift-ready. Give as a gift at Christmas time or for a birthday treat.
For clean cuts: Line the pan with parchment paper and let the fudge chill completely before slicing.
Best slicing tip: Use a sharp knife and wipe it clean between cuts for smooth, even squares.
Storage & Shelf Life
Room temperature: Store this creamy banana fudge in an airtight container for up to 3 days in a cool, dry place.
Refrigerator: This fudge keeps well for up to 2 weeks, and storing it in the fridge helps maintain a firm, creamy texture.
Freezer: Freeze tightly wrapped pieces for up to 2 months. Wrapping them in plastic wrap will help prevent freezer burn.
Texture notes: The fudge will firm up when chilled, but it softens again after sitting at room temperature for a few minutes.
Banana Fudge FAQ
Does banana fudge need to be refrigerated?
Banana fudge does not need to be refrigerated right away, but refrigeration is recommended for longer storage.
It can be kept at room temperature in an airtight container for up to 3 days. For best texture and freshness beyond that, store it in the refrigerator.
Can banana fudge be frozen?
Yes, banana fudge freezes very well. Wrap the pieces tightly in plastic wrap and store them in an airtight container or freezer bag for up to 2 months. Thaw in the refrigerator or at room temperature before serving.
Why is my banana fudge grainy?
Grainy banana fudge is usually caused by sugar that wasn’t fully dissolved. This can happen if the mixture didn’t reach a proper simmer, was cooked too quickly, or wasn’t stirred consistently.
How to fix grainy fudge: Cooking the sugar gently and stirring constantly helps create a smooth, creamy fudge texture.

Banana Fudge
Creamy, no-bake banana fudge made on the stovetop with marshmallow fluff and white chocolate for a smooth, reliable set. Bold banana flavor without the fuss, no candy thermometer needed.
Did you try this recipe?Let our readers know how it turned out by Leaving a Review!
Ingredients
- 2 teaspoons banana flavoring
- ½ teaspoon yellow food color gel
- ¾ cup salted sweet cream butter
- ½ cup half and half
- ⅓ cup heavy cream
- 1 teaspoon clear vanilla flavoring
- 3 cups granulated sugar (plus 2 tablespoons)
- 1 ⅓ cup white baking chips (i used Ghirardelli)
- 7 ounces marshmallow fluff
- 2 tablespoons crushed Nilla wafers (optional garnish)
DIRECTIONS
- Line a 9×9-inch baking dish with parchment paper, making sure the parchment paper goes up all four sides of the baking dish. Lightly spray the parchment paper with nonstick cooking spray. Set it aside.
- Add the banana flavoring and yellow food color gel to a small glass bowl. (A glass bowl will not stain. You can also use a small yellow bowl or a disposable bowl.) Stir to combine. Set it aside.
- Add the butter, half and half, heavy cream, and clear vanilla flavoring to a 3 to 4-quart heavy-bottomed saucepan over medium heat. Stir continuously until the butter is melted.
- Add the sugar and keep stirring constantly as the mixture comes to a simmer. This should take between 6 to 7 minutes. Keep stirring and allow the mixture to simmer for another 3 minutes. Remove from the heat.
- Add in the white baking chips. Cover the saucepan and let the mixture rest for 3 to 4 minutes. Stir until the white baking chips are melted.
- Add the marshmallow fluff and stir until completely incorporated.
- Stir in the yellow food gel and banana extract mixture into the fudge. Continue stirring until the color is uniform.
- Use either a silicone spatula or an offset spatula to evenly spread the banana fudge into the prepared baking dish. Sprinkle the crushed Nilla wafers over the top of the fudge. Cover with aluminum foil.
- Allow the fudge to sit at room temperature for 30 minutes before chilling in the refrigerator for at least four hours. Once the fudge is set, lift the fudge out of the pan with the parchment paper. Use a large sharp knife to cut the fudge into five slices x five slices, giving you 25 pieces of fudge. Keep refrigerated until ready to serve.
Notes
- A glass bowl will not stain. You can also use a small yellow bowl or a disposable bowl.
- When heating the butter, half and half, heavy cream, and clear vanilla, be sure to stir continuously. This prevents the mixture from sticking or burning at the bottom of the saucepan.
- When ready to serve, cut the fudge into pieces with a large sharp knife. Wipe the knife between cuts for cleaner edges.
Nutrition
Calories: 227kcal | Carbohydrates: 36g | Protein: 1g | Fat: 10g | Saturated Fat: 6g | Polyunsaturated Fat: 0.4g | Monounsaturated Fat: 3g | Trans Fat: 0.2g | Cholesterol: 21mg | Sodium: 59mg | Potassium: 33mg | Fiber: 0.03g | Sugar: 34g | Vitamin A: 236IU | Vitamin C: 0.1mg | Calcium: 23mg | Iron: 0.04mg
HAVE YOU TRIED THIS RECIPE?Follow me on Pinterest @bestblogrecipes
« BLT Dip

Leave a Comment