
Last updated on
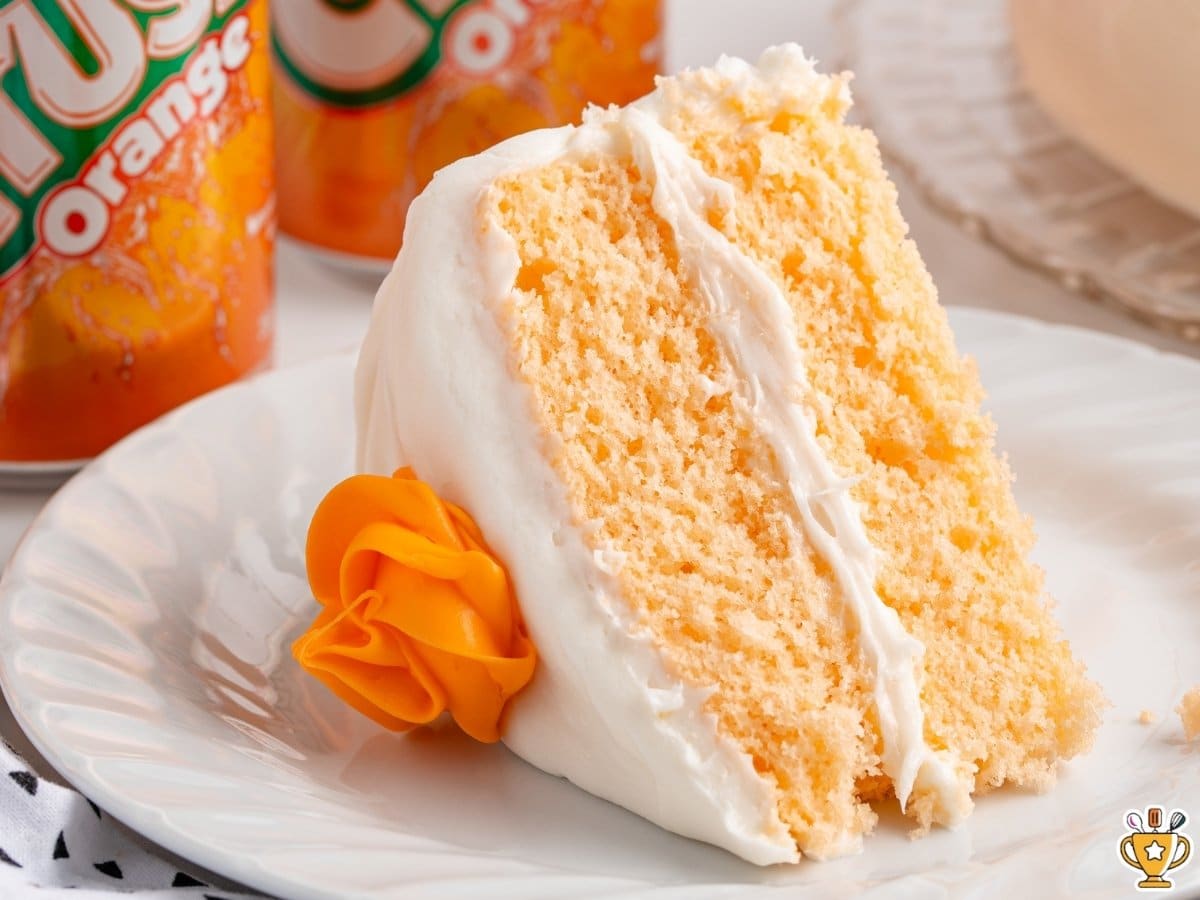
Orange Crush Cake

This orange crush cake uses just two ingredients to create a light, fluffy cake with a soft crumb and bright citrus flavor. The carbonation from the soda helps the cake rise, so there’s no need for eggs or oil. Mix, pour, and bake for a simple dessert that turns out consistently when you follow a few key steps.
Jump to RecipeTable of Contents


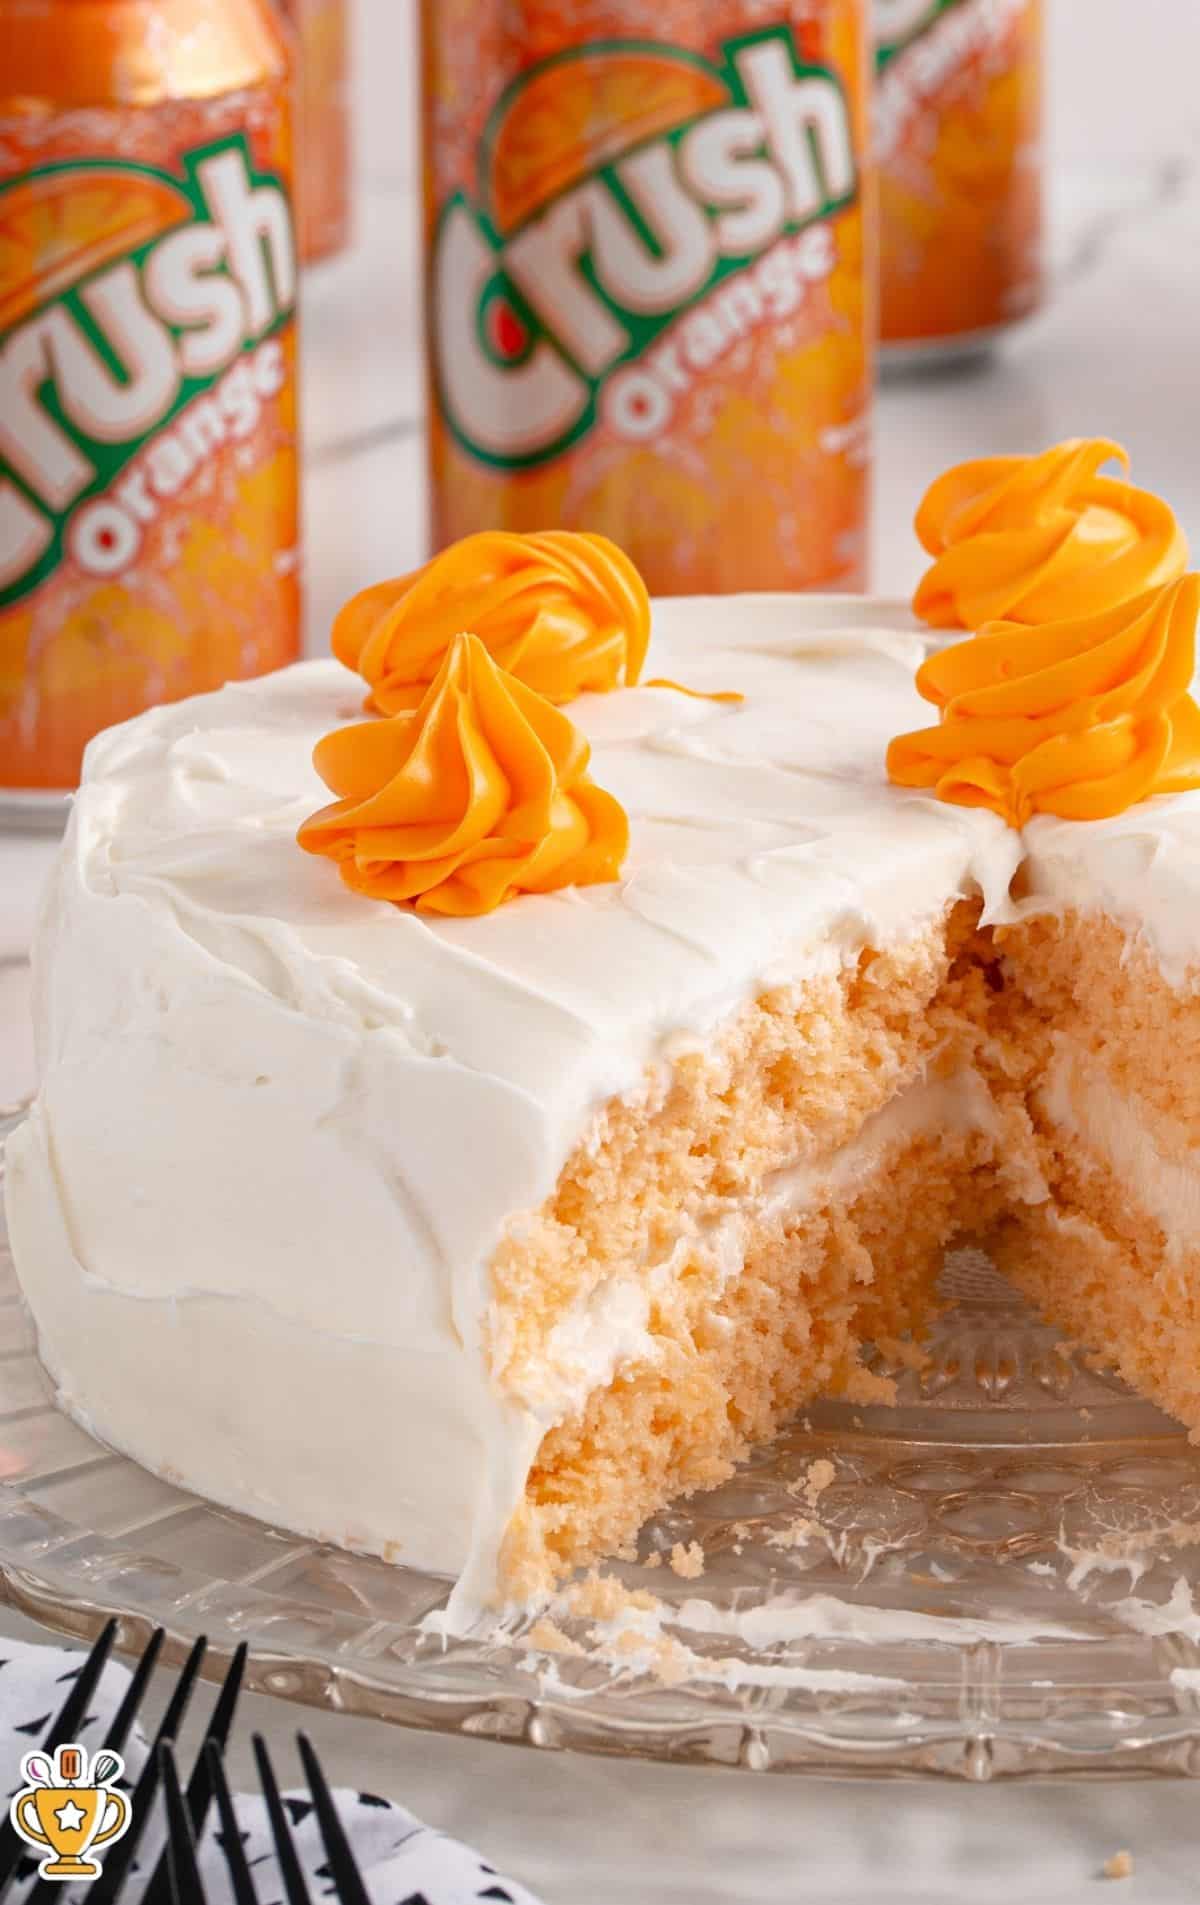
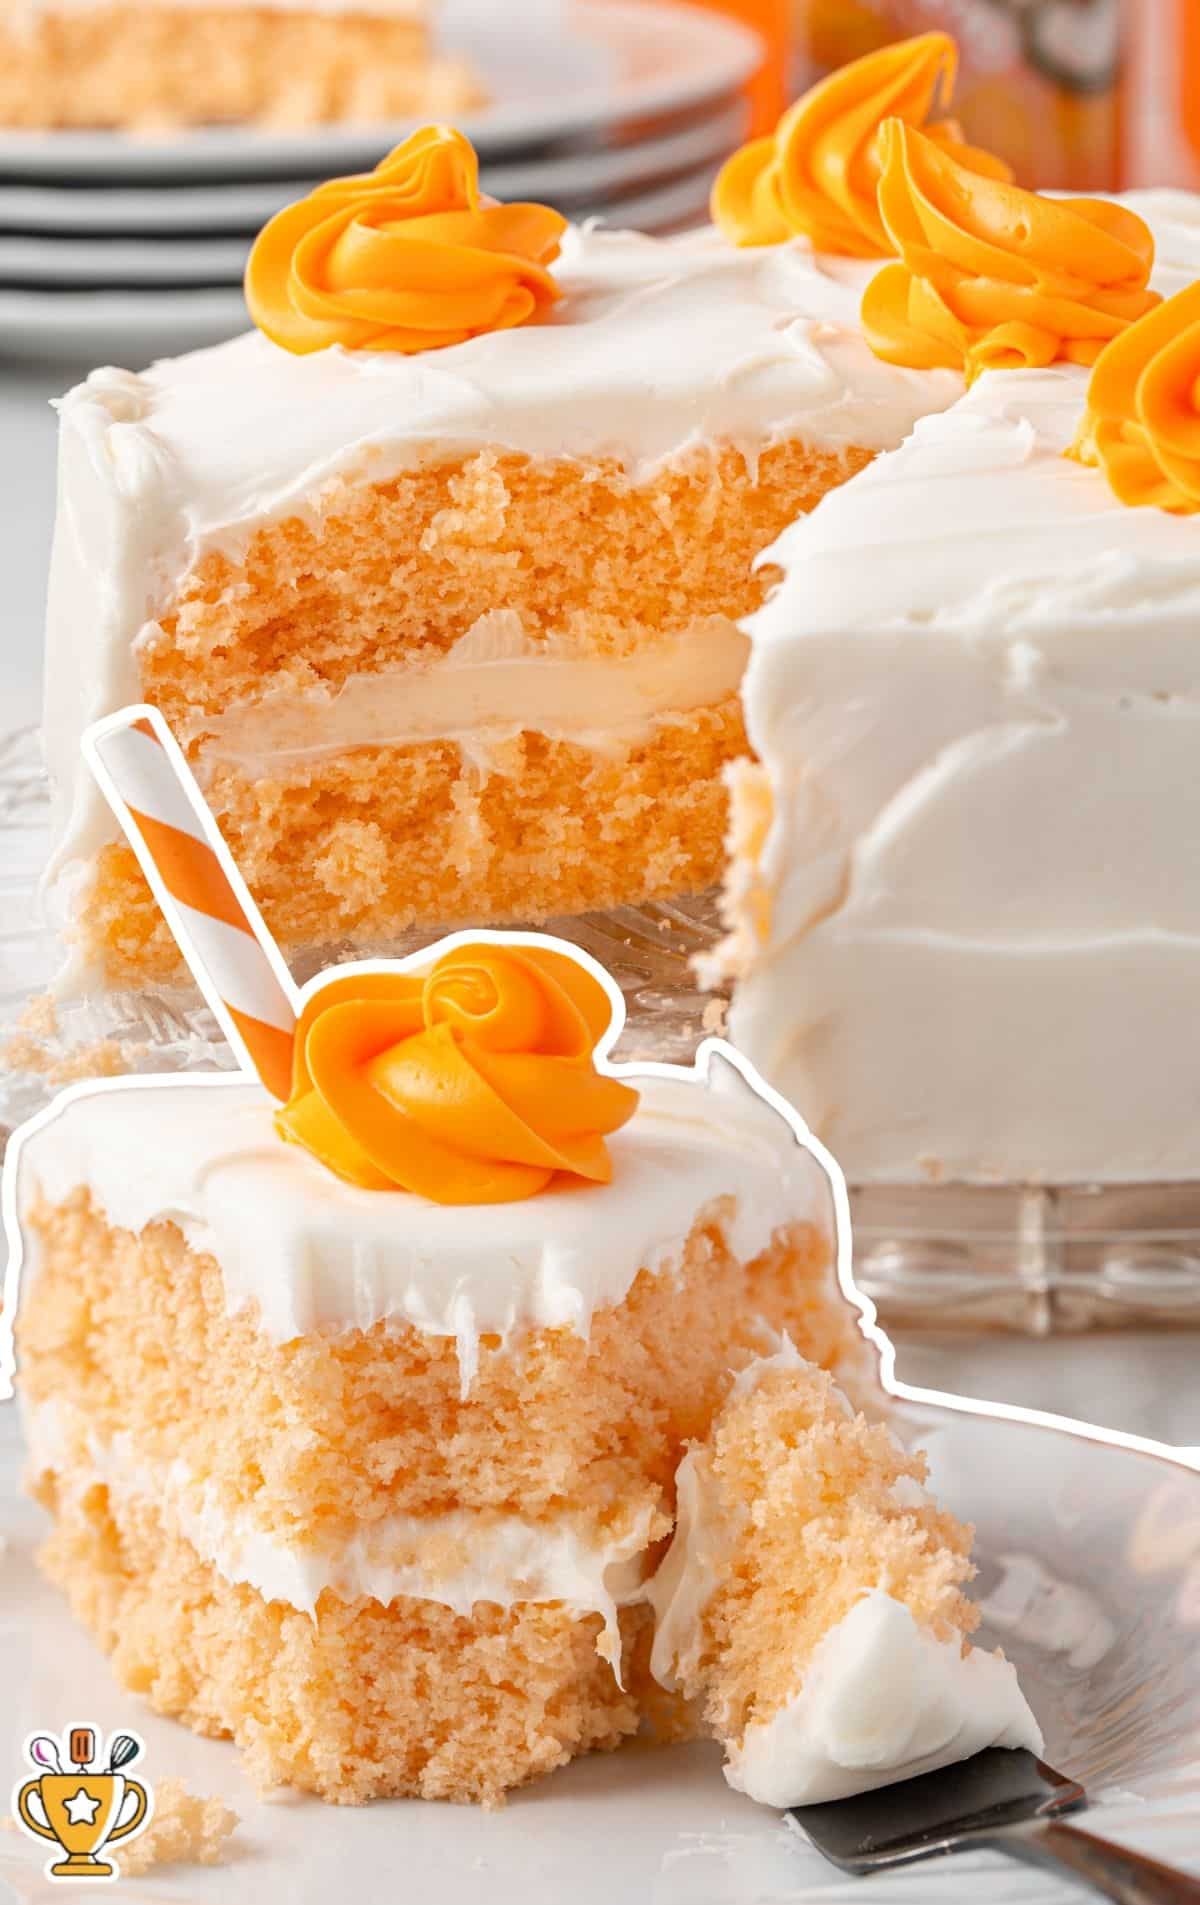
Orange Crush cake uses a box of cake mix and a can of orange soda to create a light, fluffy cake with a clear citrus flavor that actually comes through.
The soda replaces the usual oil and eggs, so the batter comes together quickly and bakes up soft and tender without extra steps. It’s simple, but there are a few small details that make the difference between a cake that’s airy and one that turns out flat or dry (don't worry, I'll provide all the tips).
This is a good option when you need something quick or don’t want to pull out a long ingredient list. Pour, mix, bake, and you’re done.
Before You Start (Read This First)
Soda cakes are simple to make, but they only turn out light & fluffy if you get a few critical things right from the start.
- Use regular Orange Crush or another full-sugar orange soda. Diet soda won’t give you the same lift or moisture, and the texture can turn out flat.
- Make sure the soda is freshly opened. If it’s been sitting out and lost its fizz, the cake won’t rise as well - or at all. It's also best to use it when it's still room temperature - not straight out of the fridge.
- Mix just until the batter is smooth. It doesn’t need to be perfect. Overmixing knocks out the bubbles that help the cake stay light.
- Once the batter is mixed, get it into the pan and into the oven right away. Letting it sit gives those bubbles time to disappear.
- Grease your pan well or line it if needed. This cake is soft and can stick if the pan isn’t prepped properly.
Ingredients For Orange Soda Cake
You'll need:
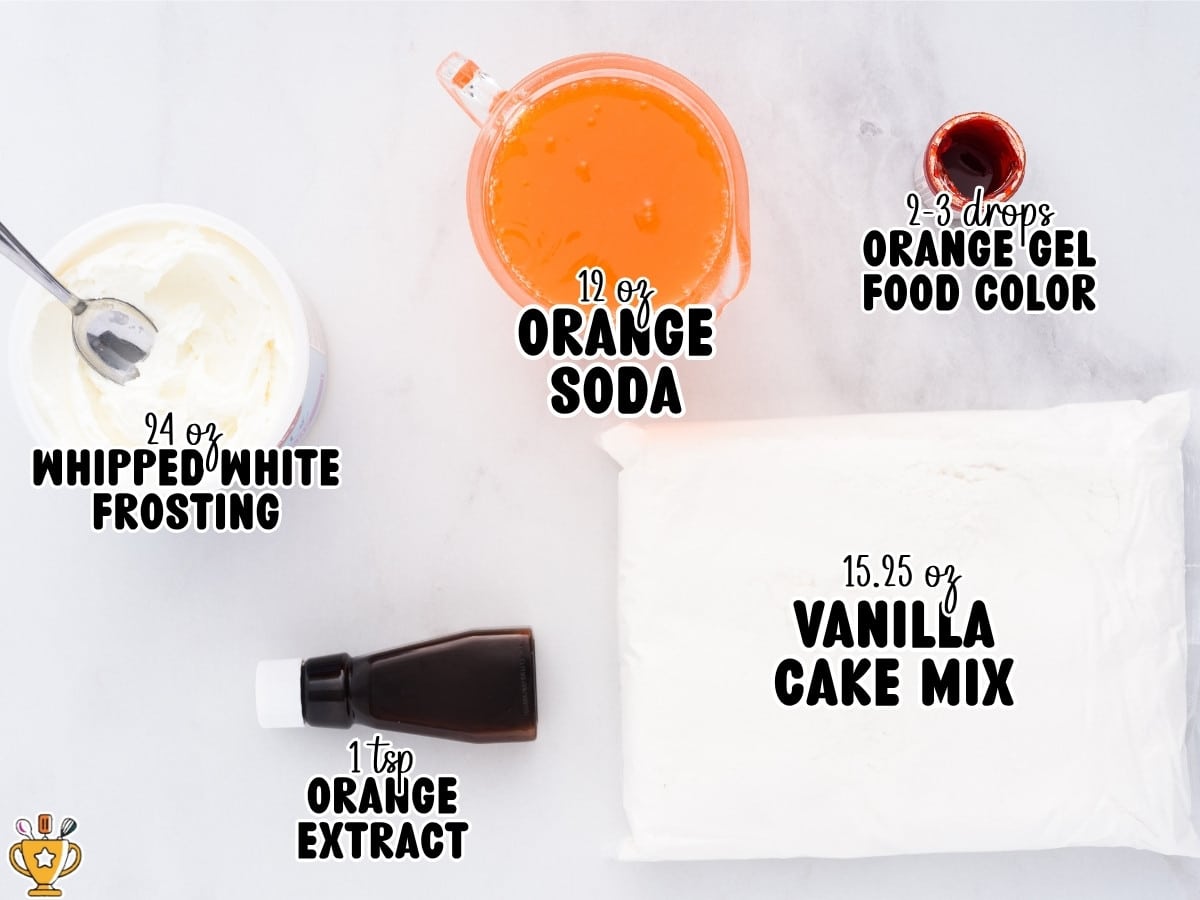
- 15.25 ounces vanilla cake mix
- 12 ounces orange soda - room temperature, freshly opened
- 1 teaspoon pure orange extract
- 2 containers of ready-made whipped white frosting
Optional:
- 2 to 3 drops of orange gel food color to tint the frosting (this won't affect the final taste or texture, but gives a pretty orange hue to the white frosting)
What To Watch For When Making Orange Soda Cake
WHEN MAKING THE BATTER
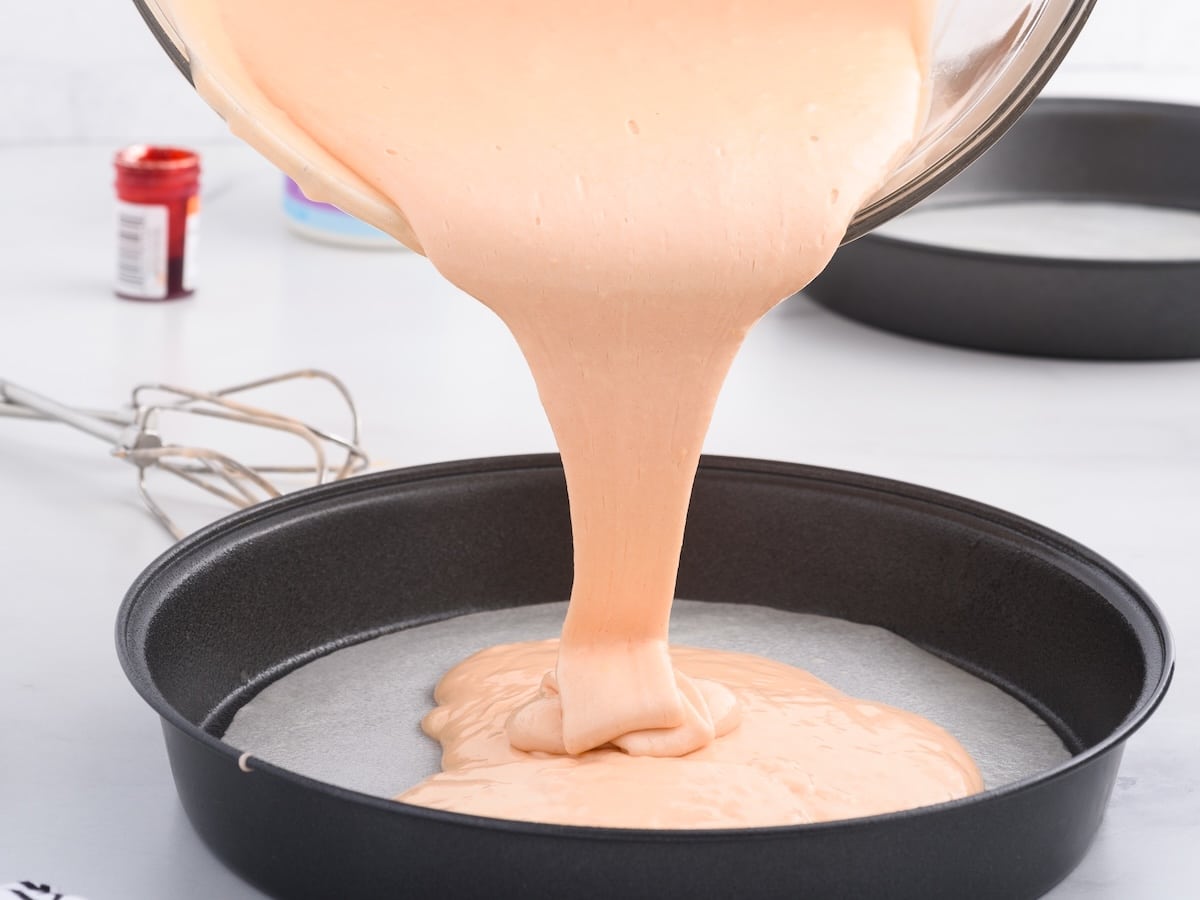
The batter will look lighter and slightly foamy from the soda. It’s thinner than a typical cake batter, and that’s exactly what you want.
Mix just until everything is combined and smooth. If you keep going, the cake can bake up dense instead of light. Don't mix for any longer than about 90 seconds.
Critical: Once mixed, get it into the pan and into the oven right away. Waiting too long lets the carbonation fade, which affects how well the cake rises.
WHEN BAKING THE CAKES
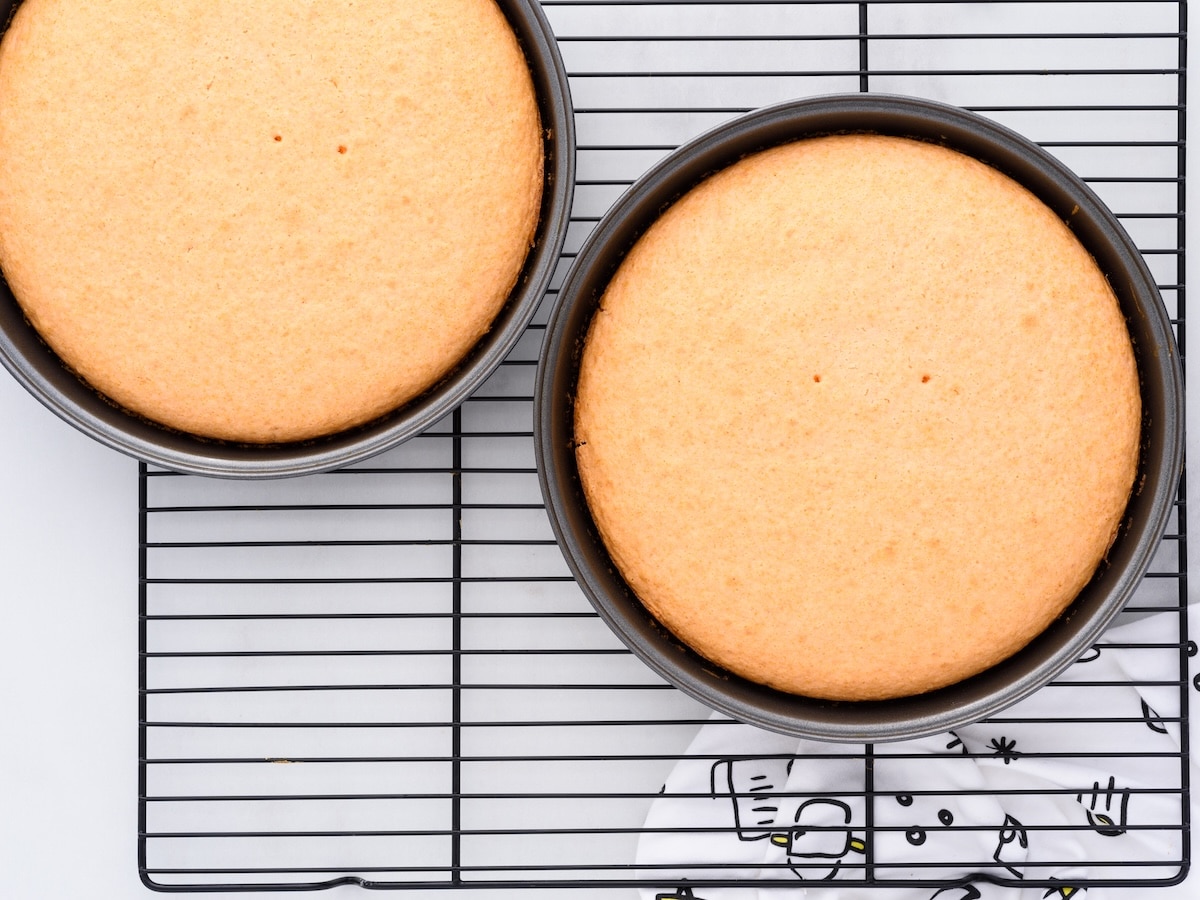
Bake on the center racks. The cake is done when the top is set, and a toothpick comes out with a few soft crumbs.
If it comes out wet, it needs more time, but waiting for a clean toothpick might mean your cake is dry.
WHEN DECORATING THE CAKES
Let the cake cool completely before frosting. If it’s even a little warm, the frosting will melt and slide.
Trim your cake domes down if needed to make them flat on top. This really gives your cake a beautifully finished look and prevents the cakes from cracking when stacked.
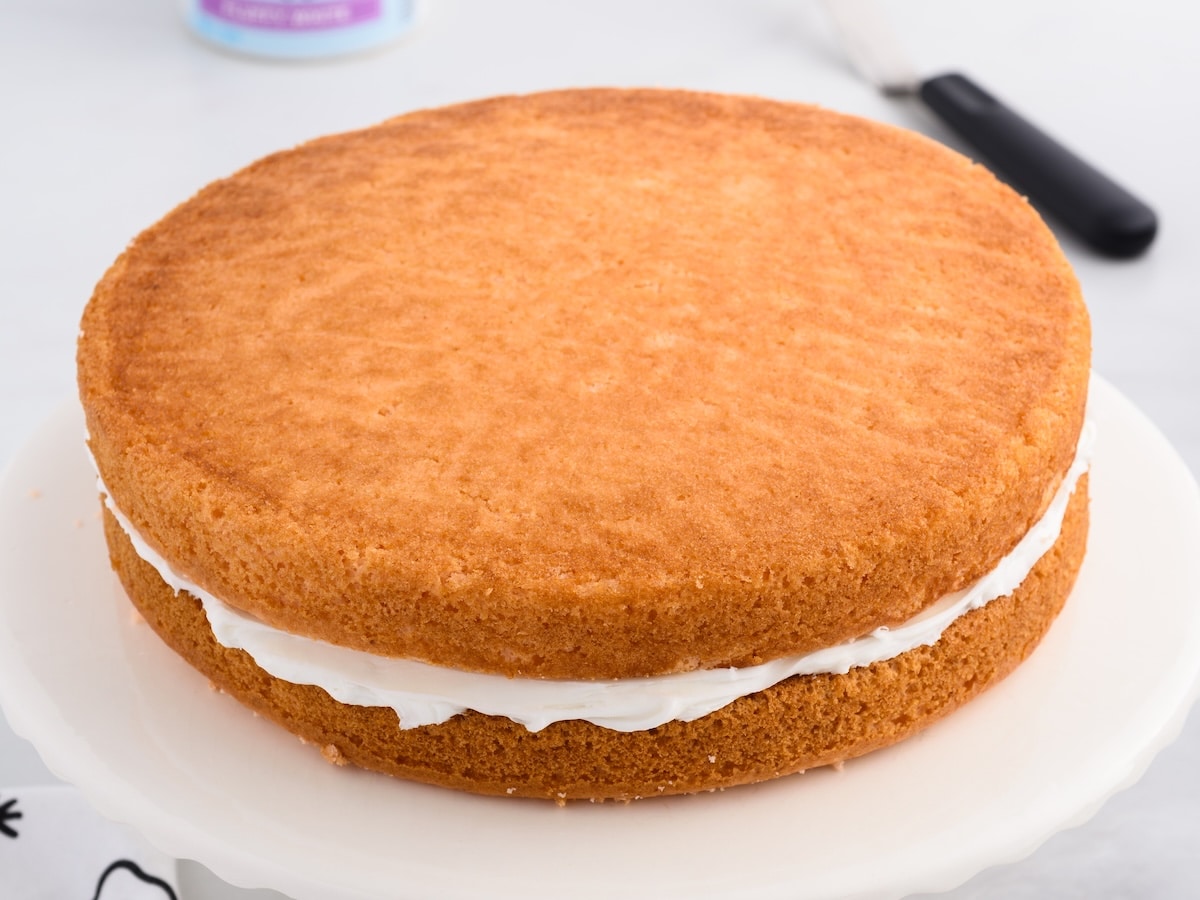
If your whipped frosting gets a bit warm, set it in the fridge for five to ten minutes. Warm store-bought frosting is notoriously slippery when it's warm, so cooling it down again will help it spread thick and make pretty layers.
I always prefer an offset spatula for spreading frosting. If you don't have one, a butter knife, a bench scraper, or even the back of a spoon will do the trick.
Storage
On The Counter - Once the cake is completely cooled, cover it tightly so it doesn’t dry out. You can keep it at room temperature for up to 2 days, but the frosting will keep the best texture in the fridge.
In the Fridge - For longer storage, refrigerate it covered for up to 4–5 days. The texture will stay soft, but let it sit at room temperature for a bit before serving so it’s not cold and firm.
Make Ahead - If you’re making it ahead, you can bake the cake a day in advance and frost it the next day. This actually makes it easier to frost since the cake is fully set.
In the Freeze - To freeze, wrap the unfrosted cake tightly in plastic wrap, then add a layer of foil. Freeze for up to 2 months. Thaw at room temperature before frosting and serving.
I don't recommend freezing the decorated cake, so eat this one up fresh.
More Recipes That Use A Cake Mix
If you like how this soda cake comes together with just a few ingredients, these all use cake mix as the base and keep things simple without sacrificing texture.
Strawberry Dump Cake - Soft, jammy strawberry base with a buttery topping that bakes up golden. No mixing bowls, just layer and bake.
Peach Dump Cake - Warm, syrupy peaches with a crisp, slightly crumbly top. This one is especially forgiving, which makes it great for busy days.
Cake Mix Cookies - Only a few ingredients and ready fast. Soft, chewy, and hard to mess up, even if you’re not paying full attention.
Lemon Dump Cake - Bright and tangy with a soft center and lightly crisp top. Good if you want something less sweet but still simple.
Chocolate Dump Cake - More like a warm, scoopable dessert than a sliceable cake. Fudgy underneath with a soft cake layer on top.


Orange Crush Cake
This orange crush cake uses just two ingredients to create a light, fluffy cake with a soft crumb and bright citrus flavor. The carbonation from the soda helps the cake rise, so there’s no need for eggs or oil. Mix, pour, and bake for a simple dessert that turns out consistently when you follow a few key steps.
Did you try this recipe?Let our readers know how it turned out by Leaving a Review!
Ingredients
- 15.25 ounces vanilla cake mix
- 12 ounces orange soda ((room temperature, freshly opened))
- 1 teaspoon pure orange extract
- 24 ounces whipped white frosting (two 12-ounce containers)
Optional
- 2 to 3 drops orange gel food color
DIRECTIONS
- Preheat the oven to 350°F. Line two 9-inch round cake pans with parchment circles, and lightly spray with baking spray. Set them aside.
- Add the cake mix to a medium-sized mixing bowl.
- Pour the room temperature orange soda over the cake mix.
- Add the orange extract.
- Use a handheld mixer on medium-low speed and mix for 1 to 1½ minutes until completely combined and smooth. Don't overmix!
- Evenly divide the cake batter between the 2 prepared cake pans.
- Bake for 22 to 24 minutes, or until a toothpick inserted comes away clean.
- Allow the cakes to completely cool.
- Once the cakes have cooled, place half of 1 of the containers of whipped frosting into a small mixing bowl. Add 2 to 3 drops of the orange gel food color. Stir well until the color is uniform. Set it aside.
- Remove 1 of the cakes from the cake pan and place on a serving dish.
- Spoon the remaining ½ of the opened frosting container onto the cake. Using a silicone spatula or an offset spatula, spread the frosting evenly over the top of the cake.
- Carefully place the second cake layer on top of the bottom layer.
- Using a silicone spatula or an offset spatula, evenly spread the second container of whipped frosting over the top and sides of the cake.
- Using a decorator’s bag fitted with a star-shaped decorator’s tip (or a quart-size Ziploc with a small corner of the bag snipped off), hold the bag ½ inch above the surface of the outer edge of the cake. Using even pressure, squeeze the bag in a circle to form a small rose shape. Repeat the pattern around the cake.
Notes
- You can use different pan sizes for this cake, or even make cupcakes instead. Use the baking times on your cake mix box as a guide, however, begin checking for doneness early so you don't overbake them.
Nutrition
Calories: 385kcal | Carbohydrates: 72g | Protein: 1g | Fat: 11g | Saturated Fat: 2g | Polyunsaturated Fat: 5g | Monounsaturated Fat: 3g | Trans Fat: 0.2g | Sodium: 357mg | Potassium: 42mg | Fiber: 0.4g | Sugar: 55g | Calcium: 82mg | Iron: 1mg
HAVE YOU TRIED THIS RECIPE?Follow me on Pinterest @bestblogrecipes


Comments
Kylie says
This cake is amazing!
Sarah says
My hubby loved this cake! He said it was his new favorite!!