
Last updated on
No-Churn Birthday Cake Ice Cream

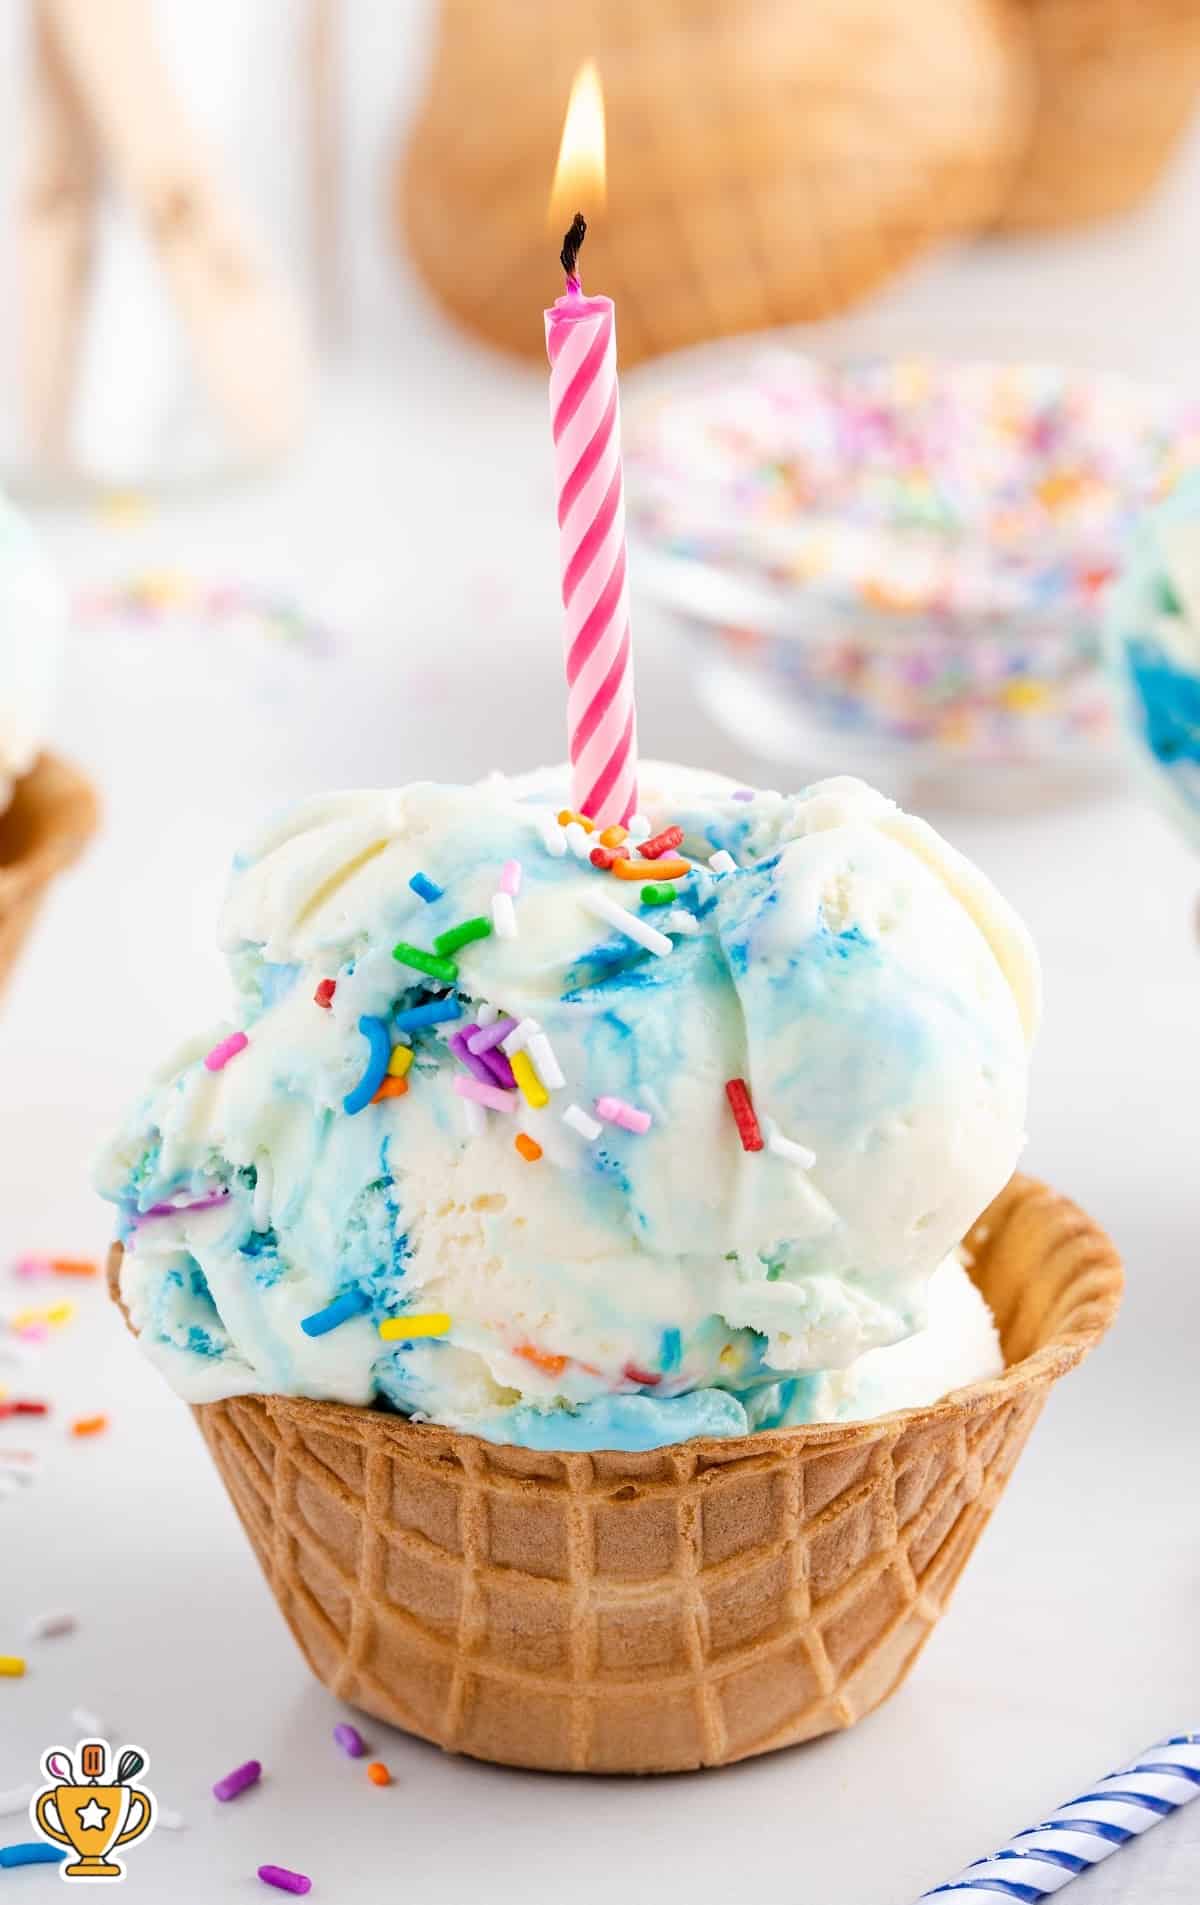
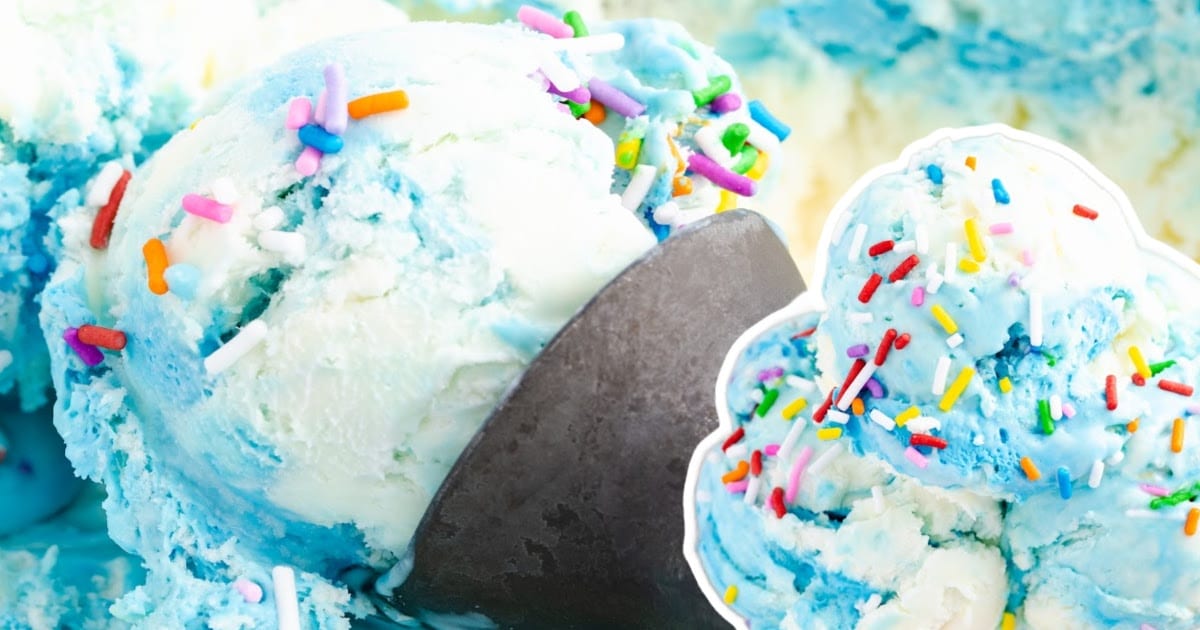
This no churn birthday cake ice cream is sweet, creamy, and packed with sprinkles and blue frosting. You can make it fast with just five ingredients and no ice cream maker.
Jump to RecipeTable of Contents


This no-churn birthday cake ice cream is sweet, creamy, and packed with sprinkles and cake mix flavor. You don’t need an ice cream maker or any fancy tools. It only takes fifteen minutes to prep and makes any day feel like a party. Simply chill and serve! Kids and adults will both go back for more.
This recipe is easy to make, just follow the guide below. We included step-by-step photos and helpful directions. You’ll also find pro tips, tricks, and answers to the most frequently asked questions.

More Recipes ⭐ No Churn Cotton Candy Ice Cream | Best Ice Cream Recipes | Best Birthday Recipes
You can make this no churn birthday cake ice cream in just fifteen minutes using five easy ingredients. Blue frosting and sprinkles make every scoop sweet and colorful.
Serve it at birthday parties, holidays, or any fun get-together. Kids and adults both love the creamy texture and cake-inspired flavor.
Ingredients
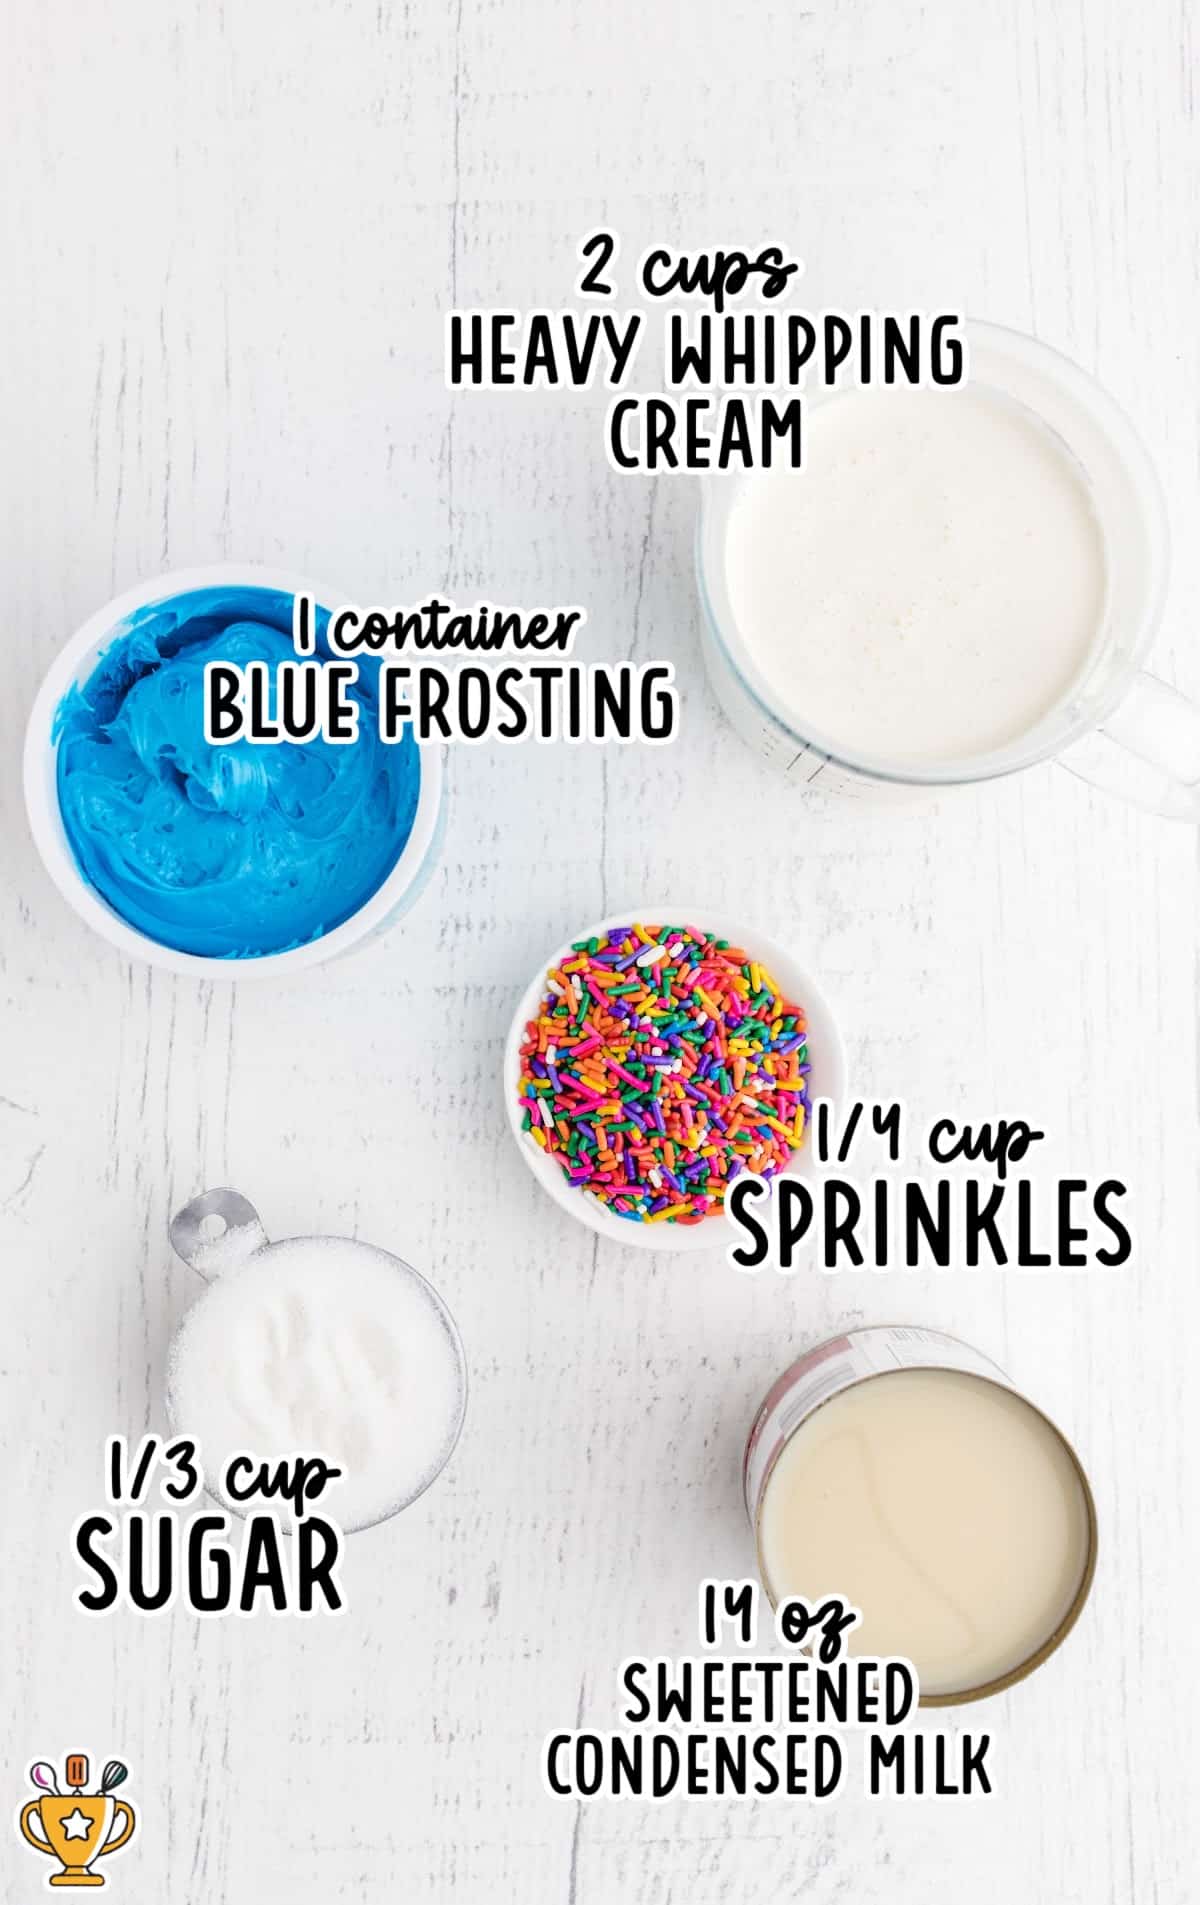
What you'll need to make this birthday cake flavored ice cream:
- 2 cups of cold heavy whipping cream
- 14-ounce can of sweetened condensed milk
- ⅓ cup of granulated sugar
- 1 tub of blue frosting
- ¼ cup of birthday sprinkles
Substitutions and Additions
Scoop up more fun by personalizing your homemade birthday cake ice cream recipe with easy swaps and tasty mix-ins! Try these sweet additions:
- Substitute Sprinkles: Use rainbow jimmies, chocolate sprinkles, or confetti quins to change up the color and crunch.
- Add Crushed Cookies: Mix in crushed Oreos or golden sandwich cookies for an extra sweet and creamy surprise.
- Add Chopped Candy: Stir in chopped peanut butter cups or mini chocolate bars for a candy-loaded version.
- Substitute Sweetened Condensed Milk: Use caramel-flavored condensed milk for a richer, sweeter taste.
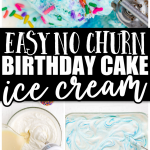
How to Make No-Churn Birthday Cake Ice Cream
Follow along with our step-by-step photos, easy instructions, and helpful tips and tricks listed below. You’ll mix it up fast and fun. Grab your sprinkles, and let’s get started!
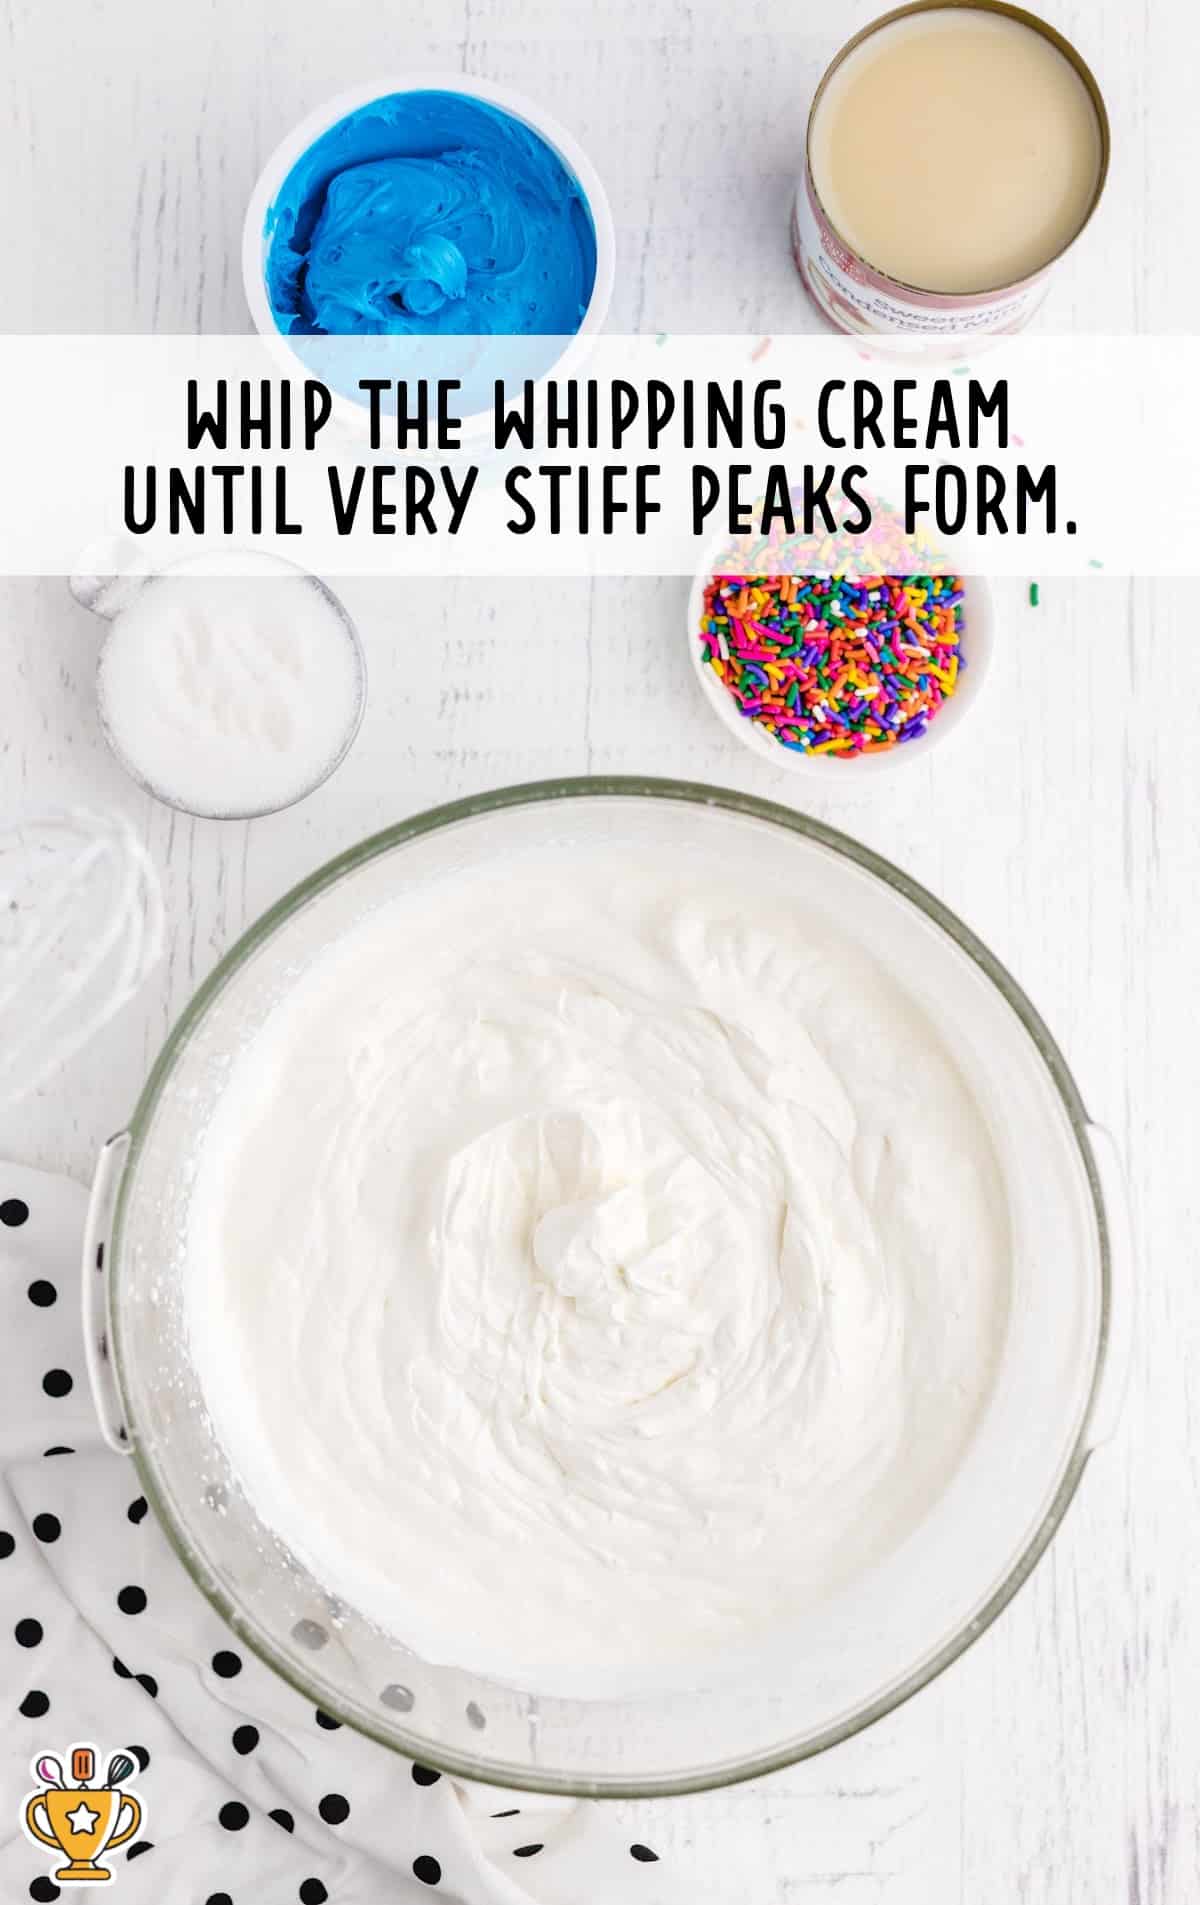
FIRST STEP: Use an electric mixer to whisk the heavy cream until very stiff peaks form. You should start on a low setting and increase to medium.
Pro Tip
Chill your condensed milk, heavy whipping cream, and loaf tin in the fridge before you start – it will make everything freeze easier.
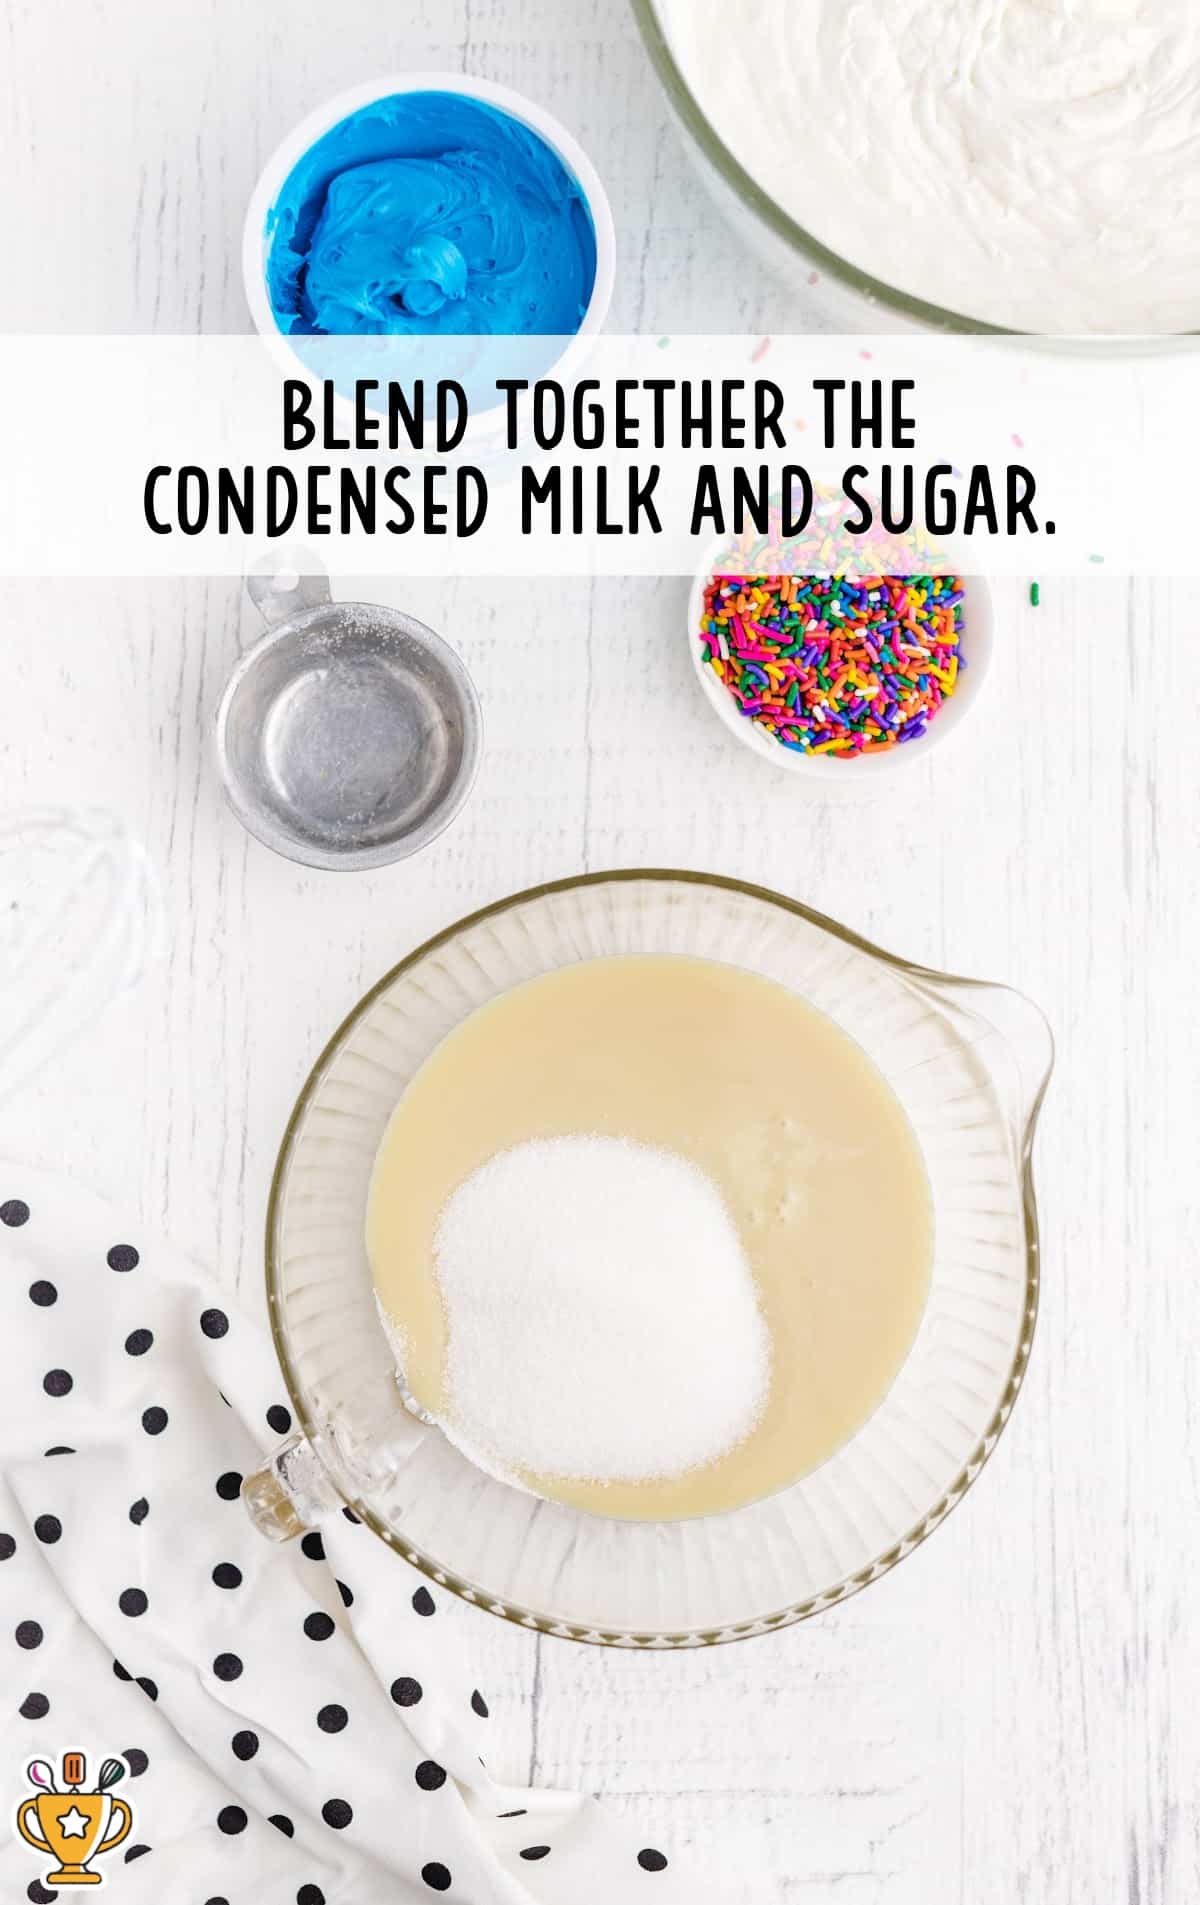
SECOND STEP: In a medium-sized bowl, combine the condensed milk and sugar.
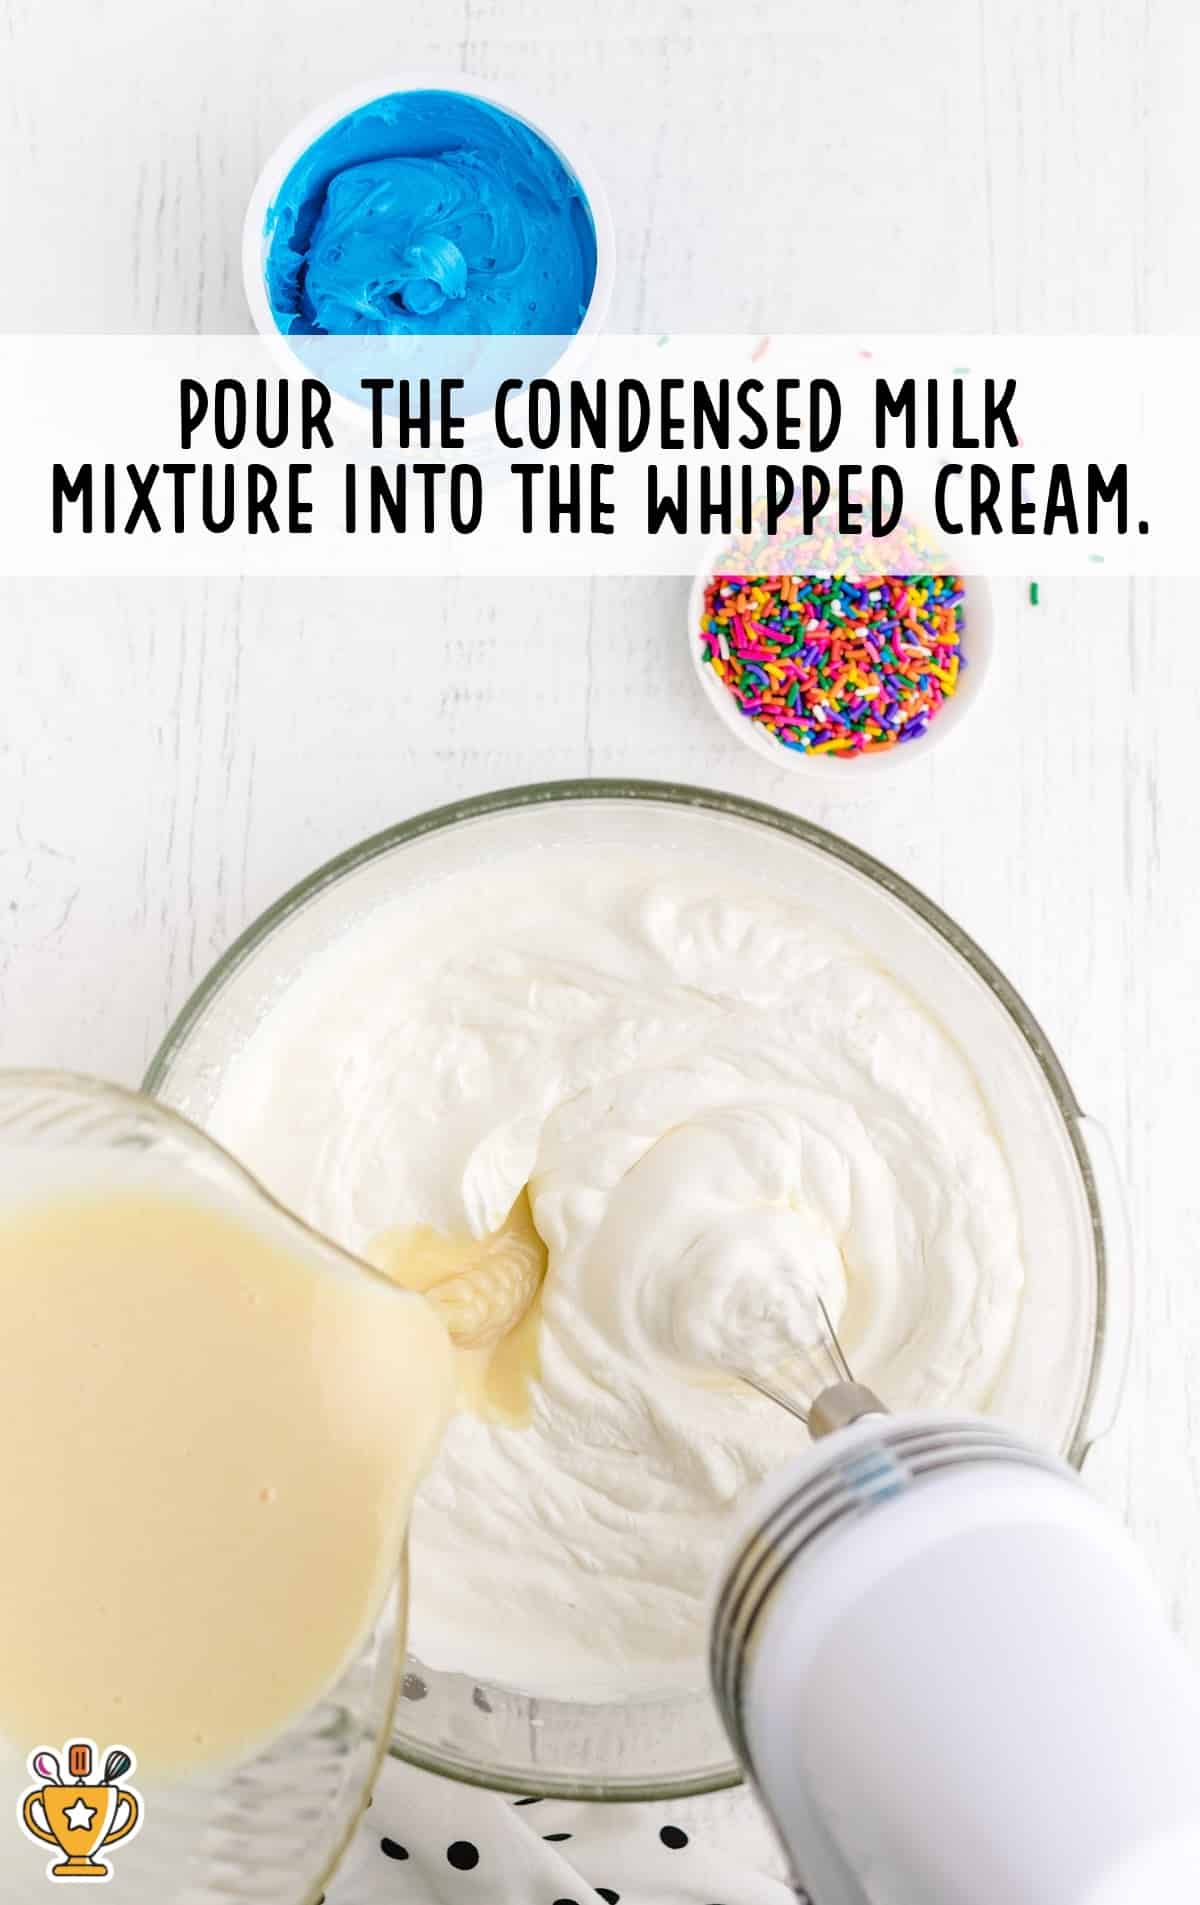
THIRD STEP: Once well mixed, pour the condensed milk mixture into the whipped cream while whipping continuously.
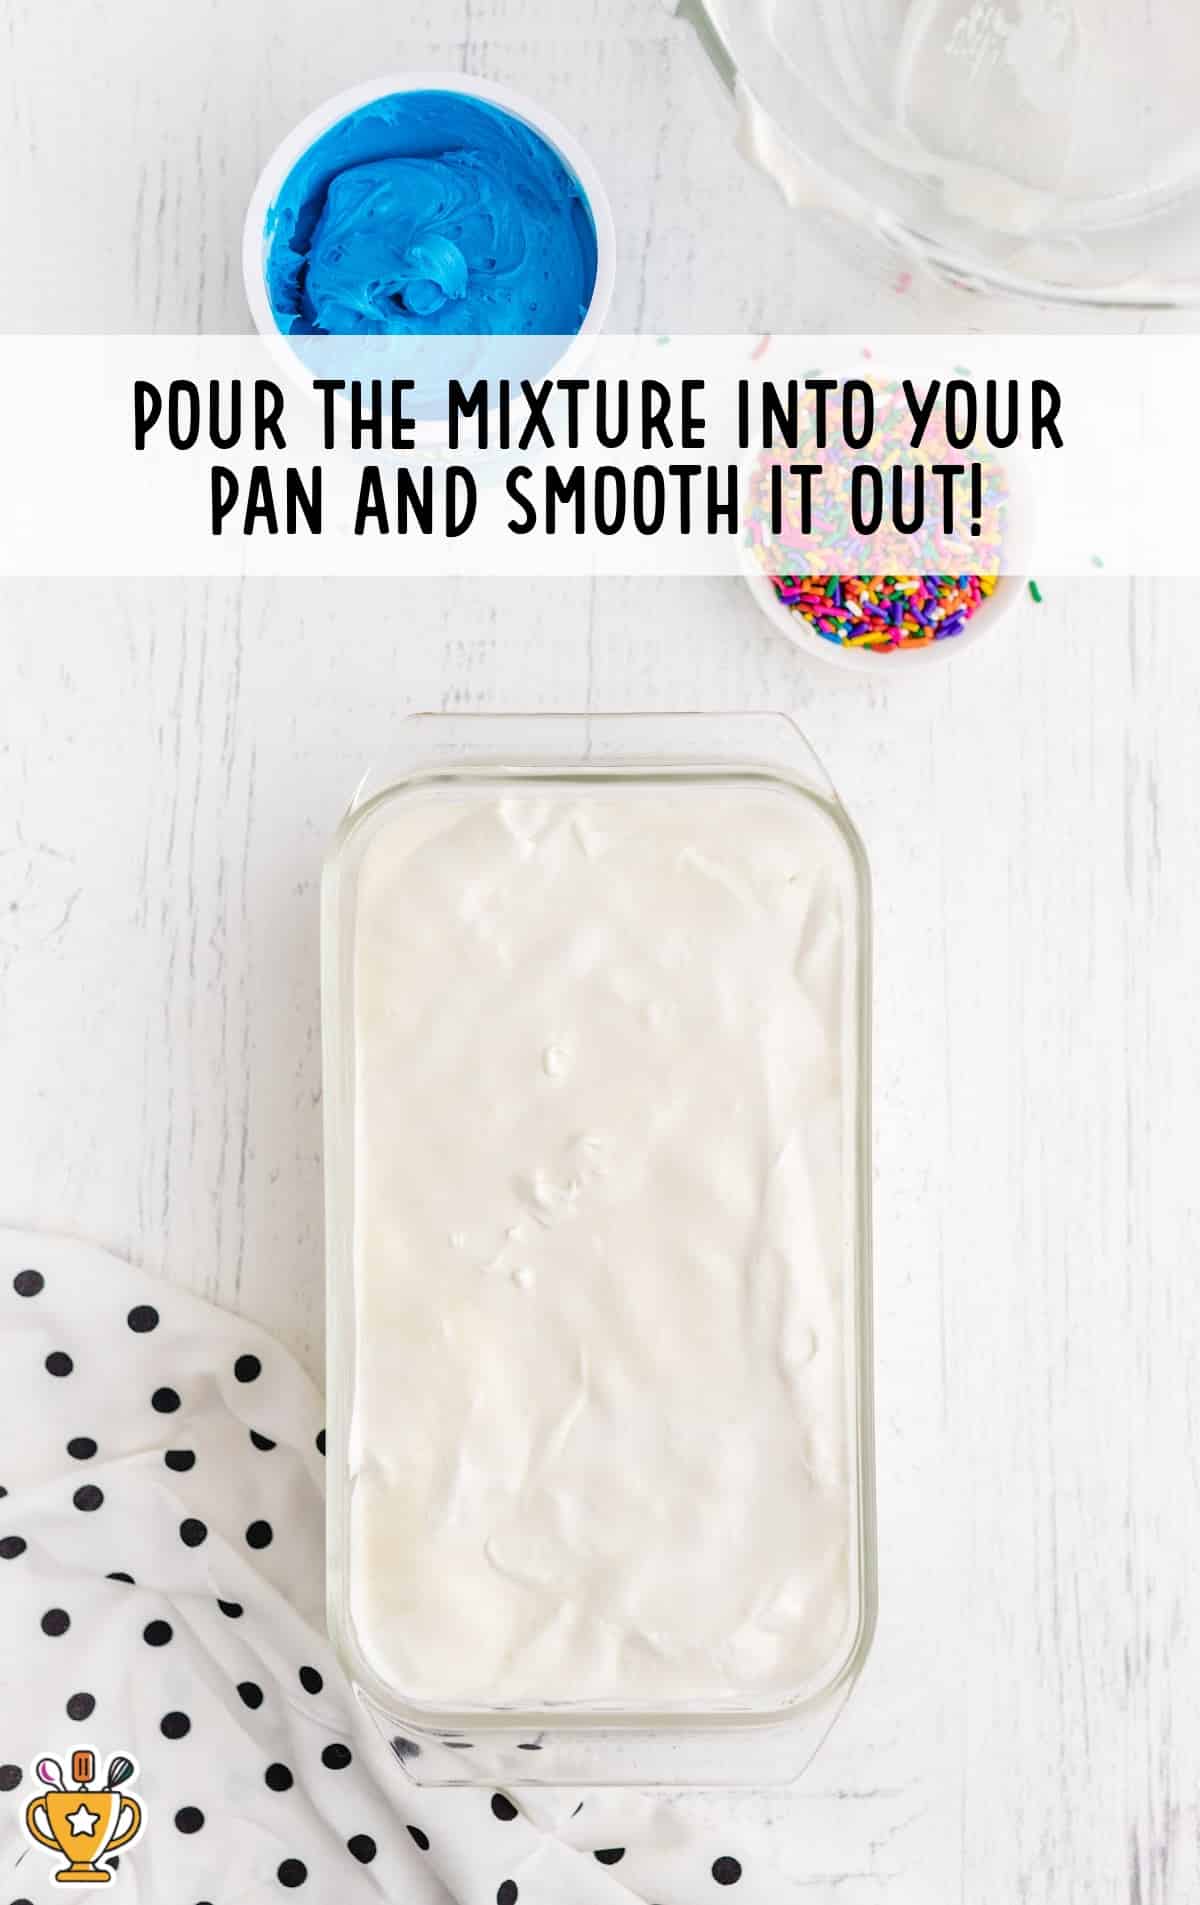
FOURTH STEP: Pour the ice cream mixture into a 9×5-inch loaf pan lined with parchment paper and smooth it out.
Pro Tip
Lining the loaf pan with parchment paper prior to filling will make cleaning up much easier.
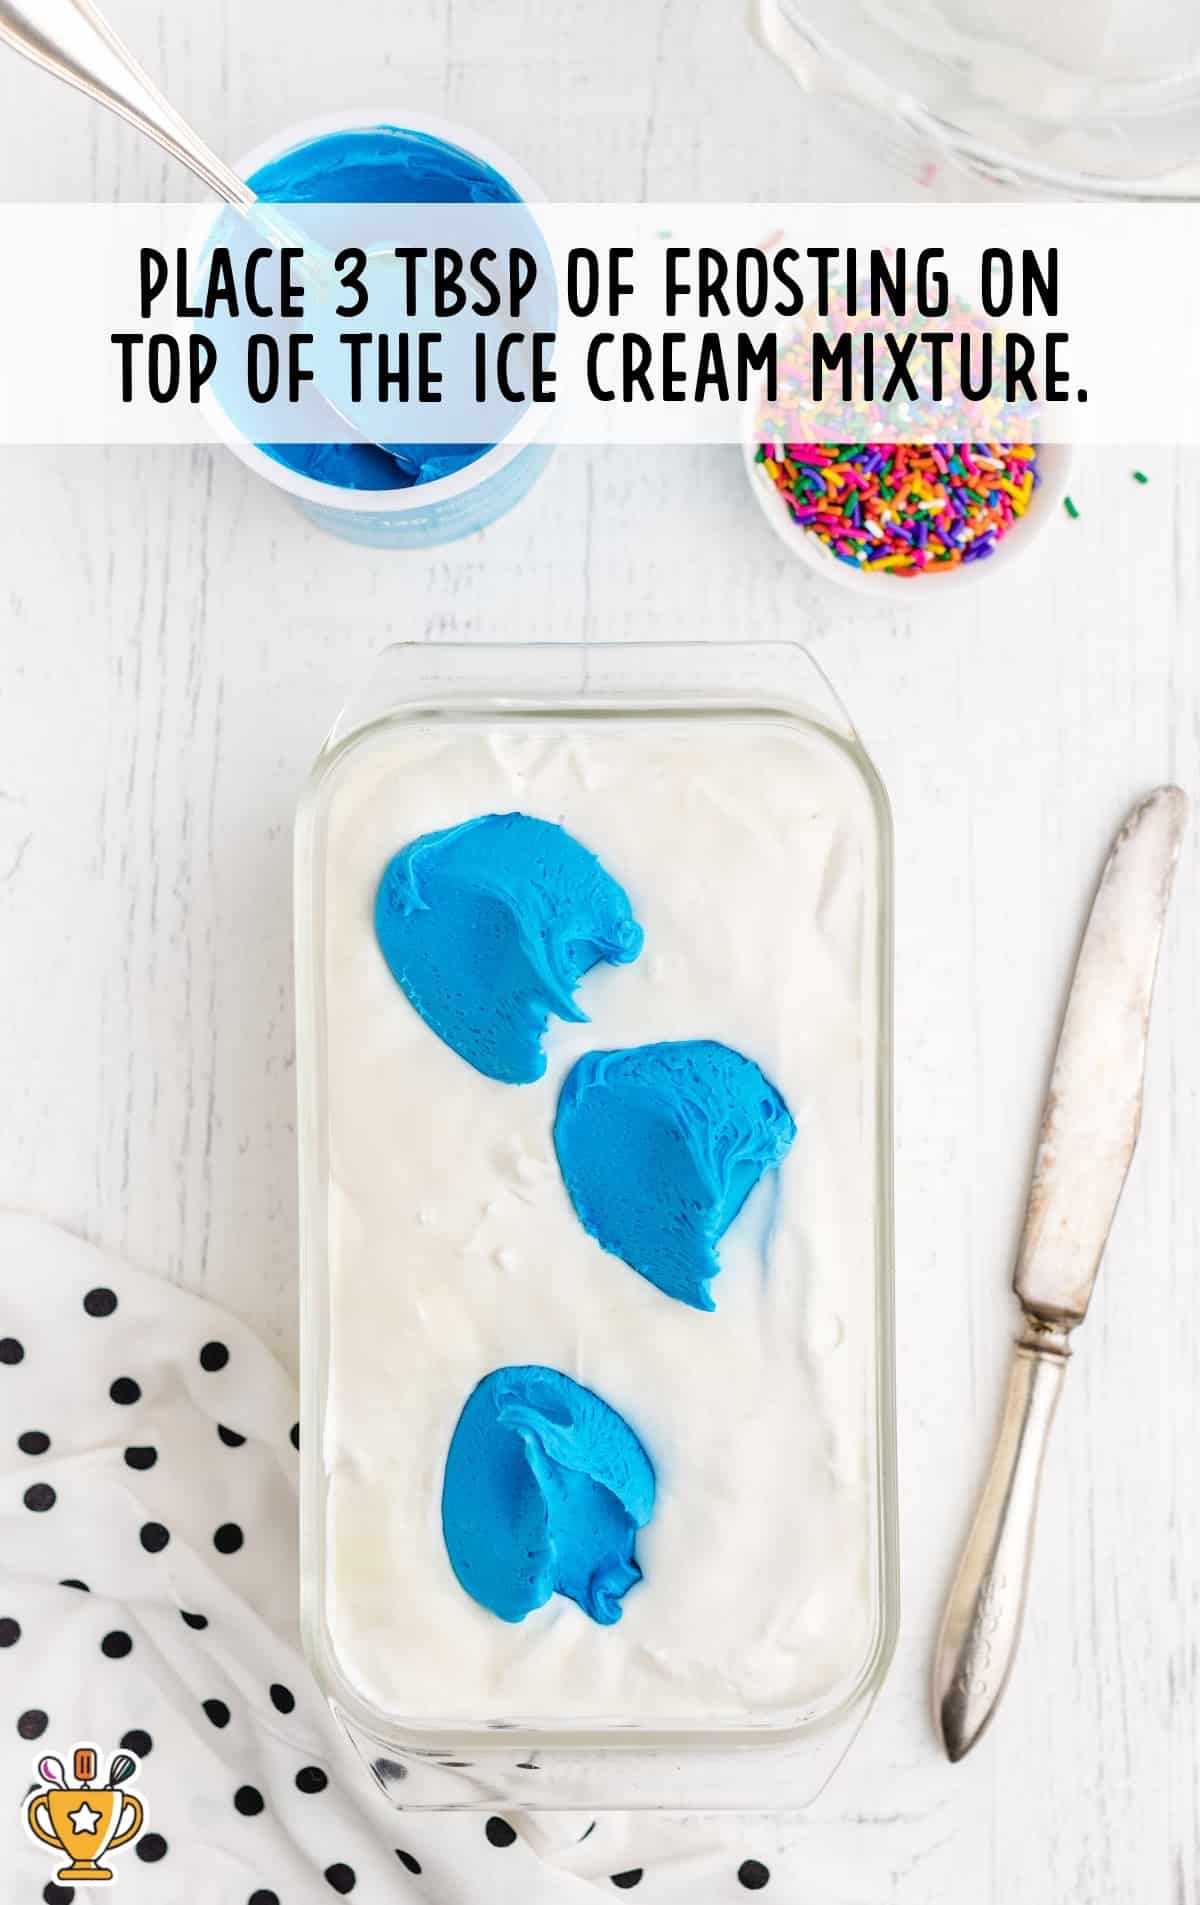
FIFTH STEP: Dollop a few scoops of frosting and some sprinkles on top of the ice cream mixture.
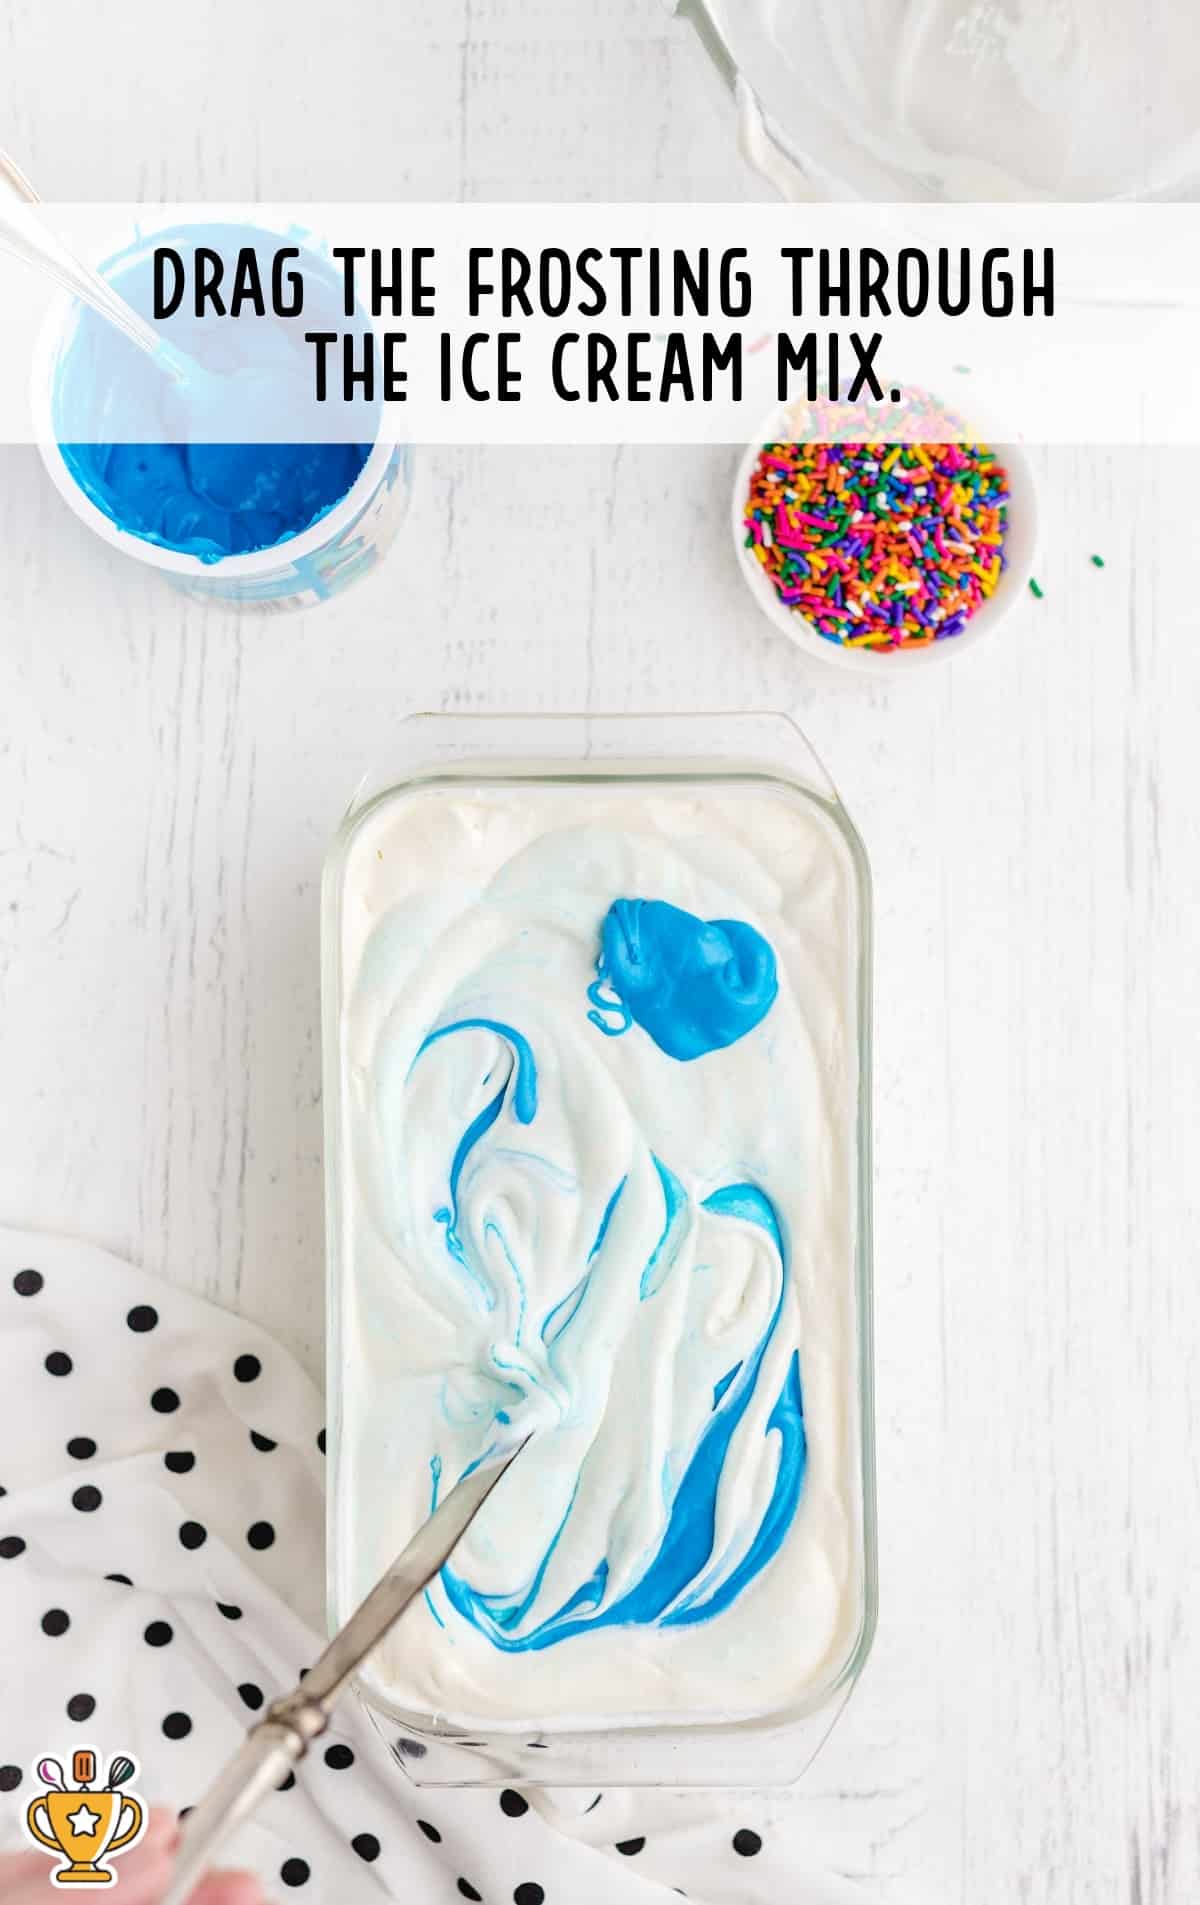
SIXTH STEP: Use a knife to swirl the ice cream mixture in. Repeat with more frosting and sprinkles until you’re pleased with the look.
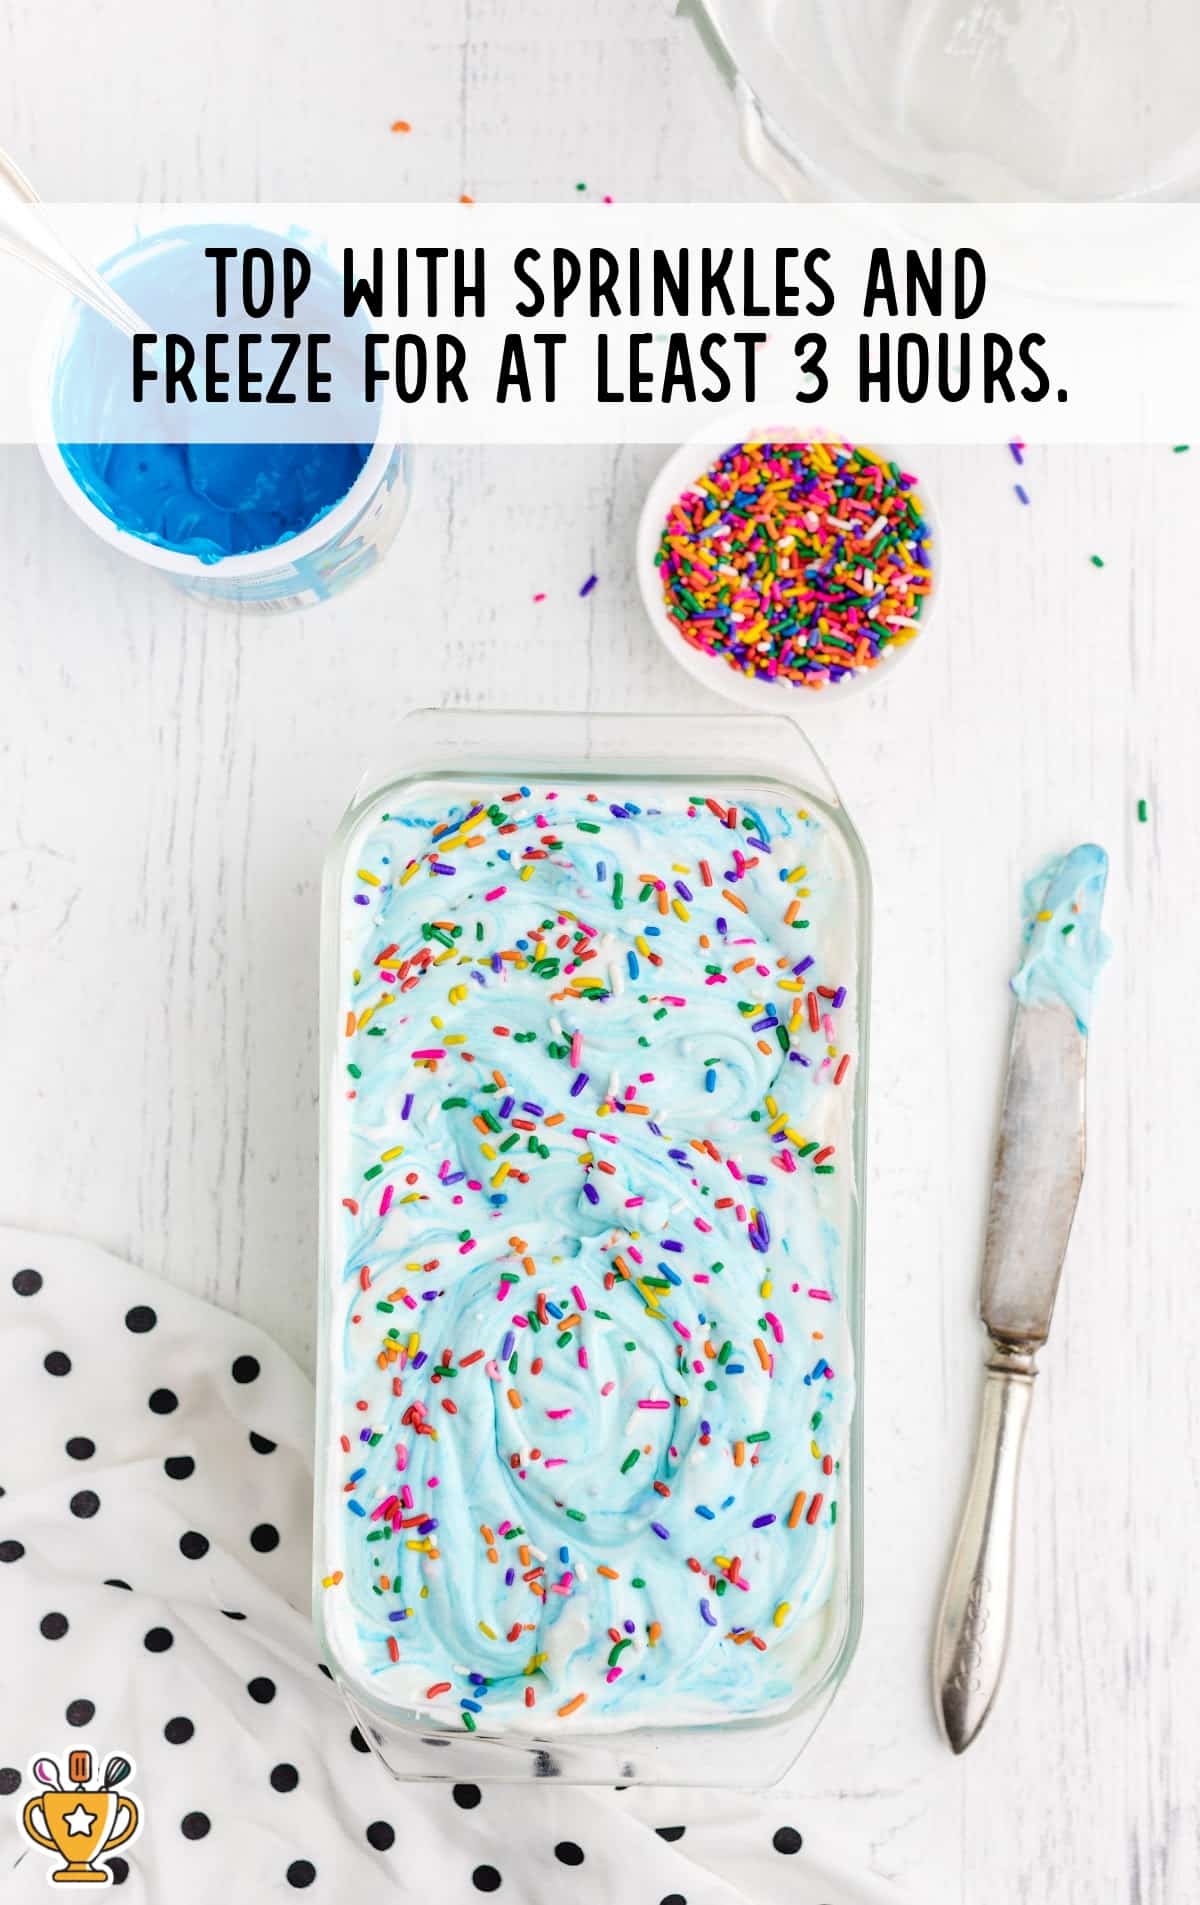
SEVENTH STEP: Add extra sprinkles on top. Cover with plastic wrap and freeze for three hours or until set.
Pro Tip
Higher fat content ice cream melts quicker than the lower fat ice creams, so have those cups or cones ready.
How To Serve Birthday Ice Cream
You can serve this no churn birthday cake ice cream all year long! It’s perfect for birthdays, holidays, or any sweet celebration.
- Serve at birthday parties: Kids go crazy for the cake mix and sprinkles. Pair it with white chocolate chip cookies or funfetti cupcakes for extra fun.
- Serve during summer cookouts: Cool off with a cold scoop after burgers and fried corn on the cob. Add rice krispie treats for a chewy crunch.
- Serve at holiday gatherings: Bright colors and cake flavor bring cheer to Easter or Christmas dessert tables. Try it with Milky Way brownies or hot fudge sundae cake.
Why You'll Love This Ice Cream Birthday Cake Recipe
This birthday cake ice cream recipe is a reader favorite because it’s fast, festive, and fun to make at home. It’s great for all ages and works for every celebration, from backyard parties to cozy nights in.
- Party-Perfect: The sprinkles and cake mix bring the party vibe every time, no matter the day or season.
- No Special Tools: Skip the fancy machines and use a simple hand mixer or whisk to get the job done.
- Fun for Kids: Little helpers love adding sprinkles and licking the spoon while they help out in the kitchen.
- Always a Hit: Readers make it again and again because it always comes out creamy, sweet, and fun to serve.
We love how easy this recipe is, and we know it’ll bring big smiles in your kitchen too.
Recipe FAQ
Here are the most common questions readers ask when making this no churn birthday cake ice cream recipe at home.
Do I need to chill the heavy cream before whipping it?
Yes, always use cold heavy cream. It whips faster and holds stiff peaks better for creamy no churn ice cream.
When should I add the blue frosting to the mixture?
Add the blue frosting after mixing the sweetened condensed milk and sugar. Then fold in the whipped cream last.
Can I use any kind of blue frosting in this recipe?
Yes, any store-bought tub of blue frosting works. Choose your favorite brand for color and sweetness.
Do I need to whip the heavy cream before combining it with the other ingredients?
Yes, whip the heavy cream first until stiff peaks form. Then gently fold it into the frosting mixture.
Can I skip the granulated sugar if I’m using sweetened condensed milk?
No, you still need the sugar. It balances the frosting and boosts the sweet birthday cake flavor in each bite.
Should I stir the sprinkles in before freezing the ice cream?
Yes, mix the sprinkles in last before freezing. This keeps them evenly spread and helps them stay crunchy.
What kind of sprinkles should I use for this recipe?
Use birthday sprinkles or rainbow jimmies. Avoid nonpareils because they bleed color and turn the ice cream streaky.
How long do I need to freeze the ice cream before serving?
Freeze the mixture for at least three hours. For best texture, let it freeze overnight.
Can I use a hand mixer instead of a stand mixer to whip the cream?
Yes, a hand mixer works just fine. Just make sure to whip until the cream forms stiff peaks.
What size pan should I use to freeze the ice cream?
Use a loaf pan or shallow freezer-safe dish. Spread the ice cream evenly so it freezes well throughout.

Serving FAQ
Should I let the ice cream sit out before serving?
Yes, let it sit for five minutes before scooping. This softens it just enough for smooth, easy servings.
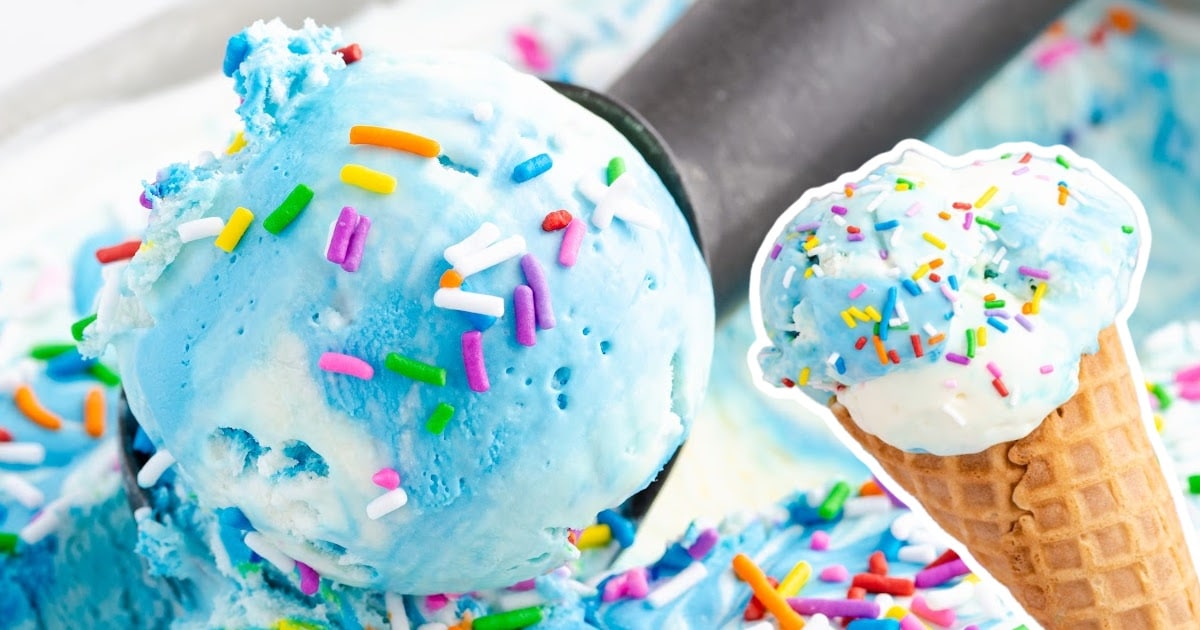
Can I serve this no churn ice cream in cones?
Yes, it scoops perfectly into cones. Kids and adults both love the birthday cake flavor with a crunchy cone.
Is this ice cream a good dessert for summer birthdays?
Yes, it’s perfect for summer birthdays. The bright colors, sweet frosting, and cold texture make it super fun and refreshing.
Can I add toppings when serving this ice cream?
Yes, try whipped cream, sprinkles, or crushed cookies. Adding toppings makes every scoop extra fun and full of texture.
Is this birthday cake ice cream fun for kids to help serve?
Yes, kids love scooping and adding toppings. Just keep napkins close—blue frosting and sprinkles can get messy fast!
Storage FAQ
Follow the directions, tips, and tricks below to keep your no churn birthday cake ice cream fresh and scoopable for days. With the right steps, you’ll enjoy every bite just as creamy and sweet as the first.
How long can I store no churn birthday cake ice cream in the freezer?
You can store this ice cream in a freezer-safe container for up to one month. Cover it tightly to prevent ice crystals.
What’s the best container to freeze this ice cream in?
Use a loaf pan or an airtight container with a lid. Spread the mixture evenly before placing it in the freezer.
Should I cover the ice cream while it freezes?
Yes, cover it with plastic wrap or foil. This helps keep the ice cream smooth and protects it from freezer burn.
Can I refreeze the ice cream after it softens?
Yes, you can refreeze it. Just return it to the freezer right after serving and keep the container sealed tight.
How long should I let the ice cream sit before scooping?
Let the ice cream sit at room temperature for five minutes. This softens it just enough for easy scooping.
Can I store the ice cream in individual portions?
Yes, freeze the ice cream in small cups with lids. It’s great for grab-and-go treats or kid-friendly servings.
No Churn Birthday Cake Ice Cream
This no churn birthday cake ice cream is sweet, creamy, and packed with sprinkles and blue frosting. You can make it fast with just five ingredients and no ice cream maker.
Did you try this recipe?Let our readers know how it turned out by Leaving a Review!
Ingredients
- 2 cups heavy whipping cream (cold)
- 14 ounces sweetened condensed milk
- ⅓ cup granulated sugar
- 1 tub blue frosting
- ¼ cup birthday sprinkles
DIRECTIONS
- In a large bowl, pour in the whipping cream and whip until very stiff peaks form.
- Using a medium-sized bowl, combine the condensed milk and sugar and blend.
- Slowly pour the condensed milk mixture into the whipped cream while whipping continually.
- Pour the ice cream mixture into a 9×5-inch loaf pan lined with parchment paper and smooth it out.
- Scoop out 3 tablespoons of frosting and place them randomly on top of the ice cream mixture.
- Using a knife, drag frosting through the ice cream mix, making a swirl pattern.
- Using a clean knife, scoop out additional frosting and smooth it on top of the ice cream.
- Continue until you’re pleased with how it looks. You can also swirl in sprinkles with the frosting as well.
- Top with sprinkles and freeze for at least 3 hours.
WATCH THIS RECIPE VIDEO
Notes
- Chill your condensed milk, heavy whipping cream, and loaf tin in the fridge before you start – it will make everything freeze more easily.
- Lining the loaf pan with parchment paper prior to filling will make cleaning up much easier.
- Higher fat content ice cream melts quicker than the lower fat ice creams, so have those cups or cones ready.
Nutrition
Calories: 415kcal | Carbohydrates: 42g | Protein: 6g | Fat: 26g | Saturated Fat: 17g | Polyunsaturated Fat: 1g | Monounsaturated Fat: 7g | Cholesterol: 84mg | Sodium: 79mg | Potassium: 241mg | Fiber: 0.001g | Sugar: 42g | Vitamin A: 1007IU | Vitamin C: 2mg | Calcium: 180mg | Iron: 0.2mg
HAVE YOU TRIED THIS RECIPE?Follow me on Pinterest @bestblogrecipes
Comments
Megan F. says
I stirred in blue frosting to get those swirly party vibes and everyone raved about it. Fun and festive dessert.